
Sketchbook collages come alive when you layer all sorts of stuff—gel-printed papers for wild depth, hand-torn tissue with gnarly edges, and even scraps of fabric or dressmaking paper. Mix warm and cool colors so your art feels unified, punch holes for cool windows, and scribble backgrounds for extra texture. Toss in found images, magazine bits, circles, or bright stitching, and watch your pages burst with energy. Try these tricks, and even more creative techniques will reveal themselves.
Key Takeaways
- Layer gel-printed and hand-torn papers for vibrant depth and organic texture in your collage.
- Combine fabric scraps or dressmaking paper to introduce visual and tactile variety to your art.
- Use cohesive color palettes and neutral tones to unify multiple layers and elements.
- Create visual intrigue by cutting windows and shaping negative space to interact across layers.
- Add interest with repeated stencil patterns, stitched details, or circular motifs throughout the piece.
Building Depth With Gel-Printed Paper Layers

Building depth with gel-printed paper layers is a bit like making a sandwich—stacking up colorful goodness, one page at a time.
In collage, layering gel-printed papers brings a cool mix of colors and shapes that really catch your eye. Imagine mixing wild patterns, swirls, and pops of color—each layer adds something extra, almost like a secret between the pages.
Using a clear adhesive, like matte medium, helps everything stick together without making the colors fade or look dull. Stencils and bold circular shapes can be added on top to jazz up the design, making sure the whole piece feels balanced, not too busy or flat.
With gel-printed papers, there’s always the thrill of surprise—each new layer might just be the best one yet.
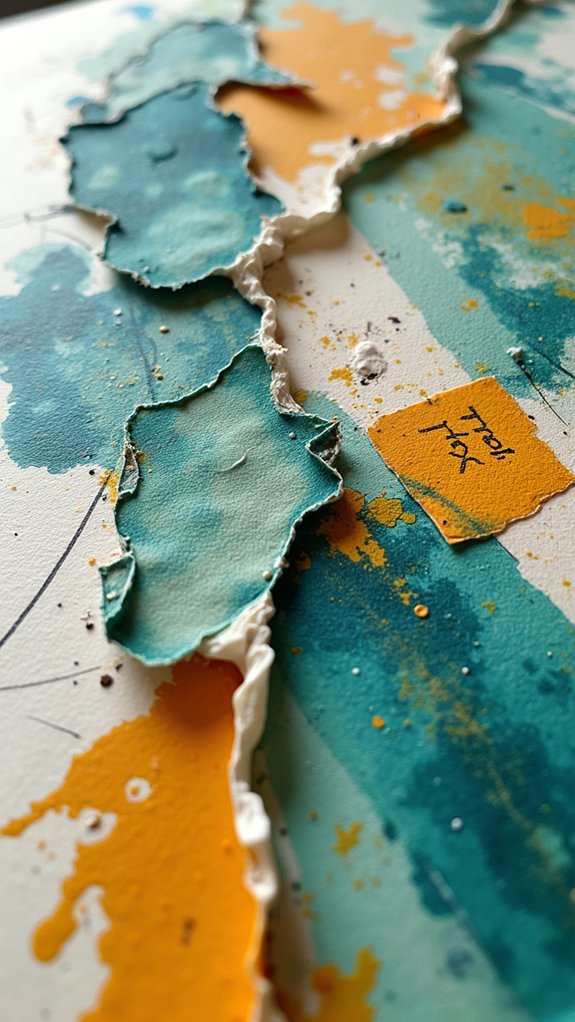
Incorporating Hand-Torn Tissue for Organic Texture

There’s something a little magical about tearing tissue paper by hand—it creates edges that look wild and real, totally different from neat scissor lines.
Picking out colors and patterns is half the fun, but the real trick is figuring out how to tear the paper so it feels like rocks, sand, or waves in your art.
Layering those jagged pieces with other scraps lets bits peek through, kind of like a secret message hiding just under the surface.
Choosing Tissue Paper Types
Tissue paper can be a secret weapon for adding excitement and organic texture to any sketchbook collage. When picking tissue paper, it’s kind of like assembling your team of superheroes—you want each piece to bring something special.
Look for colors and patterns that match your collage’s vibe so nothing feels out of place (no one likes an oddball in their masterpiece, right?). Solid colors, wild prints, or even tissue with botanical designs—all these options add their own unique flair.
Layering different tissue papers lets the cool designs underneath peek through, creating depth that draws the eye in. And let’s be real, those hand-torn, wobbly edges make everything flow together like watercolor paint, helping your collage stay smooth, seamless, and totally awesome.
Techniques for Hand-Tearing
Once the perfect tissue papers are picked out, it’s time for the real hands-on magic—hand-tearing. Forget scissors! When you use your fingers to pull and tear the tissue, the edges become wild and unpredictable, adding instant character to your collage.
These hand-torn edges give a cool, organic texture that just can’t be faked with straight lines. Want some drama? Try tearing different sizes—tiny ripped bits or big bold chunks. Mixing hand-torn tissue with printed pieces creates this awesome contrast, making your whole artwork pop with energy.
Always peek at the color and pattern of each piece, or else you might end up with a wacky, eye-crossing scene. Hand-torn tissue is where the collage comes alive—messy, playful, never boring.
Layering for Natural Effects
Layering is where a collage turns into a wild experiment—like nature growing across a page, piece by piece. Hand-torn tissue papers make everything more interesting, thanks to their jagged, irregular edges. When these bits are layered, something magical happens: depth appears out of nowhere! Gluing down tissue with a matt medium, instead of regular glue, lets you keep that soft texture and makes your fingers just slightly less sticky. Try using tissue in different colors or with cool patterns—botanical prints, weird shapes, maybe even text.
Here’s a quick guide:
| Technique | Effect on Collage |
|---|---|
| Overlapping tissues | More depth and complexity |
| Printing/textured tissue | Natural, tranquil vibes |
| Layering colors | Harmonious, nature-inspired look |
Nature doesn’t follow rules—your collage shouldn’t either!
Creating Visual Unity With Color Harmony

When picking colors for your collage, choosing a scheme that fits together—like best friends at a party—makes everything pop in the best way.
Mixing a balance of warm colors, like reds and yellows, with cool shades, such as blues and greens, creates an energy that keeps your eyes moving around the page.
It’s almost like telling your collage pieces, “Let’s work together so nobody sticks out like a sore thumb!”
Selecting Cohesive Color Schemes
Color magic—that’s how some artists describe the clever use of a perfect palette. When selecting cohesive color schemes for your sketchbook collage, it’s almost like saying, “I’m going to make these colors become best friends.”
Choose three to five harmonious colors, maybe pulled from your gel-printed stash, to give your collage a unified vibe. The color wheel is your sidekick here—finding colors that complement each other can really make your art pop.
Remember, color isn’t just about looks; blues and greens might calm things down, while crimson or orange can crank up the excitement. Try layering shades of one color for extra depth.
And don’t forget about neutral tones—whites, blacks, and browns keep everything balanced, letting your chosen colors shine bright.
Balancing Warm and Cool
Artists who love picking out color schemes often find themselves imagining their collage as a giant team sport; each color has a position to play, and nobody wants the game to get out of hand.
In collage, balancing warm and cool colors is like making sure both teams have equal players—too much orange, and it turns into a basketball game played on the sun!
Combining colors from gel-printed papers boosts harmony. Try warm yellows and oranges upfront, while cool blues and greens chill in the background. This layering trick creates depth and draws attention, almost like a visual magic trick.
Neutral shades—grays, tans—are the referees, helping bridge gaps between bold colors and textures. The result? A balanced piece that feels energetic and calm, all at once.
Experimenting With Fabric and Dressmaking Paper

If regular collage feels a little flat, adding strips of fabric and pieces of dressmaking paper can turn a boring page into an adventure you can actually touch. Nobody wants a collage that feels like cardboard! Using fabric brings bold texture, cool patterns, and even a soft touch, while dressmaking paper is like a secret window—it lets light and color peek through in such a mysterious way. Try layering bright fabric over printed scrapbook paper, or let the dressmaking paper overlap a hand-drawn sketch for surprise effects. Stick everything down well; heavier fabrics are stubborn and will try to peel up, so don’t be shy with the glue! Here’s a table to spark your imagination:
| Fabric Ideas | Dressmaking Paper Ideas |
|---|---|
| Torn denim patches | Soft ruffled edges |
| Vintage floral print | Overlapping translucent layers |
| Felt shapes | Stamped patterns on top |
| Striped ribbon trims | Folded or crumpled textures |
Playing With Negative Space Using Cutouts and Windows
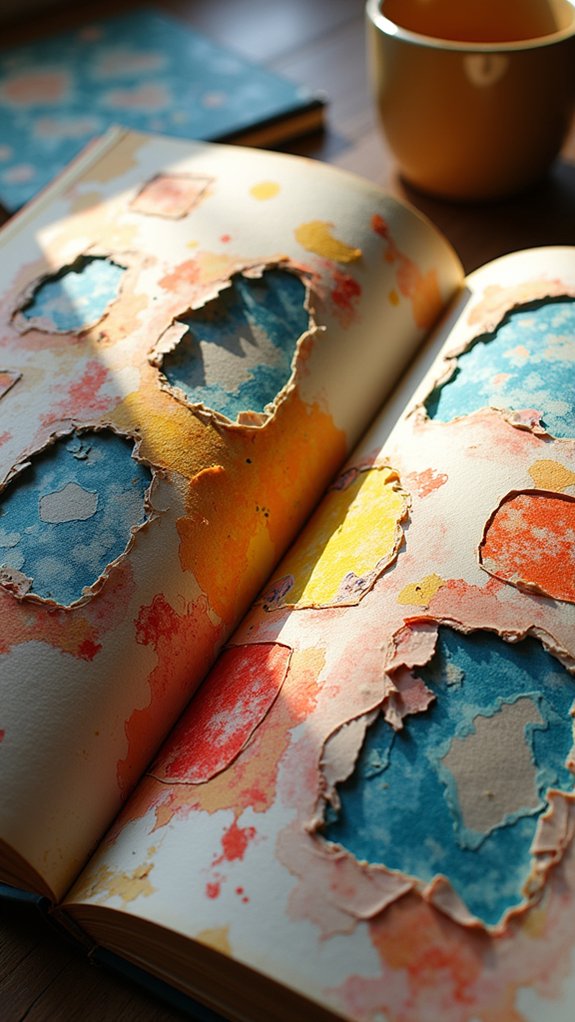
Negative space is like the sneaky sidekick of any collage—it may not be the main star, but it totally changes the whole mood.
Playing with negative space using cutouts and windows can make your art pop in unexpected ways. By snipping bold shapes or windows right into the page, you let different layers peek through and stir up excitement.
Different cutout sizes and wacky shapes help balance your layout and give the viewer’s eye a path to follow. And, when you mix up colors and textures in those negative space areas, your collage just shouts for attention.
- Use cutouts to frame a central image, or lead the eye around your page.
- Combine contrasting textures and colors to highlight the negative space.
- Layer shapes for maximum visual intrigue.
Adding Dimension With Overlapping Transparent Elements
One way to instantly make a collage pop off the page is by layering on see-through materials like tissue paper or tracing paper—it’s almost like your art is wearing cool sunglasses.
These transparent pieces can overlap, adding a soft haze of color and letting little peeks of what’s underneath show through, which makes everything seem more magical and mysterious.
Whether it’s a shimmery blue sky made from tracing paper or a patchwork of bright tissue shapes, the mix of layers creates an awesome sense of depth you just can’t get with solid paper alone.
Layering With Tissue Paper
Few art materials spark as much creative excitement as tissue paper—seriously, it’s like magic for your sketchbook.
It’s not only colorful and easy to tear, but it transforms your collage with see-through layers, creating tons of dimension and energy. When layered, tissue paper lets all those cool shapes and colors underneath peek through, adding depth without making things messy.
Smooth on a piece with some clear drying glue (matte medium is a favorite), and instantly the page comes alive. Want to blend colors or soften harsh lines? Just blot the tissue paper with a paint-laden brush—easy fix, endless effects!
Here’s how to get even more out of tissue paper collage:
- Mix different colors and patterns by overlapping layers.
- Cut tissue paper into wild shapes for dynamic compositions.
- Layer small pieces to build backgrounds, then add bold shapes up front.
Using Tracing Paper
There’s something totally magical about what tracing paper can do in a sketchbook collage—seriously, it’s like giving your art a set of secret layers!
Tracing paper is way more than just something for copying doodles. Fold it, layer it, and suddenly you get this cool stacked effect, almost like your collage has its own background, middle ground, and foreground all in one place.
Artists love how you can quickly sketch out ideas on tracing paper and literally move them around to see what looks best before gluing anything down. The see-through quality makes overlapping pieces a breeze, so you can let lines and shapes swoop and connect, drawing the viewer’s eye all over the page.
It’s just the perfect tool for playing with depth and flow.
Using Scribbled Marks for Expressive Backgrounds
Anyone who’s ever picked up a pencil and just let their hand go wild on the page knows how freeing scribbled marks can be. Scribbled marks aren’t just random doodles—they’re like the secret language of your emotions splashed across the page!
Using charcoal, graphite, or even an old crayon, artists can play with light and heavy marks to set the mood for expressive backgrounds. Some scribbles shoot across the paper like lightning; others curl and twist, tiny or giant, mixing up energy and calm all in one piece.
- Mix up the density and weight of your scribbled marks for eye-catching textures.
- Try big, bold strokes alongside delicate, controlled squiggles to create lively contrast.
- Let your intentional mistakes spark totally unique styles—each background tells its own story!
Integrating Found Images and Magazine Cuttings

After letting wild scribbles take over the page, turning to found images and magazine cuttings feels like flipping open a treasure chest. Digging through magazines or collecting collage papers is like going on a miniature scavenger hunt for patterns, faces, or colors that vibe with your theme. Want your artwork to pop? Layer background collage papers first and then stack up smaller, detailed pieces in the front—it’s all about creating cool depth, like a 3D movie on paper. Try tearing the papers for a wild, soft look, or cut sharp shapes for contrast. Mixing your own snapshots with magazine cuttings adds a personal twist, but also keeps things looking mysterious and abstract.
| Source Type | Effect on Collage |
|---|---|
| Magazine images | Bold color, variety |
| Collage papers | Texture, backgrounds |
| Personal photos | Unique, personal feel |
| Tearing edges | Soft, organic look |
Collaging With Circular Motifs and Repetition
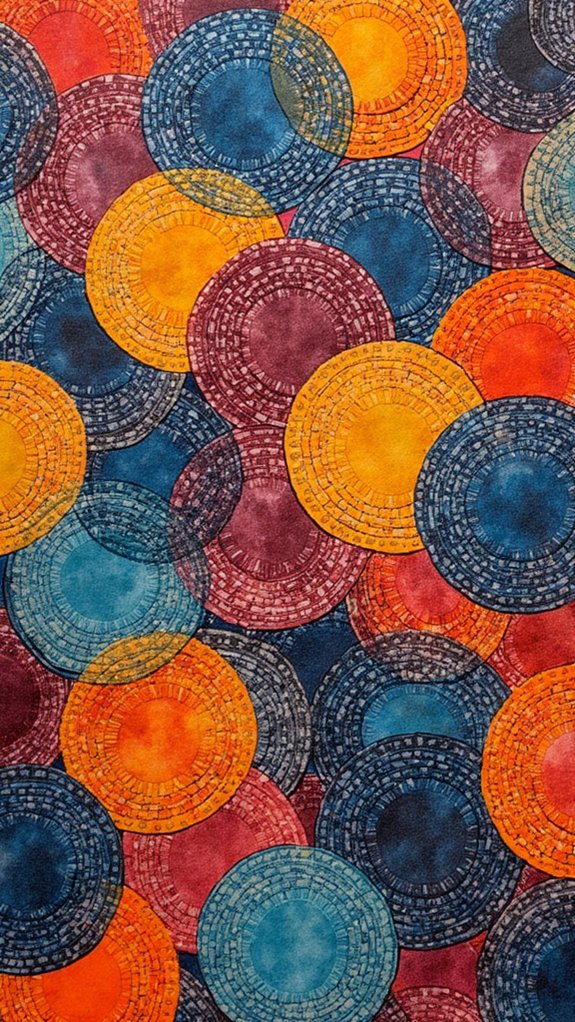
Even though squares and rectangles often steal the spotlight in collage art, circles bring a totally fresh vibe that feels almost hypnotic.
When someone says, “I’m going to start layering circles,” it’s like magic happens on the page. Using a hole punch with gel-printed paper, circles pop out in perfect little spots that you can scatter, cluster, or overlap for surprising effects.
Try changing up the size and placement to keep your viewers guessing and their eyes busy. Stencils let you cut background circles too, softening your design and adding depth.
And if you repeat these circular motifs across your collage, it looks more connected and meaningful.
Here are three creative ways to get started:
- Layer punched circles over painted backgrounds.
- Arrange circles in winding, spiral paths.
- Mix small, medium, and big circles for cool contrast.
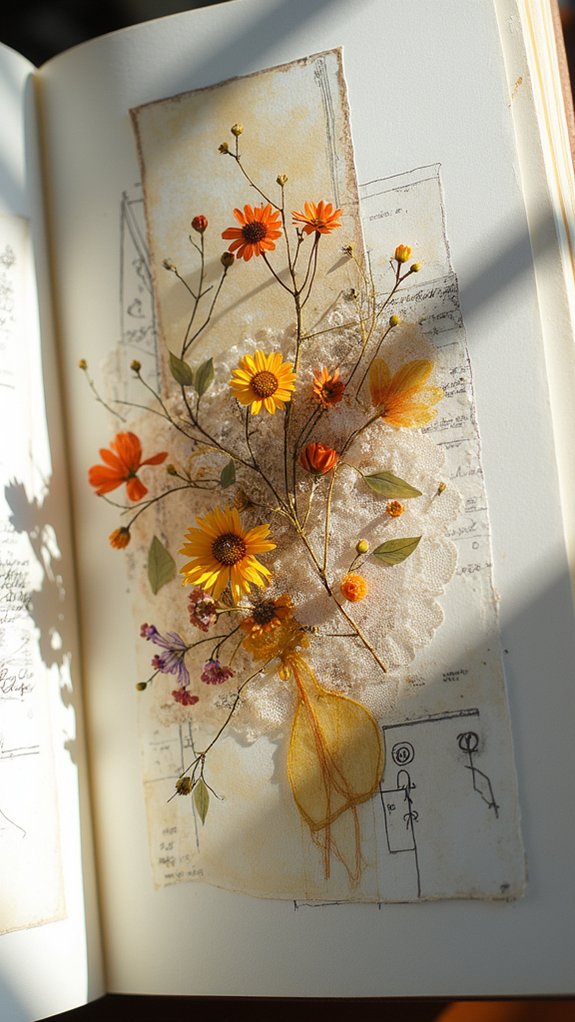
Incorporating Natural Elements and Botanicals
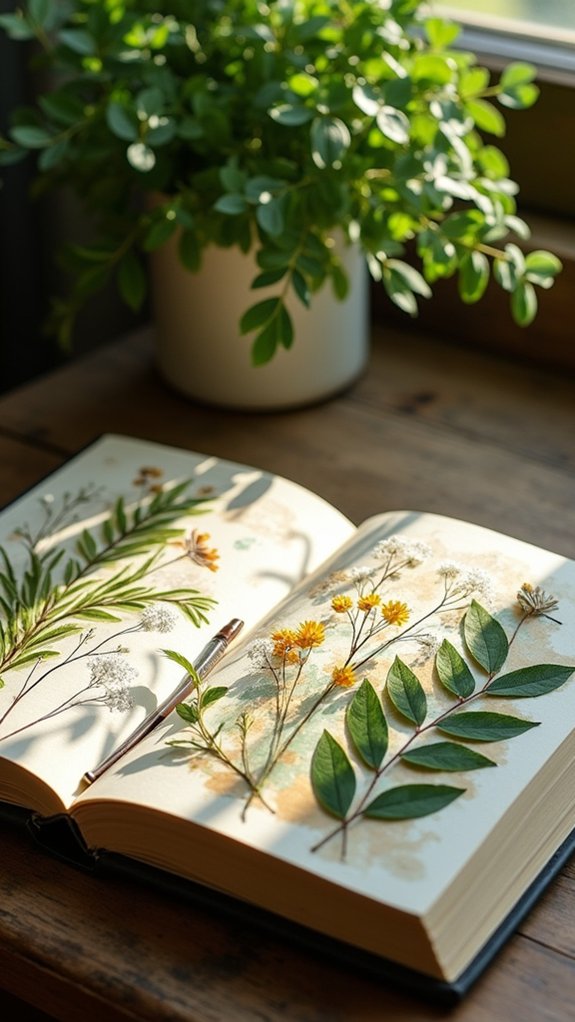
Circles and patterns are cool, but nothing stirs up excitement like adding real pieces of nature straight into a sketchbook collage.
I’m going to start by saying: dried leaves, pressed flowers, and anything that used to be alive can instantly give your art that wild forest vibe.
Try sticking down a crunchy leaf or using gel-printed papers with botanical designs—it’s all about getting that natural magic into your pages.
Layer translucent tissue paper over your botanicals to add mystery—what’s hiding underneath? Who knows!
Rip your papers by hand for those soft, wonky edges instead of going all ruler-happy.
And don’t be afraid to punch out circular bits from leaves or petals. Suddenly, your collage feels alive, buzzing with nature’s colors and texture.
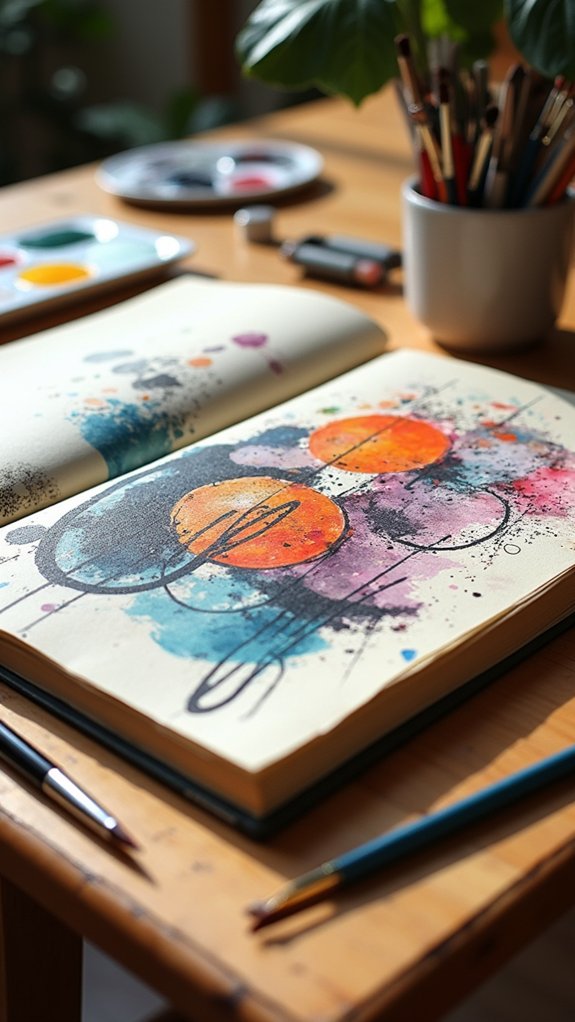
Layering Paint and Paper for Dynamic Surfaces
Diving right in, layering paint and paper is like building your own tiny world inside a sketchbook—it’s messy, a little unpredictable, and totally magical.
If you’re thinking, “Im going to start,” get ready to play with gel-printed papers, splashy acrylics, and all kinds of bits and pieces.
That moment when the matt medium goes down and you press your first scrap into the wet paint? It feels almost like science class, but way more fun.
Dressmaking paper and tissue overlays add surprises, softening some spots while letting little peeks show through.
Mix it up by ripping paper edges or carving away paint with a palette knife.
Here’s what makes layering paint and paper truly dynamic:
- Blend colors using paper and paint echoes.
- Play with texture by layering different materials.
- Use overlays for complexity and secret reveals.
Enhancing Collages With Stenciled Designs and Stitching
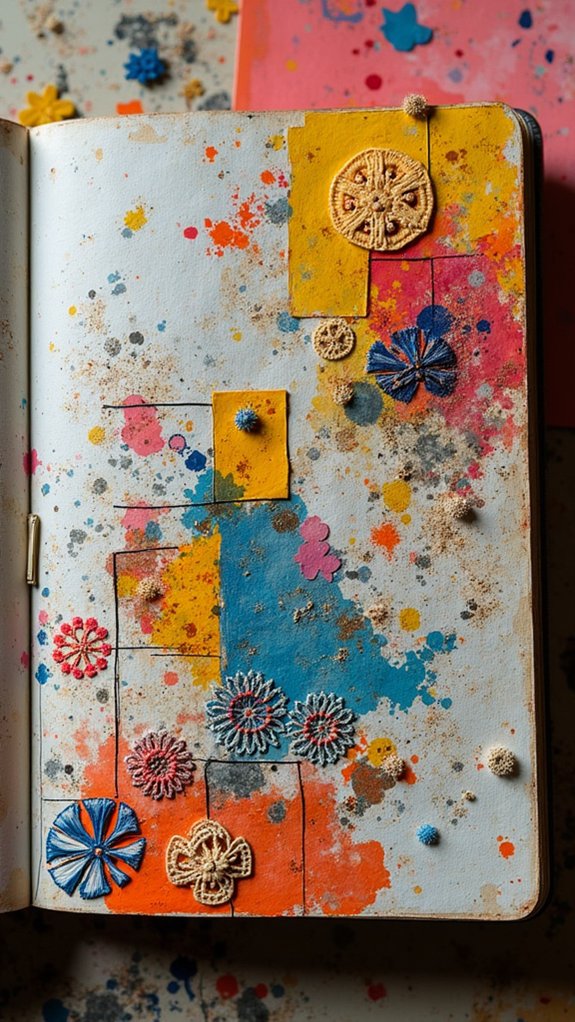
Ink up a stencil or grab a needle—collage just got way more interesting. Adding stenciled designs lets artists lay down cool patterns, secret shapes, and bursts of texture that instantly level up any page.
Plastic or cardboard stencils both work, and layering different stencils can make your art so deep it looks 3D. But it doesn’t stop there—bring in stitching and suddenly those paper layers don’t just stick, they jump right off the background!
Try bright threads, zigzag lines, or even wonky freeform stitches. Stitching can highlight certain areas, or pull the whole look together when things feel too random.
Mixing stenciled designs and stitching doesn’t just make art—it creates wild, one-of-a-kind masterpieces that totally stand out.
Frequently Asked Questions
What Is Layering in Collage?
Layering in collage refers to arranging different materials, such as papers and textiles, in stacked formations. These layering techniques create visual depth and complexity, utilizing a mix of textures, opacities, and adhesives to achieve a cohesive composition.
What to Include in a Level Art Sketchbook?
A level art sketchbook should include a range of art supplies, observational drawings, artist research, process documentation, material experiments, concept development, annotations, color studies, and photographs to thoroughly demonstrate creative exploration, technical skill, and thoughtful progression throughout the project.
How Do You Make a Good Art Collage?
To make a good art collage, one should apply art techniques such as choosing a unified color scheme, layering elements for depth, mixing textures and patterns, and thoughtfully combining mixed media, thereby enhancing overall visual impact and cohesion.
How to Make Your Sketchbook Interactive?
To make a sketchbook interactive, one might incorporate interactive elements such as flaps, pockets, and fold-outs, use tactile materials, add transparent overlays, and include narrative features or reflective prompts that encourage viewer engagement and exploration.
Conclusion
Collage isn’t just cutting and pasting—it’s a little bit of magic, a dash of chaos, and a whole lot of fun. From layering scraps to playing with windows, these sketchbook ideas prove art has no rules except the ones you make. So, grab your glue stick, raid the recycling bin, and let your imagination loose. Who knows? Your next masterpiece could start with a torn paper edge or an accidental smear of paint. Get messy—it’s totally allowed!
Leave a Reply