
Posca markers are crazy fun for beginners who want to jazz up boring stuff—think decorating plant pots with zigzags, doodling wild patterns on notebooks, or making super bold rock art. You can whip up eye-popping bookmarks, zany monster magnets, shrink-plastic charms, and even silly animal characters (yes, sunglasses on a cat totally work). Try abstract color blocks, geometric shapes, or just add pops of color to anything that could use extra personality. Ready for some seriously cool inspiration next?
Key Takeaways
- Decorate plant pots or household rocks using fat and skinny Posca markers for colorful patterns, sealing your designs for durability.
- Personalize notebooks or bookmarks with layered colors, playful doodles, and inspirational quotes, leaving some white space for visual balance.
- Create vibrant rock art by priming rocks, then using bold backgrounds and detailed marker work, finishing with a protective clear coat.
- Make unique shrink plastic charms or monster magnets by transferring marker designs onto shrink plastic, baking, and sealing for durability.
- Illustrate whimsical animal characters or abstract art by combining bright colors, geometric shapes, and playful accessories using a mix of thick and thin markers.
Decorating Plant Pots With Bold Patterns

There’s something magical about turning an ordinary plant pot into a bold work of art—suddenly, that plain old terracotta container becomes the star of the windowsill!
To start, choose a terracotta or ceramic pot that’s squeaky clean. A quick swipe with a cloth gets rid of dust, because nobody wants their paint markers sliding around.
Begin with a spotless terracotta or ceramic pot—wipe away every speck of dust for the perfect paint marker playground.
Next, roll on a layer of gesso primer—think of it as a superpower for your colors, making Posca marker shades pop like fireworks. Use skinny paint markers to outline sharp geometric shapes, wild florals, or even wacky abstract patterns. For big spaces, grab a fat marker and color away, fast and bold!
Finally, seal your masterpiece with a clear coat, so your design laughs in the face of rain and sunshine.
Customizing Notebooks With Doodle Art
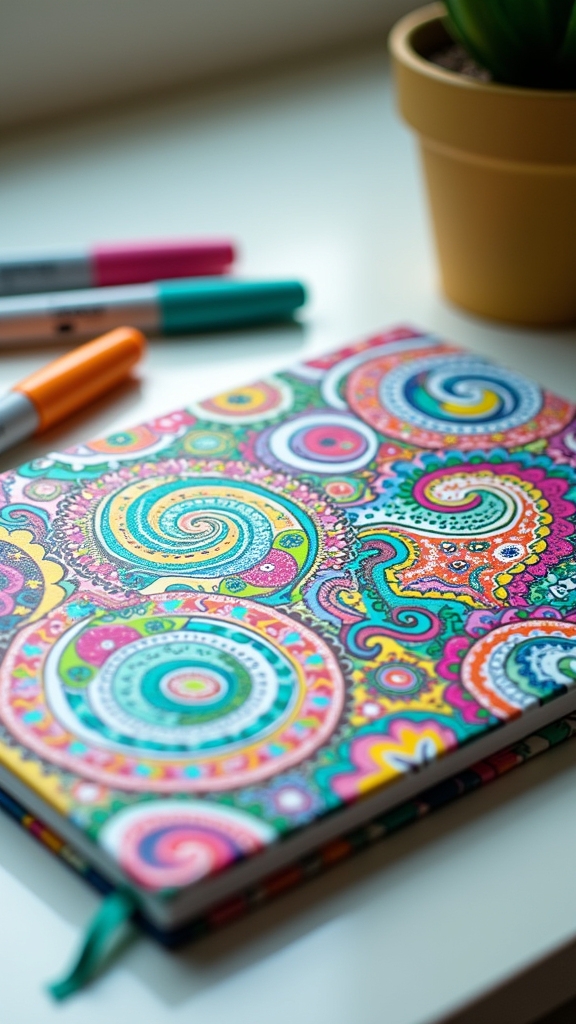
Customizing a notebook with doodle art starts with picking a theme that makes you smile—think cute animals, wild patterns, or even inside jokes only you understand.
Layering colors with Posca markers lets those doodles pop off the cover, and mixing bold shades or unexpected combos can turn even a plain notebook into your own personal masterpiece.
There’s something awesome about seeing a swirl of colors and ideas come together, so don’t be afraid to get a little wild with it!
Choosing Doodle Themes
Ever wondered how to turn an ordinary notebook into something totally unique and eye-catching?
It all starts with choosing a doodle theme that speaks to you. Are you gonna pick nature, goofy animals, or maybe cool geometric shapes? Sticking to one theme makes your notebook look super organized and totally pro.
With Posca markers, those bold outlines and vibrant colors really pop, so your doodles stand out. Try mixing up doodle sizes—some tiny, some big—to make things interesting.
Don’t forget to leave some white space so your design doesn’t look like a marker explosion! For an extra boost, sneak in an inspirational quote or your favorite saying.
Suddenly, it’s not just a notebook—it’s your personal masterpiece.
Layering Colors Creatively
Jump right in and watch a plain notebook totally transform when Posca markers get involved.
First, slap on a layer of gesso—seriously, it’s like giving your notebook a superhero cape, making those colors pop!
When it’s dry, grab Posca markers in different sizes; fat ones fill space fast, while skinny ones sneak in the details.
Here’s where layering colors creatively comes alive: let each color dry before adding another. It’s like magic—no muddy mess, just bright, clean layers.
Leave some white space so your doodles don’t get overcrowded; your eyes need a breather too!
Try themed doodles, like wild nature or cool abstract shapes. This helps you plan which colors to layer for a notebook cover that’s totally unique.
Creating Vibrant Rock Art

Rock art is like turning ordinary stones into tiny, colorful masterpieces just waiting to brighten someone’s day.
To start, rocks need a good wash—no one wants dirt messing up their paint pens! After drying, a coat of gesso primer makes colors pop and helps Posca markers stick better.
For big, bold backgrounds, fat Posca markers are a lifesaver; skinny ones make outlining and detail work a breeze. There’s no wrong way to design: use color blocks, playful patterns, or let the rock’s shape spark a wild idea. Even leaving some white space can look awesome.
Once your creation dries, seal it with clear acrylic spray or Mod Podge so it survives rain, sunlight, and maybe even a tumble or two.
Designing Personalized Bookmarks
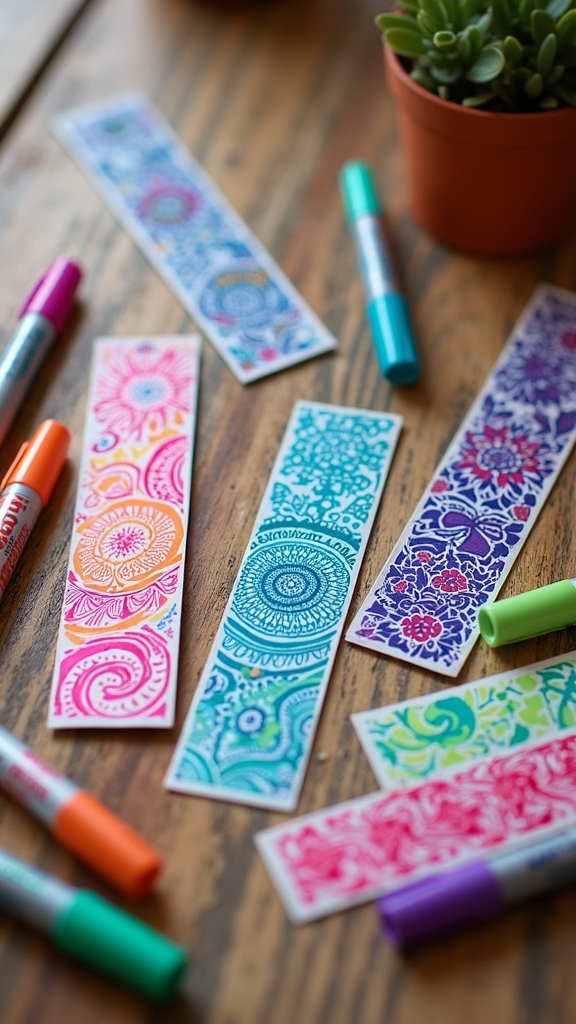
When designing personalized bookmarks, picking out super bold color palettes with Posca markers can totally make your creations pop off the page.
Adding your own quirky character illustrations—think cats wearing glasses or skateboarding bananas—brings loads of personality and fun.
Mixing colors and goofy little doodles makes every bookmark one-of-a-kind, and who wouldn’t want to show that off at the next library visit?
Choosing Vibrant Color Palettes
Even though picking colors might sound like a small detail, it’s actually one of the most exciting parts of designing personalized bookmarks with Posca markers. A great color palette can totally change how your bookmark feels—whether it’s chill and calming or wild and bold.
It’s not just about grabbing random markers! You want to choose colors that pop and work together, mixing complementary and contrasting shades for a look that really stands out. Here’s how to make your bookmarks burst with personality:
- Use big blocks of color for a bold, eye-catching background.
- Layer lighter and darker shades to add cool shadows and highlights.
- Save some white space to help your colors breathe and pop.
- Pick themes—like autumn warmth or summer coolness—for extra inspiration.
Go wild with those colors!
Adding Unique Character Illustrations
Characters are where bookmarks truly come alive, bursting with personality and making every page feel special.
To get started, sketch your character idea on paper—think goofy monsters, cool cats, or even a spaghetti superhero (pasta pens for the win!). Once you’re happy, transfer your design onto the bookmark and grab your Posca markers.
Use skinny markers for sharp outlines and details, and fat markers for bold color blocks or filling in backgrounds. Play with layering colors and leave some white space so your character pops.
Want to add even more flair? Scribble a funny quote or doodle patterns around your character.
After you’ve finished your masterpiece, brush on a layer of Mod Podge to seal it. Now, your bookmark is both awesome and protected!
Making Unique Shrink Plastic Charms
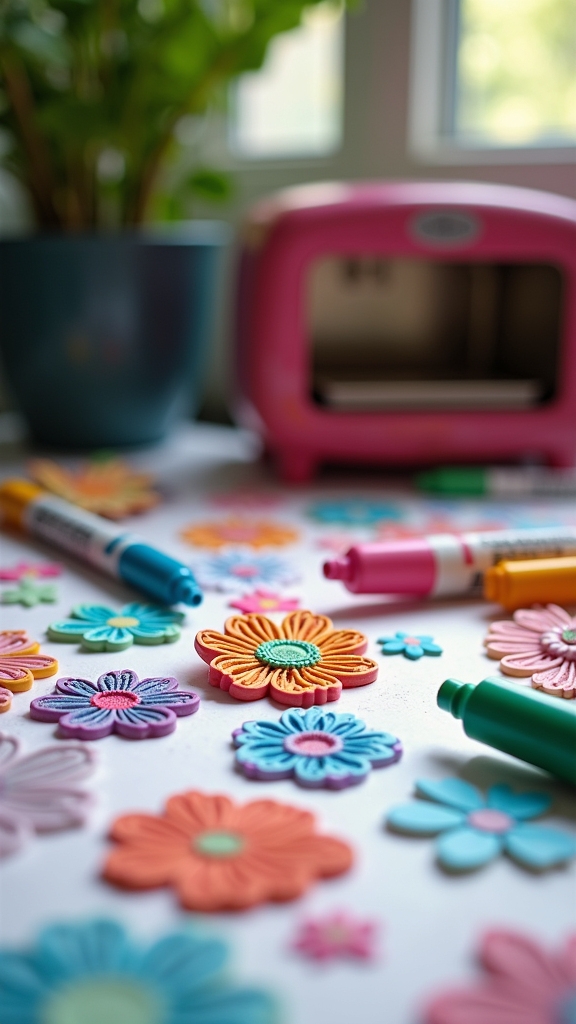
Plenty of creative adventures start with just a sheet of shrink plastic and a handful of Posca markers, and making unique shrink plastic charms is no exception.
These little charms look really cute, and the process is pure magic—watching your art shrink down to size in the oven never gets old!
First, sketch your design on paper, then copy it onto shrink plastic so you know exactly how your charm will turn out. Color it in with Posca markers for bold, vibrant shades, and secure the plastic with tape when cutting to avoid slips.
Here’s a quick rundown:
- Plan your design on paper first
- Use Posca markers for bright, even color
- Tape your plastic while cutting for precision
- Seal with Mod Podge, then attach to pins or magnets
Now, you’ve got adorable, custom charms!
Transforming Dollar Store Boxes Into Art

Shrinking plastic into tiny masterpieces is cool, but boxes from the dollar store open up a whole new world of Posca possibilities.
Imagine grabbing a plain, boring box and turning it into a colorful piece of art—all for just a few bucks! To start, make sure you slap on a layer of gesso; it helps the Posca markers stick and makes colors pop like fireworks.
Then, use both skinny and thick markers to doodle bold patterns, doodles, or even your favorite cartoon characters. Layer the colors, don’t be afraid of mixing things up—chaos can be awesome. Experiment with swirls, stripes, or random shapes.
In the end, you’ll have a unique storage box that’s not only practical but also makes your friends jealous.
Drawing Abstract Shapes and Color Blocks
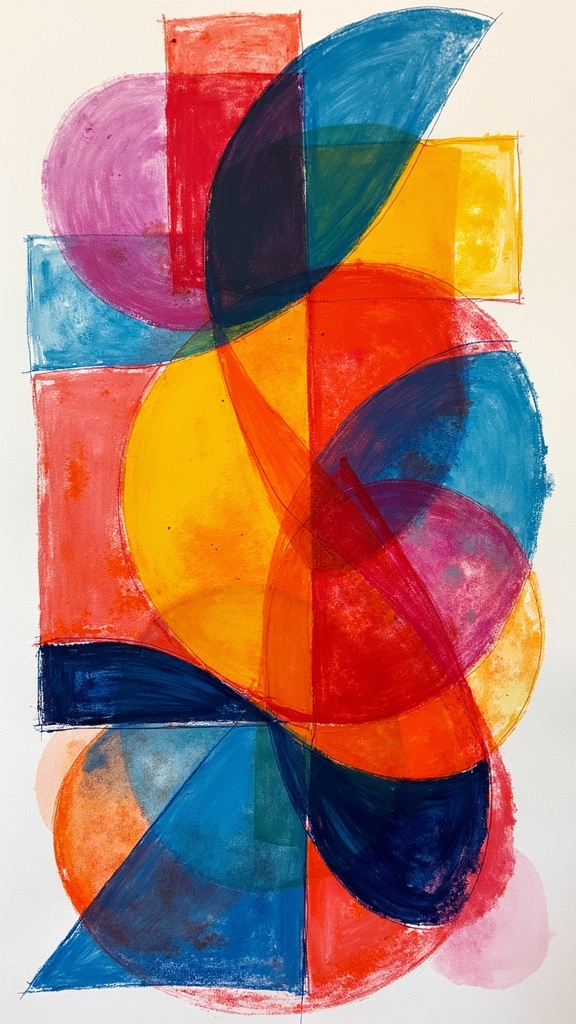
When it comes to drawing abstract shapes and color blocks with Posca markers, the possibilities are seriously endless—think wild color explosions and shapes that don’t have to “make sense” to look awesome.
All you need is a little bit of imagination and some colorful markers to start experimenting. Beginners can dive right in by picking out their brightest marker shades and letting loose on a sketchbook or canvas.
Imagination and colorful markers are all it takes—just grab your brightest shades and start creating on your sketchbook or canvas.
Don’t worry about being perfect; abstract art is all about having fun and making something that feels cool to you!
- Try mixing geometric shapes with random squiggles for a funky vibe.
- Leave a little bit of white space so your colors really pop.
- Let each color block dry before layering to keep things crisp.
- Mix thick and skinny marker lines for depth and detail.
Crafting Fun Monster Magnets
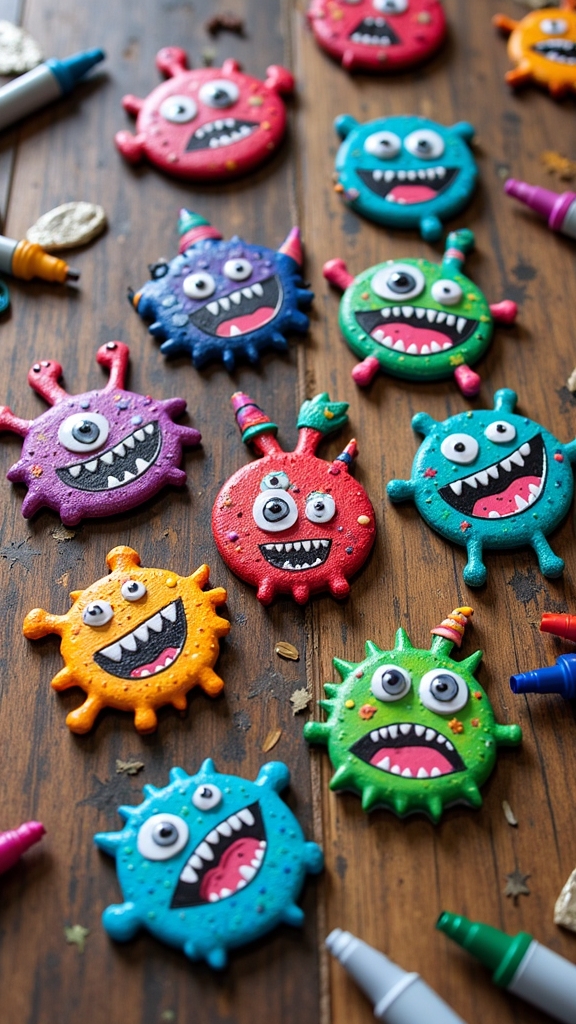
Monster magnets are one of those crazy-cool crafts that let anyone get wild with creativity—think funky eyes, goofy smiles, and colors so bright they practically glow.
To start, just sketch some simple monster shapes on shrink plastic. Don’t worry about making them perfect—the weirder, the better! Plan out your colors and features, like wild hair or extra arms, so coloring later with Posca markers is a breeze.
These markers give you bold, solid colors that pop, kind of like rock painting but on plastic. Cut out your monsters, then bake them at 325°F for about a minute—watch them shrink and curl like magic!
Once they’re cool, seal with Mod Podge and stick magnets on the back. Instant fridge fun!
Illustrating Whimsical Animal Characters
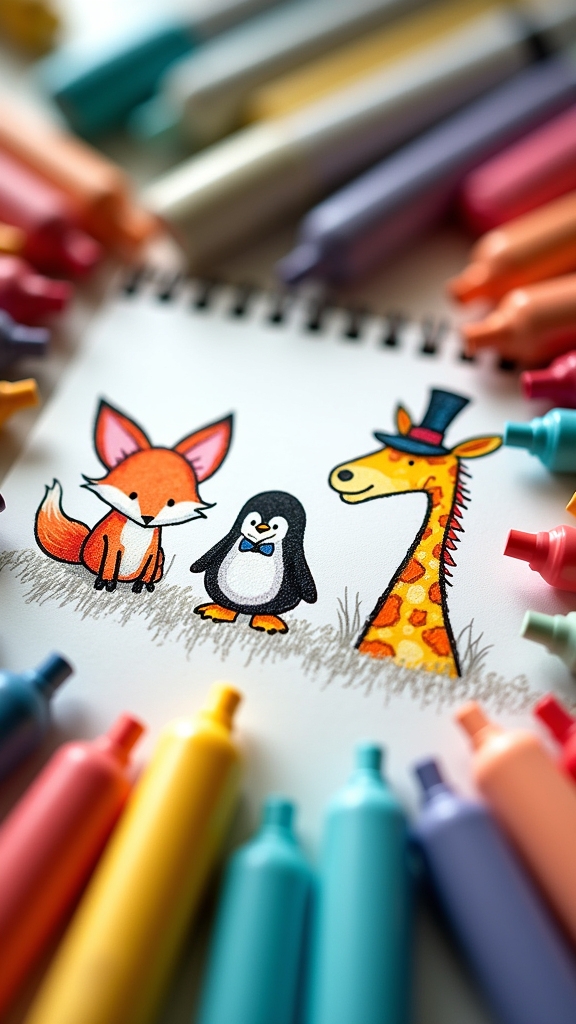
Fridge monsters might be wild, but animal characters can get even wackier. When it’s time to illustrate your own whimsical animal, you’re gonna go big on personality!
Start by sketching lightly in pencil, just to map things out before releasing the Posca markers. Thick markers fill in those chunky bodies, while thin tips are perfect for wild whiskers and tiny toes.
Don’t forget, playful patterns and bold, bright colors make your animal pop off the page. Want your creation to really stand out? Leave some white space for balance and drama.
To amp up the fun, toss in sunglasses, hats, or even wings—why not? Here’s how you’re gonna go wild:
- Light pencil sketch first
- Use different marker sizes
- Try bold patterns and colors
- Add zany accessories
Adding Colorful Accents to Everyday Objects
Plain boxes and ordinary rocks might sound boring, but with Posca markers, they can totally steal the show on your desk or bookshelf.
Just imagine a plain old tissue box turning into a rainbow treasure chest, or a backyard rock sporting a funny face or wild pattern.
With a little color and creativity, even the most everyday stuff can become something you’ll actually want to show off.
Transforming Plain Boxes
Everyday objects can turn into eye-popping works of art with just a few bold moves and a set of Posca markers. Imagine a boring, plain box suddenly bursting with color—yep, that’s totally possible, and you’re good to go after a few simple steps!
First, slap on a coat of gesso to make the box smooth and ready for those vibrant markers.
Try out these ideas:
- Use skinny Posca markers for sharp outlines and cool, detailed patterns.
- Block out sections with solid colors before you doodle, for big pops of contrast.
- Leave some white space—don’t cover every inch—so your designs can really shine.
- After decorating, seal it all with Mod Podge or a clear sealant for a glossy, protected finish.
Who knew boxes could be this fun?
Decorating Household Rocks
Grab a handful of those random rocks sitting in the backyard and get ready to turn them into mini masterpieces!
First things first—make sure the rocks are nice and smooth by washing off all the dirt and giving them a quick scrub. Once dry, a layer of gesso helps the colors pop, kind of like putting on a fresh coat of primer before painting a wall.
Now, it’s Posca marker time! Use fat markers to cover big spaces and skinny ones for those awesome little details and outlines. Go wild with color combos and patterns—think zigzags, polka dots, or tiny cartoon faces.
When you’re satisfied, seal your designs with a clear finish. Suddenly, those ordinary rocks are extraordinary, ready to decorate your room or garden!
Frequently Asked Questions
What Easy Things Can You Do With Poscas?
When exploring what easy things can be done with Posca markers, one finds creative techniques such as layering colors, drawing simple patterns, decorating rocks, making greeting cards, and experimenting with negative space to achieve visually striking beginner-friendly results.
What Should I Draw With My Posca Markers?
When considering what to draw with Posca markers, one might explore Colorful Creations such as geometric patterns, mandalas, playful characters, or personalized objects, utilizing the markers’ vibrant hues to experiment with bold designs, color blending, and expressive details.
What Posca Markers Are Good for Beginners?
When considering which Posca markers are good for beginners, one should prioritize basic color selection, opting for starter packs with primary hues and a mix of tip sizes. This guarantees versatility for practicing various techniques and experimenting with color combinations.
Is POSCA Ok on Skin?
When considering skin safety, Posca markers are generally safe for temporary use on skin, though not designed for body art. Users should test for sensitivity first, and removal may require soap, water, or an alcohol-based cleanser.
Conclusion
With Posca markers, art isn’t just for the pros—it’s for everyone who wants to try something bold and colorful. Whether doodling monsters or decorating plant pots, anyone can turn plain things into masterpieces. The best part? Mistakes just make the art more interesting! So, grab those markers, pick an idea, and don’t be afraid to get a little messy. Who knows? The next great artist might just be you, laughing through every scribble.
Leave a Reply