
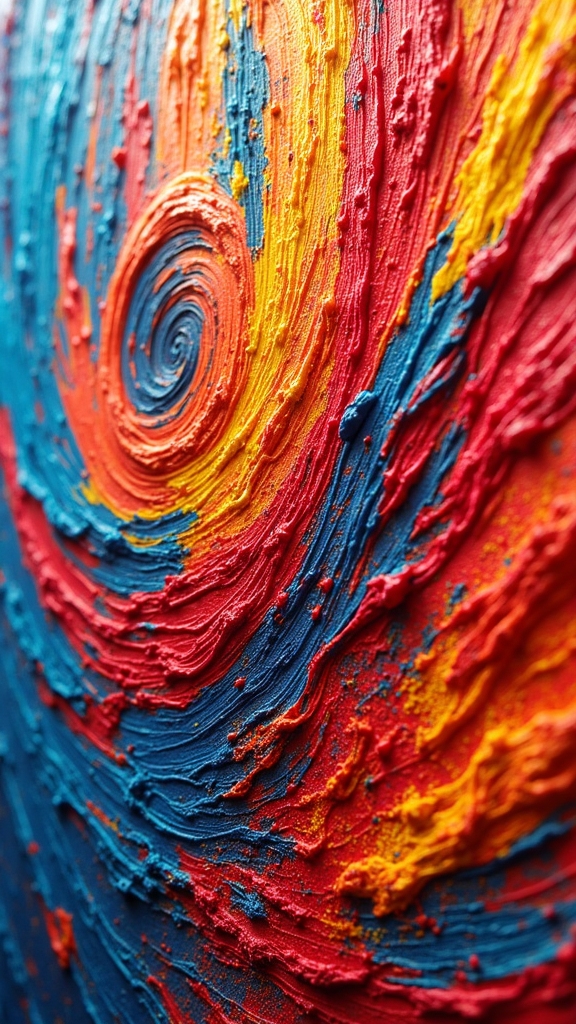
With POSCA markers, creativity gets seriously fun—imagine giving old plant pots wild new designs, doodling your favorite band lyrics on a tote bag, or making phone cases that turn heads in the cafeteria. Try bold geometrics on furniture, trick out skateboards, or add wild faces to pet rocks for extra laughs. You can even create murals outside, decorate glass candle holders, or give a boring jean jacket a new vibe. Want to see all twenty awesome ideas unfold right before you?
Key Takeaways
- Personalize tote bags, denim jackets, and phone cases with bold patterns, layered colors, and unique hand-drawn illustrations using POSCA markers.
- Revamp wooden furniture and plant pots with geometric designs, abstract art, or colorful motifs for a vibrant home décor update.
- Craft DIY skateboard deck art, box frame ombre effects, and mural projects, utilizing various POSCA nib sizes for texture and detail.
- Enhance canvas art and fabric banners with layered marker techniques, hand lettering, and gradient backgrounds for eye-catching mixed media pieces.
- Decorate glass votives, pet rocks, and ceramic vases with intricate designs, sealing finished items for durability and outdoor use.
Customizing Ceramic Vases With Bold Patterns

There’s something seriously cool about taking a plain old ceramic vase and turning it into a work of art with just a few POSCA markers.
Imagine starting with a blank vase, covering it with a smooth layer of white from your POSCA pens to get that perfect canvas.
Next, grab a Uni-ball Gold 8K POSCA Marker and swipe gold at the bottom, then blend it up with a dry sponge—suddenly, your vase looks like it’s dipped in sunlight!
With POSCA pens, you can experiment with blocks of bold color, crisp lines, and even leave some white space for drama.
The quick-drying ink means you can add layer after layer without smudges.
For a final touch, use a fine white POSCA pen to draw detailed floral patterns.
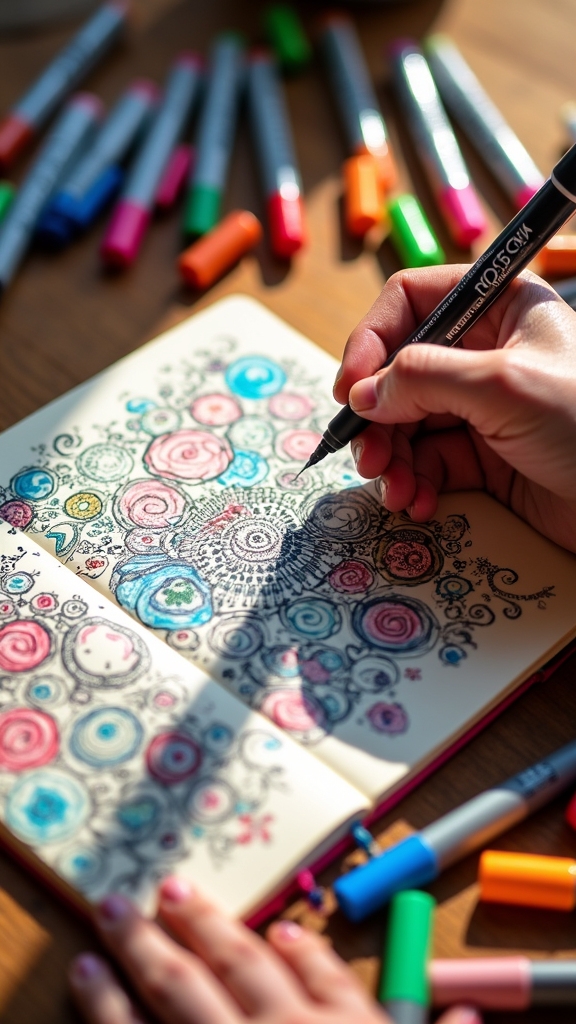
Personalizing Tote Bags With Hand-Drawn Designs
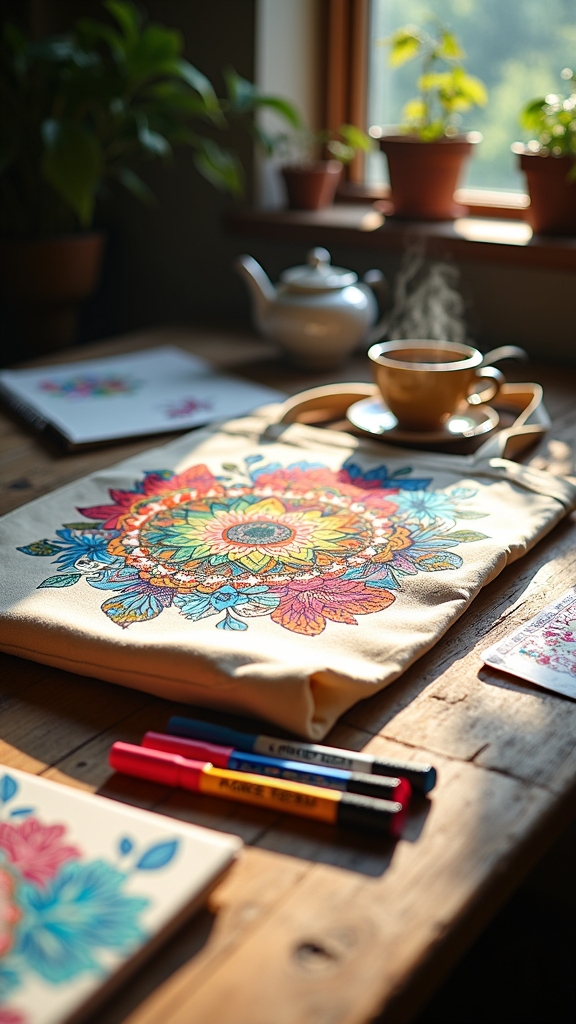
Once a plain vase gets a bold new look with POSCA markers, it’s hard not to wonder what else could use a splash of personality. Tote bags, anyone? Using posca paint markers, even the most basic cotton tote becomes a one-of-a-kind masterpiece. Start with a pencil sketch—no need to stress about mistakes! Then, grab posca paint markers in your favorite colors, layering shades for cool depth and vibrant pops. These markers are water-resistant, so your art is tough enough for daily adventures. Just let it dry all the way before tossing it in the wash. Plus, customizing totes means fewer boring plastic bags and more eco-friendly style.
| Step | Tip | Result |
|---|---|---|
| Sketch Design | Light pencil, plan layout | Neat guide |
| Apply Colors | Use posca paint markers, blend and layer | Bold, bright art |
| Dry Completely | Wait before washing | No smudges |
| Show Off Tote | Use for shopping, school, or gifting | Eco-chic style |
Upcycling Wooden Furniture With Modern Motifs

When it comes to upcycling wooden furniture with POSCA markers, picking a bold color palette can turn a boring chair into the rock star of any room.
Geometric patterns—think zigzags, triangles, or wild checkerboards—are a fun way to make old wood look new and totally modern.
For a finish that lasts longer than your favorite meme, sealing your masterpiece is a must, so those bright designs stay sharp and awesome.
Choosing Bold Color Palettes
Color explosions can turn the most boring wooden chair or table into something you’d actually brag about to your friends. Choosing bold color palettes is where the magic starts.
With POSCA markers, it’s easy to go wild—pick electric blues, hot pinks, and blazing yellows for instant impact. These markers love wood, so their pigment pops right away, making every stroke count.
Want your furniture to feel modern? Try layering colors or use contrasting shades for drama. Since POSCA markers dry super fast, mistakes are easy to fix and you can stack colors for cool effects.
Color blocking with vibrant tones can add a playful twist without making the piece look messy. Suddenly, that old desk is a total showstopper, not a snooze fest!
Geometric Pattern Techniques
Patterns have the power to totally transform boring wooden furniture into something super cool and modern. With a Posca Marker in hand, anyone can create eye-catching geometric designs—think triangles, stripes, and zigzags—right on the wood.
Start by sanding the surface, so the paint sticks better, then use painter’s tape for sharp, clean lines. The fast drying Posca paint is perfect for layering, and colours can be mixed or blurred with the tip or a brush to create infinite gradations of colour, just like Street Art pros do.
If your tip is stained or the paint is wet, simply clean it and re-prime the marker to restore the initial colour coverage.
- Bold triangles popping with Black and White Posca
- Overlapping hexagons, mixed on the work surface by blurring
- Rainbow stripes using different marker tips
- Optical illusion squares that wow your friends
Sealing for Long-Lasting Results
Now that those wild geometric designs are bursting across the furniture, it’s time to make sure all that hard work sticks around for the long haul—because nobody wants their awesome modern motifs wiping off with the next dusting. After the POSCA marker masterpieces are finished, sealing is the secret sauce for long-lasting results. Let that colorful ink dry for at least 24 hours (yes, it’s hard to wait!), then go for a water-based clear varnish or polyurethane. This keeps the colors vibrant and stops them from turning weirdly yellow. Always seal in a spot with good airflow, because breathing in fumes is definitely not part of the creative process. And hey, check for scratches every so often—you can always reapply the sealant to keep everything looking fresh.
| Step | Why It Matters | Pro Tip |
|---|---|---|
| Dry for 24 hours | Prevents smudging | Patience pays off! |
| Use water-based sealant | Keeps colors bright | No yellowing over time |
| Work in ventilation | Safety first! | Open windows or use a fan |
| Reapply as needed | Maintains protection | Inspect every few months |
Designing DIY Skateboard Deck Art
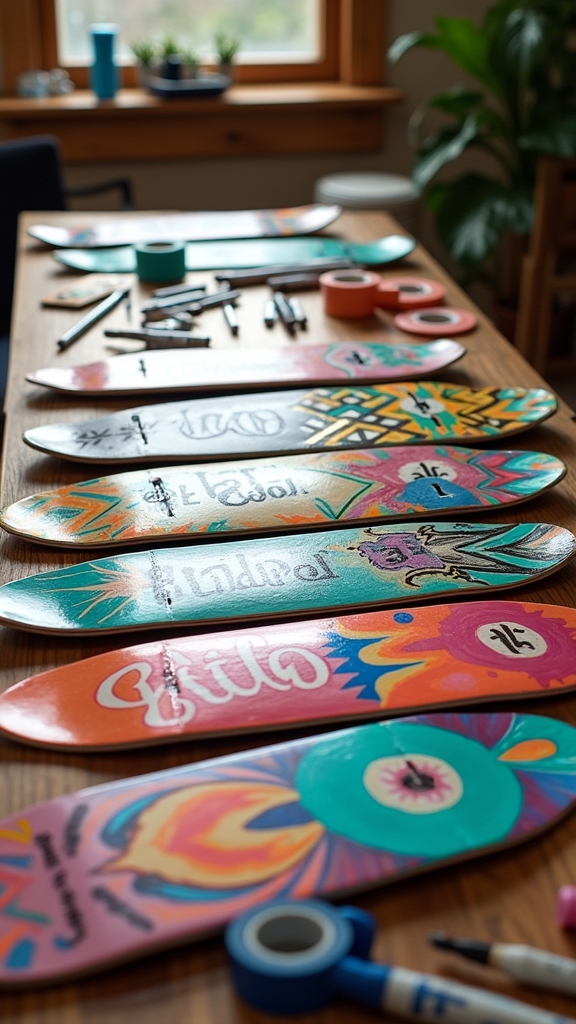
Ever wondered how to turn a plain skateboard deck into a rolling masterpiece? With the right Skateboard Techniques and a box of Uni-ball Posca markers, anyone can make their board stand out at the skatepark.
It all starts with sanding the deck lightly—think of it as giving your board a spa day—to help the colors grip better. Posca markers dry fast and don’t wash away, so you can layer bold colors and blend shades for awesome effects.
Playing around with different nib sizes means you get crisp lines, wild textures, and cool little details. When the art is done, a clear sealant keeps it safe from scrapes.
Imagine these:
- Bright graffiti-style letters popping
- Cartoon monsters with wild eyes
- Abstract geometric shapes weaving
- Nature scenes with dreamy sunsets
Creating Unique Phone Case Illustrations
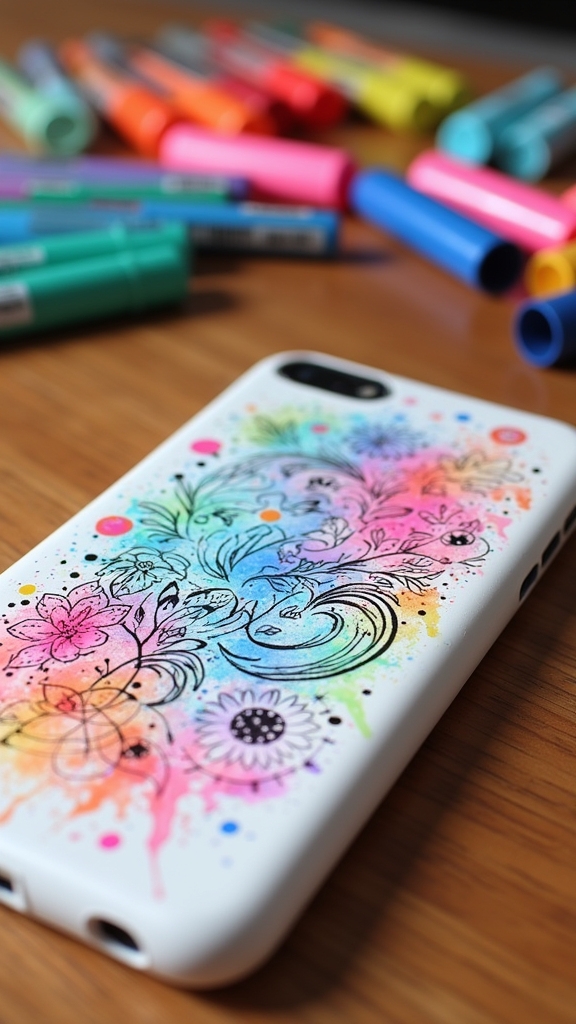
Picking out just the right color palette can totally set the mood for your phone case—bright and bold, or chill and pastel, it’s your call!
Adding cool textures and fun patterns with different Posca nibs makes your design pop, and if you mess up, hey, that’s just “abstract art,” right?
Once you’re happy with your masterpiece, don’t forget to seal it up with a clear coat so your colors stay sharp and your phone case survives the chaos of everyday life.
Choosing Your Color Palette
How do artists make a phone case illustration stand out from the crowd? It’s all about Color Exploration!
When picking a palette, choosing bold contrasts—think deep greens against bright reds—makes a huge difference. Posca markers come in tons of shades, so don’t be afraid to get adventurous.
Try color blocking by breaking up the case into sections, or blend colors right on the case for awesome gradients. And don’t forget: white and black markers are secret weapons for outlines and details, making everything pop.
Here’s what that could look like:
- Electric blue and neon yellow zigzags slicing across a jet-black background
- Ruby Red hearts outlined in crisp white
- A moody gradient fading from English Green to pale sky blue
- Sharp black lines separating blocks of vibrant color
Adding Texture and Patterns
Although choosing bold colors grabs attention, it’s the texture and patterns that really make a phone case illustration unforgettable.
Using Posca markers, artists can explore cool Pattern Techniques like stippling, cross-hatching, or even layering colors to create depth and dimension. Imagine swirling geometric shapes or popping floral motifs all over your case—that’s instant wow-factor!
Try mixing up nib sizes, like the big PC-5M for chunky lines and the super-fine PC-1MR for tiny, detailed patterns. Want a crazy, splatter effect? Just blow gently on the ink before it dries. It’s a little messy, but totally worth it!
Contrasting colors really make those patterns stand out, so don’t be afraid to experiment. Let your creativity run wild—your phone case deserves it!
Sealing for Durability
Once the masterpiece is finished and every color pops just right, nobody wants to watch their awesome phone case art scratch off after just a few days—talk about a creative heartbreak!
That’s why Artistic Protection is the secret weapon for keeping those Posca designs looking fresh. After letting the ink dry completely, artists should grab a clear acrylic sealant made for plastic. This magical layer shields the artwork from scratches and daily wear.
Multiple thin coats work best, letting each dry before adding another, so the colors don’t get cloudy or weird. And, just like sunscreen, it’s smart to reapply every so often to keep everything vibrant.
- A shimmering clear sealant misting over bold colors
- Tiny paintbrushes sweeping on thin, invisible layers
- Bright phone cases gleaming under room lights
- Happy artists admiring their long-lasting creations
Decorating Glass Votives With Delicate Florals
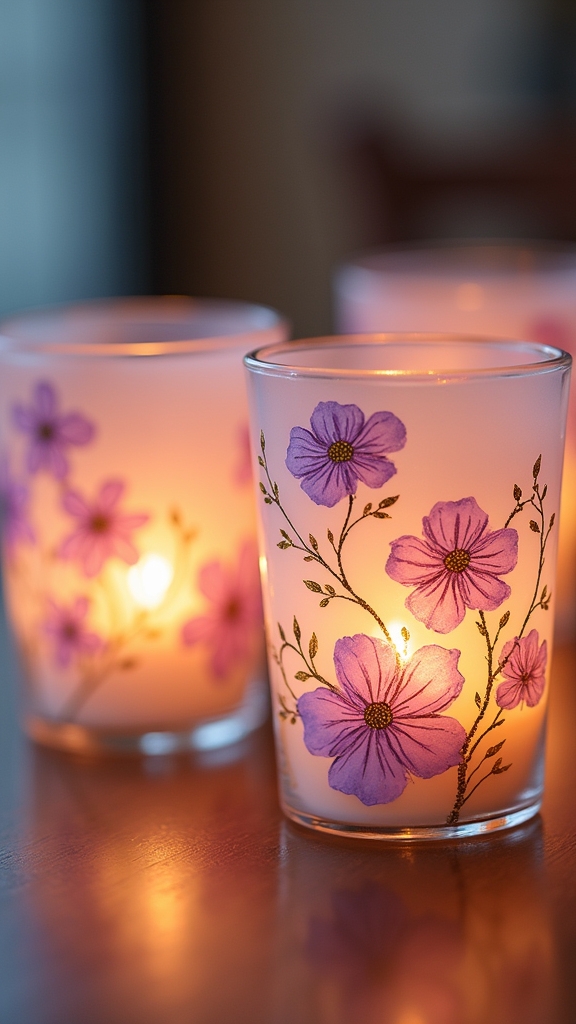
There’s something magical about turning plain glass votives into dazzling little works of art, especially when delicate florals come into play.
Drawing Floral Inspiration from nature, anyone can grab a white POSCA 1mr Pen and let creativity bloom right on the transparent surface. For those who aren’t confident in their freehand skills (no shame—it’s tougher than it looks!), tracing templates can help those petals pop with perfect precision.
The quick-drying marker means you can layer colors, adding depth so your flowers look extra fancy and detailed. Want even more sparkle? Pop an LED Flameless Candle Tea Light inside, and suddenly, your votive glows like it’s holding a tiny fairy garden.
Mixing different floral designs and colors makes each votive one-of-a-kind—perfect for any room or occasion.
Making Personalized Notebook Covers
Ready to give your boring old notebook a glow-up?
First, picking the right notebook and grabbing some Posca pens is key—they’re like magic wands for paper, with tons of colors and nib sizes for seriously cool designs.
Once you’ve got your masterpiece down, a quick spritz of sealant keeps your art safe from backpack disasters and lunchbox leaks.
Choosing Notebook Materials
Before diving into doodling dragons or splashing your favorite colors across a notebook, it’s smart to pick the right materials—because nobody wants their masterpiece peeling off a flimsy cover after a week.
Notebook Selection is a big deal here! Start by scoping out sturdy covers, like thick cardboard or faux leather, so your creations stick around. Size matters, too—A5 notebooks are easy to toss in a backpack, while A4 gives tons of space for wild ideas.
Blank or grid pages are awesome for mixing sketches and notes. And don’t forget: white or light-colored covers make Posca colors pop like fireworks!
Spice things up with extra touches like washi tape or stickers for that “I made this!” vibe.
- Cardboard or faux leather covers
- A5 for portability, A4 for more space
- Blank or grid page layouts
- White or light-colored backgrounds
Designing With Posca Pens
Release some serious creativity by turning a plain notebook cover into a one-of-a-kind masterpiece with Posca pens. Start with a basic cover made of paper or cardboard—these soak up Posca ink like a sponge, making colors pop.
Playing with Color Theory is super fun here: try layering light shades first, then add darker colors to make your design jump off the page. Grab different Posca pen tips, using thick ones for bold backgrounds and thin ones for tiny details, doodles, or even quirky quotes.
Go for geometric shapes, random doodles, or anything that makes you smile. The ink dries fast, so smudges won’t ruin your hard work. Experiment, mess up, laugh, and just let your imagination go wild—your notebook, your rules!
Sealing and Finishing Touches
Once a notebook cover is bursting with colors and doodles from Posca pens, it feels like a total work of art—so why not make sure it lasts?
After flexing some cool design techniques, the next step is locking in that awesomeness so it doesn’t smudge when tossed into a backpack. If the cover’s clean and dry, a clear acrylic spray sealant works wonders—just wait until the ink is 100% dry.
For even more pop, layer colors for depth, then finish with a matte or glossy varnish for pro-level durability. Always test your sealing plan on a scrap first, so there are no “oops” moments.
- Shiny covers gleaming under the light
- Smooth, smudge-proof doodles
- Deep, layered colors with extra dimension
- Professional finishes that wow friends
Revamping Denim Jackets With Vibrant Artwork

Transforming a plain denim jacket into a walking work of art is totally possible with POSCA markers, and honestly, it’s a blast.
With their bold, vibrant colors and smooth flow, these markers turn ordinary jackets into masterpieces of Denim Artistry. Because POSCA ink is both dense and opaque, artists can experiment with layering—stacking color on color for awesome depth, without worrying about the ink bleeding through.
Color blocking, wild patterns, or even super detailed illustrations? All fair game. Plus, since the ink dries quickly, there’s no need to stress about smudges when adding those tiny, tricky details.
To keep the jacket looking fresh wash after wash, a layer of fabric medium seals the deal, protecting that custom creation for ages.
Crafting Colorful Pet Rocks
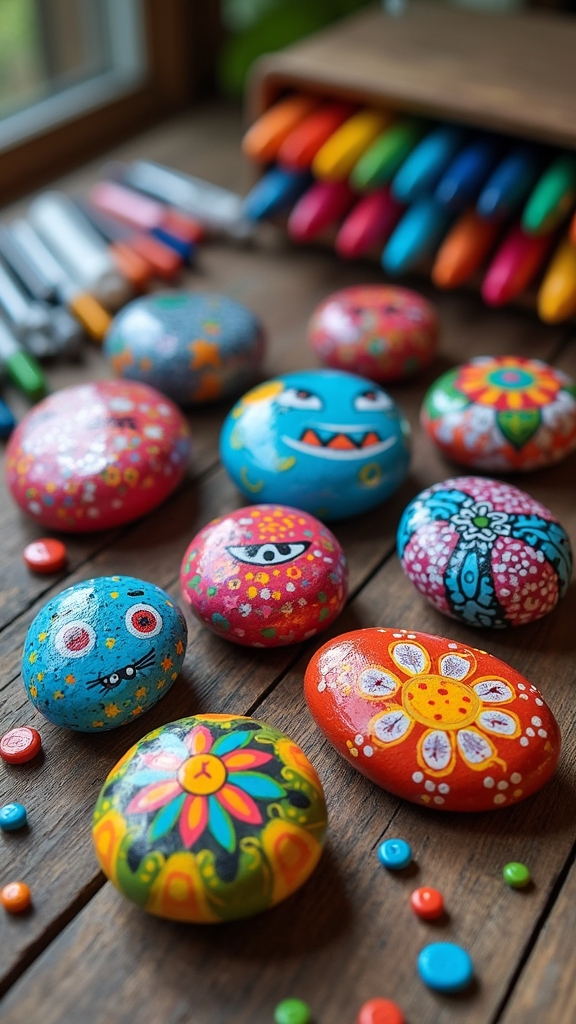
Pick up a smooth stone and suddenly, it’s not just a rock—it’s a blank canvas begging for some serious personality.
With Posca markers, even the wildest rock textures become the perfect background for colorful creations. Start by picking stones that feel nice and smooth, then grab different marker nib sizes to add both bold stripes and tiny dots.
Layer colors—Posca dries fast, so you can stack shades without waiting forever. Here’s where things get creative: add playful faces, funky patterns, or maybe a rainbow swirl.
Don’t forget, if your masterpiece will face rain or sun, finish it with a clear sealant.
- A sleepy cat painted on a round, gray pebble
- Bright polka dots popping over bumpy rock textures
- Vibrant stripes wrapping around an oddly-shaped stone
- Smiling cartoon faces with crazy, colorful hair
Painting Folk-Inspired Trinket Boxes
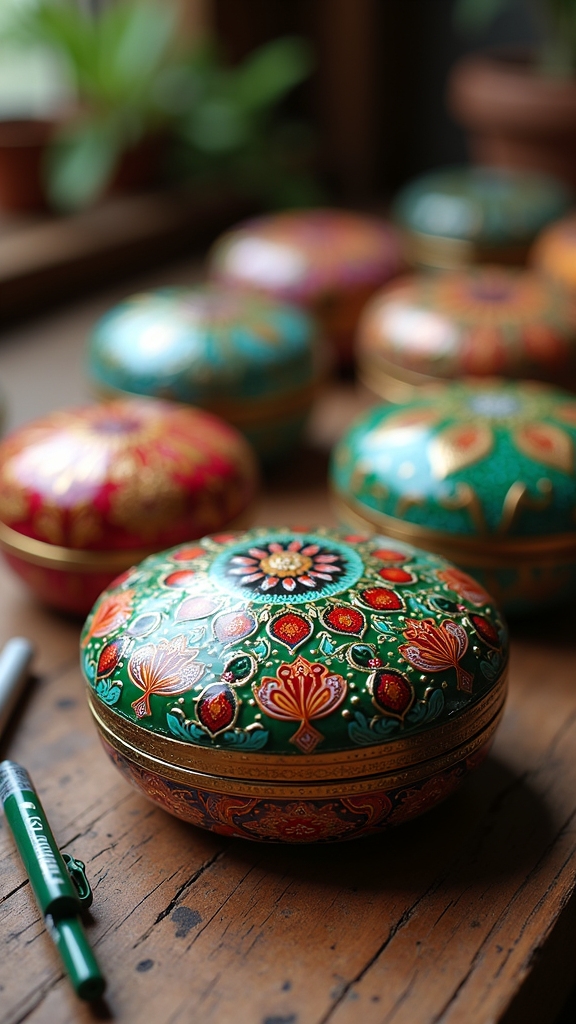
A plain wooden trinket box might look a little boring at first glance, but with Posca markers in hand, it’s basically begging for a folk-art makeover. The process starts with a base layer of white Posca, turning the box into a blank canvas.
Next comes a sweep of blue markers, giving the surface a painterly vibe straight out of a storybook. Folk motifs are the star here—think swirling flowers and leafy patterns, popping with yellow and green for that extra wow factor.
There’s no need to stick to just one pattern; every side can show off its own unique design. Once the masterpiece dries, sealing it up will protect those vibrant colors.
Suddenly, that boring box is a folk-inspired treasure chest!
Designing Contemporary MDF Letter Art
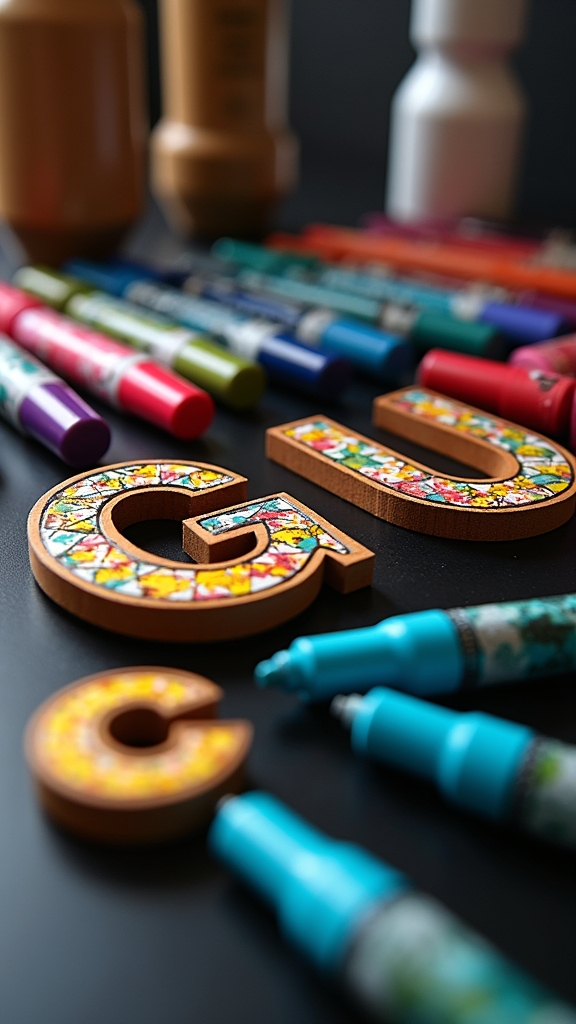
Now it’s time to turn plain MDF letters into something bold and unforgettable by picking color palettes that really pop—think neon pink next to jet black, or maybe turquoise with a splash of yellow.
Creative mark-making with POSCA markers, from wild zigzags to tiny dots, can totally change the mood of each letter, almost like they’re shouting out their own personalities.
For maximum wow-factor, layering different patterns—maybe stripes on polka dots or checkerboards over swirls—brings the whole piece to life and makes it impossible to ignore (in the best possible way).
Choosing Bold Color Palettes
Ever wonder how some art just pops off the wall and grabs your attention? That magic is all about choosing a bold color palette, especially when it comes to designing contemporary MDF letter art.
Artists reach for contrasting colors—think electric blues clashing with sunny yellows from the POSCA marker set—to make their letters impossible to ignore. Color contrast isn’t just a fancy term; it’s the secret sauce for eye-catching designs. Outlining with black or white markers adds extra punch, making each letter stand out even more.
Layering colors gives the artwork depth, almost like the letters are jumping out at you. For a modern twist, geometric shapes and color blocks make each letter look super fresh and unique.
- Deep blue letters outlined in sharp white
- Sunny yellow backgrounds with bold black borders
- Overlapping layers of color for rich, vibrant depth
- Chunky geometric patterns popping from each letter
Creative Mark-Making Techniques
Jump right in, and creative mark-making totally transforms plain MDF letters into eye-catching art.
Start by grabbing those chunky letters and covering them with a slick base coat—black or white POSCA markers work perfectly to prep your canvas.
Now, mark making mastery comes into play. Pull out the brightest POSCA colors you’ve got and experiment! Try wild stripes, playful dots, or even dab on some ombre magic while the paint’s still wet for that ultra-cool blended effect.
Don’t be afraid to add dashes or daubs for a texture that practically dares people not to touch. The secret? Let those colors dry so everything looks crisp and pro.
Suddenly, those boring letters are the stars of your shelf, bursting with personality!
Layering Patterns for Impact
Once those wild marks and pops of color have made the MDF letters come alive, it’s time to level up and bring in some serious pattern power.
Layering patterns is where the magic happens—hello, Textured Layers! Artists use a lighter base coat with a Posca marker, then stack on darker shades for depth, kind of like making a sandwich, but way cooler and less messy.
By switching between broad-tip and fine-tip markers, those patterns get extra sharp and interesting. Masking tape? It’s like a superhero cape for keeping lines crisp while layering on geometric or wavy patterns.
Remember, patience is key—let each layer dry so colors don’t turn into an accidental tie-dye disaster.
Imagine:
- Zigzag stripes racing across bold letters
- Polka dots floating above soft gradients
- Masked triangles popping with contrast
- Spirals swirling through multiple Textured Layers
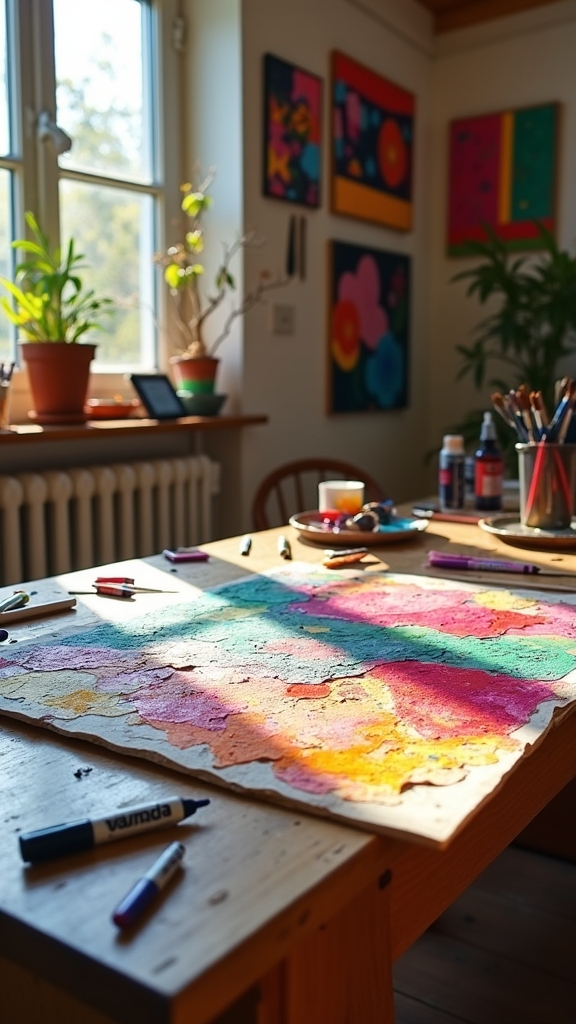
Enhancing Canvas Art With Layered Marker Techniques
Immerse yourself in the world of canvas art, and suddenly, POSCA markers feel like magic wands in your hands.
With their bold, opaque ink, Layering Techniques become your secret superpower. Start with the big guns—the broad PC-7M tip—for those sweeping, dramatic backgrounds.
Then, grab the fine PC-1MR to sneak in crisp details and doodles. Remember to let each layer dry, or else your masterpiece might turn into a mushy mystery (not as fun as it sounds).
Try diluting the colors with water for smooth gradients that make your art look extra pro. Mix colors right on the canvas, and play with darks and lights to create awesome depth.
Suddenly, your canvas is bursting with vibrant layers and crazy-cool textures!
Adding Flair to Shoes With Custom Graphics
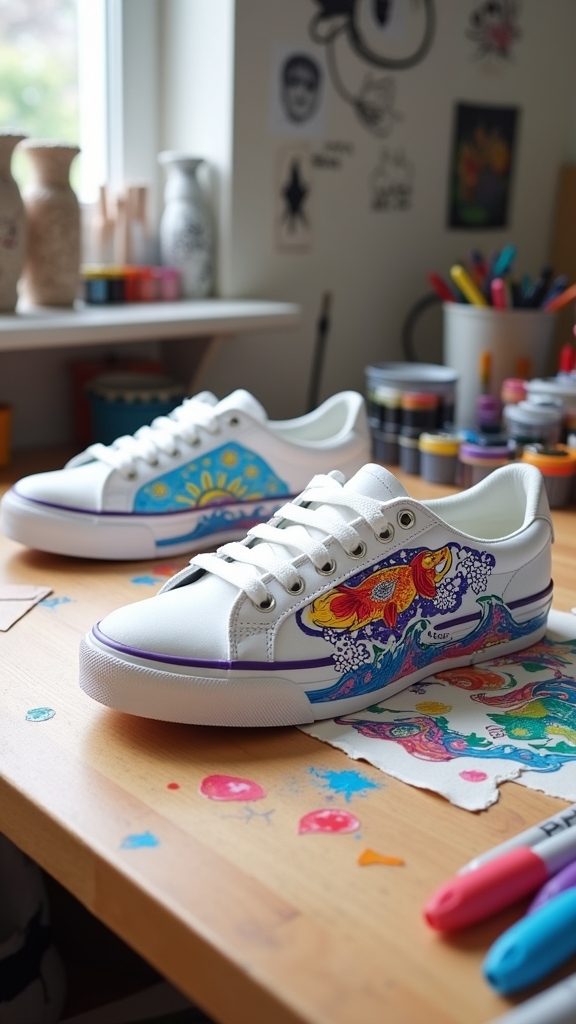
Although everyone wears shoes, not everyone rocks a pair that screams “one-of-a-kind.” Customizing kicks with Posca markers turns boring sneakers into walking masterpieces, making every step a bold statement.
Shoe Techniques using Posca markers start with a light pencil sketch—think of it as a blueprint for your wildest ideas. Then, artists plunge into bright, bold colors, layering and blending for depth that pops.
Switching between fine and broad nibs helps nail the details or splash on big areas of color. When the masterpiece is done, a clear acrylic spray locks in the design, keeping it safe from puddles, scuffs, and jealous glances.
- Neon lightning bolts zipping across white canvas
- Cartoon eyes peeking from heel to toe
- Ombre galaxy swirls wrapping around the sole
- Graffiti-style names exploding with color
Illustrating Bold Posters for Wall Decor
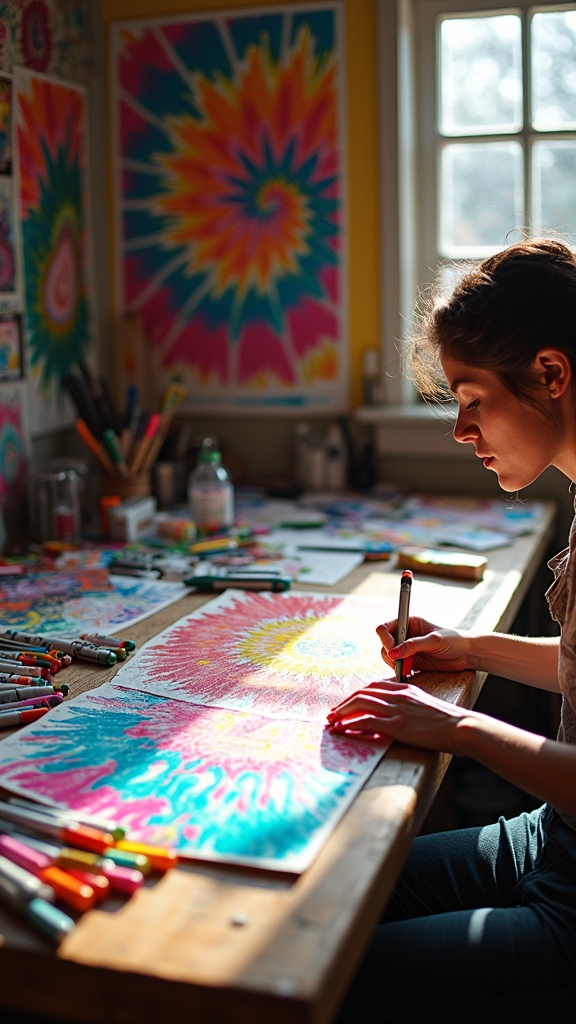
When it comes to illustrating bold posters for wall decor, picking a super vibrant color palette is key—think colors that shout, not whisper.
Graphic patterns, like zigzags or funky shapes, can take your poster from plain to “wow, who made that?” in seconds.
Choosing Vibrant Color Palettes
Ever wonder how some posters just explode with energy and practically shout from the wall? It all comes down to choosing vibrant color palettes, and that’s where Color Theory becomes your superpower.
When using Posca markers for bold wall decor, artists pick contrasting hues—think deep red slammed up against bright yellow, or electric blue buzzing next to neon green. They use color blocking, splitting the poster into wild sections of color, making every inch pop.
White space isn’t just emptiness—it gives those colors room to breathe, so nothing feels crowded. Layering and blending? That’s where the magic happens, creating depth and custom shades that no one else has.
- Splashes of fiery orange beside cool turquoise
- Big blocks of bold purple and sharp lime
- Streaks of sunny yellow breaking through black
- Layered pinks melting into moody blues
Incorporating Graphic Patterns
Patterns have a way of waking up a boring wall faster than a double shot of espresso. When it comes to illustrating bold posters, Posca markers are basically superheroes for Pattern Play. Their vibrant, opaque colors turn every zigzag, polka dot, or checkerboard into a head-turner.
Artists can use color blocks and wild contrasts to make their patterns pop, grabbing attention even from across the room. Thanks to Posca’s quick-drying magic, colors stay crisp and don’t bleed—so even the tiniest details stay sharp.
Playing with different nib sizes is like having a box full of pattern-making tools, letting creators switch from chunky stripes to skinny squiggles.
Pattern Play with Poscas? It’s an instant ticket to wall art that shouts “look at me!”
Layering for Visual Impact
Crank up the drama—layering with Posca markers is like turning a flat poster into a mini explosion of depth and color.
With Layering Techniques, artists start with a light color, then stack on richer, darker shades, using Posca’s quick-drying magic to avoid a smeary mess.
Mixing tip sizes, like the beefy PC-5M and the skinny PC-1MR, lets creators add chunky backgrounds and sharp details all in one masterpiece.
And hey, experimenting with wet-on-wet blending delivers slick gradients that practically pop off the wall.
Want eyes glued to your art? Use contrast and negative space for that wow factor.
Imagine this:
- A sunny yellow base glowing underneath bold purples
- Swirling gradients melting from blue to green
- Tiny white details dancing atop dark layers
- Sharp lines cutting through bursts of color
Creating Ombre Effects on Box Frames
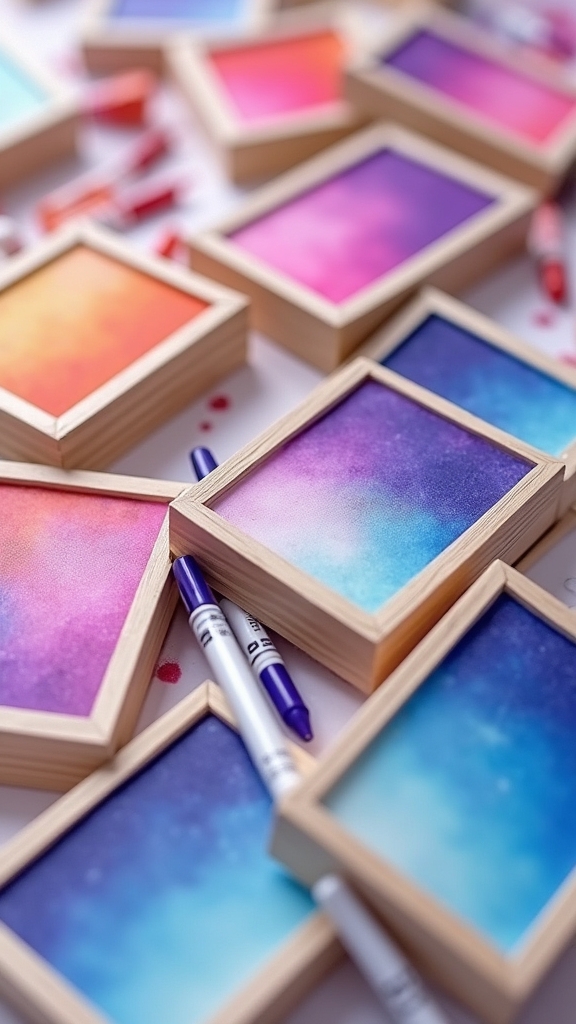
A splash of ombre can totally transform a plain box frame into a piece of art that jumps off the shelf—no boring decor allowed!
To nail this look, start by drawing diagonal lines with a Posca marker, creating sections for your colors to blend. Grab two or more colors for awesome color blending—apply the lighter shade first, then quickly add the darker one while the paint is still wet.
Blend fast, because Posca markers dry at superhero speed! Try out different color combos for a subtle fade or a bold pop of color.
For even more wow, add several layers, letting each dry a bit for super intense ombre effects. Seriously, who knew a box frame could look this cool?
Experimenting With Mixed Media Collages
Once those ombre box frames are bursting with color, it’s impossible not to want more creative chaos.
That’s when experimenting with mixed media collages comes into play! With Posca markers, artists immerse themselves in Layering Techniques, stacking paper, fabric, and found objects to craft wild, eye-catching masterpieces.
The markers’ rich, opaque colors pop on any surface, and since the paint dries fast, there’s no fear of smudging the magic. Want fine lines or funky patterns on top of thick paint or even some crumpled tissue? Posca’s got it covered, literally.
Blending and mixing colors? Totally doable for gradients that sizzle with energy.
- Torn magazine pages layered with neon Posca accents
- Fabric scraps outlined in bold, graphic lines
- Doodled doodads sketched onto textured paper
- Shiny found objects highlighted with vibrant marker edges
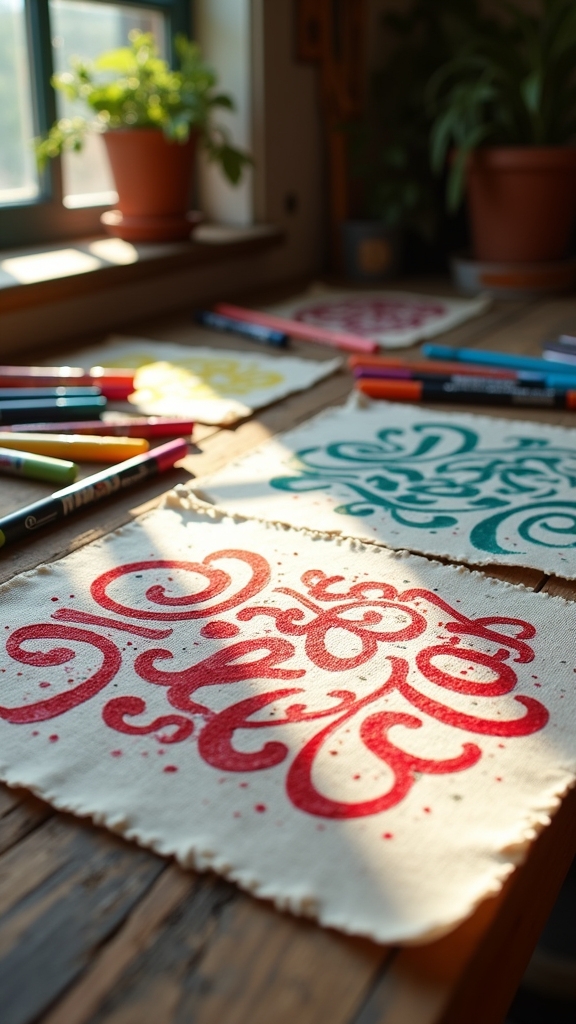
Hand Lettering Quotes on Fabric Banners
Imagine walking into a room and being greeted by a burst of colorful words dancing across a fabric banner—now that’s a welcome!
Hand lettering quotes on fabric banners with Posca markers isn’t just fun; it’s a way to show off some awesome Fabric Techniques. The secret? Posca’s quick-drying, water-resistant ink means your designs can survive a rainy day or a trip through the washing machine.
Hand lettering with Posca markers turns any fabric banner into a durable, colorful masterpiece—rain or shine, your words will last!
With different nib sizes, artists can mix skinny, elegant lines with bold, loud letters. Want your words to really pop? Layer and blend colors, or try pre-washing your fabric for extra-vivid results.
Just don’t rush—let your masterpiece cure for 24 hours. That way, your banner will look great and last even longer!
Transforming Old Plant Pots With Abstract Designs
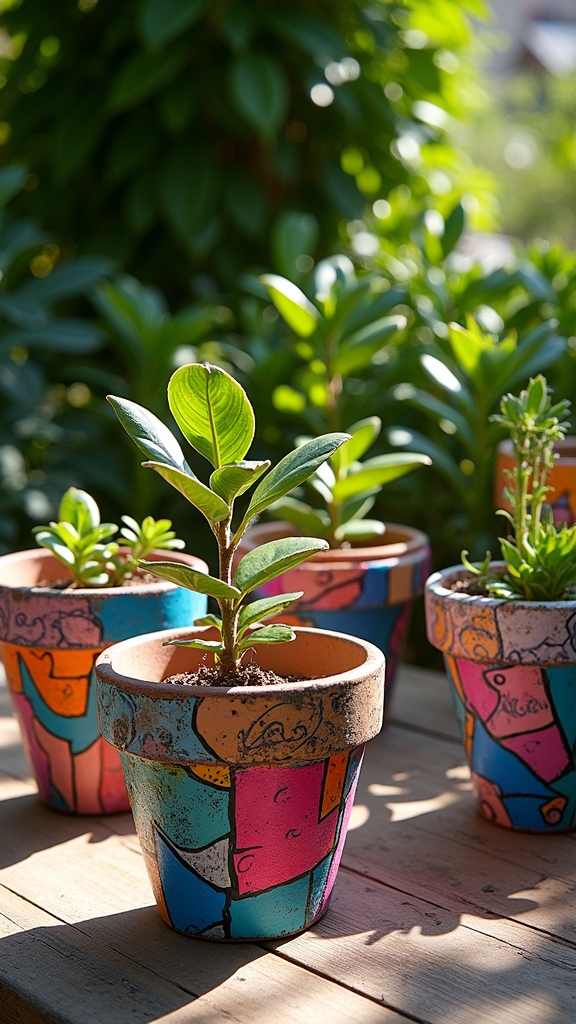
Give those tired old plant pots a second chance at life with a splash of abstract art and some trusty Posca markers!
These markers are perfect for Color Exploration, letting anyone turn boring pots into wild, one-of-a-kind masterpieces. Start with a base layer of white or soft color to make sure your bold designs really pop.
Try using different nib sizes—grab a PC-5M for cool details and a PC-8K for those dramatic, chunky lines. Remember, it’s all about layering. Let each swipe dry before adding more, and soon you’ll see your abstract vision taking shape.
Want to get extra fancy? Mix colors right on the pot for awesome gradients.
- Swirling neon shapes hugging the rim
- Lightning bolt patterns zigzagging down the sides
- Layered pastel clouds floating over the surface
- Splashes of rainbow gradients dripping toward the base
Painting Murals on Outdoor Surfaces
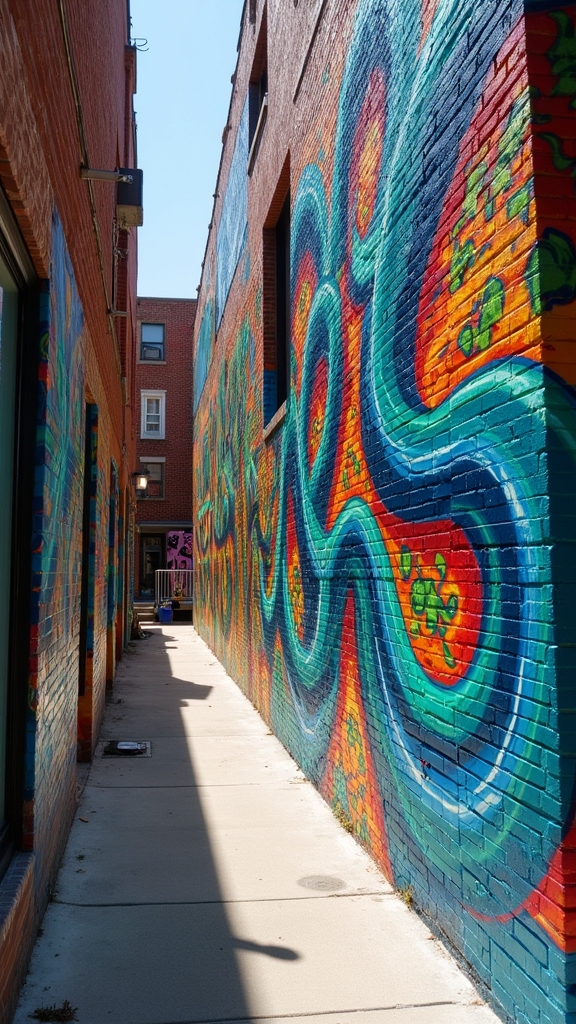
There’s something seriously awesome about seeing a plain wall or boring fence suddenly explode with color, and that’s where POSCA markers come in.
These markers are like magic wands for mural techniques—quick-drying, water-resistant, and packed with bold pigments that stay bright even after rain or sun.
Artists love how POSCA pens work on all kinds of outdoor surfaces, from bumpy brick to rough wooden fences and even concrete.
Before jumping in, it’s super important to clean the surface well so the colors stick and don’t peel off.
Always prep your wall first—clean surfaces help your colors pop and make sure your mural lasts, rain or shine.
With different nib sizes like the PC-5M for crisp lines and the chunky PC-8K for wild, broad strokes, anyone can try out new mural techniques and let their creativity take over those empty outdoor spaces!
Customizing Leather Accessories With Intricate Details
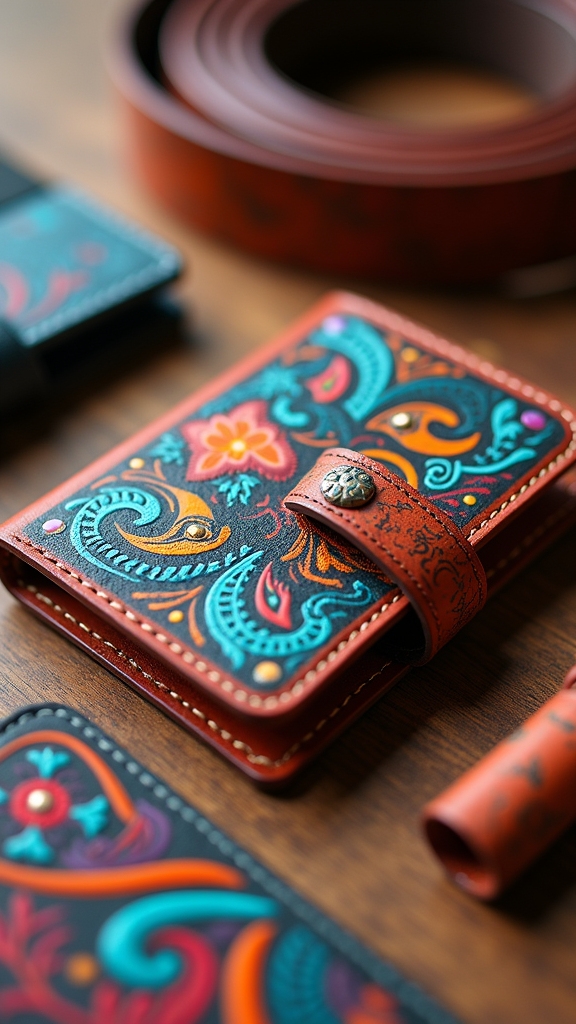
Even the most ordinary leather wallet or pair of shoes can turn into something jaw-dropping with a handful of POSCA markers and a little imagination.
With the right Leather Techniques, artists can make wallets, bags, or sneakers totally unique. POSCA markers work great on leather, thanks to their quick-drying, water-resistant paint. Fine tips are perfect for tiny doodles, while color blocking and layering can make bold, dynamic patterns.
It’s important to clean the leather first—nobody wants dust mixed with their masterpiece!
Just imagine:
- A dragon snaking across a wallet, its scales popping with bright colors
- Sneakers with comic book-style lightning bolts and speech bubbles
- A vintage handbag blooming with neon florals
- Cool geometric patterns zigzagging over a leather journal
With POSCA markers, leather just got interesting!
Frequently Asked Questions
What Cool Things Can You Do With POSCA?
Exploring art projects with POSCA markers allows individuals to customize ceramics, glass, wood, and fabric, transform clothing, personalize accessories, and experiment with layering techniques, resulting in vibrant, detailed artwork suited for both personal expression and community art initiatives.
What to Customize With POSCA?
When considering what to customize with Posca, a variety of customizable objects come to mind, including denim jackets, aprons, ceramic vases, notebooks, wooden furniture, phone cases, tote bags, and shoes, each offering unique creative opportunities.
Is POSCA Ok on Skin?
The current question addresses Skin Safety regarding POSCA markers. While they are generally non-toxic and can be used on skin temporarily, they are not intended for body art. Individuals should patch test first and consider products formulated for skin.
Why Is POSCA so Expensive?
The current question concerns why Posca markers are so expensive. Pricing factors include their high-quality, opaque ink, water-based non-toxic formula, diverse nib selection, durability, and strong brand reputation, all contributing to their premium cost in the market.
Conclusion
With just a handful of Posca markers and a splash of imagination, anyone can turn ordinary stuff into amazing art. Whether it’s jazzing up a boring vase or making your skateboard the coolest on the block, the possibilities are huge. Mistakes? Totally part of the process! So, grab those markers, crank up the music, and let your creativity run wild. Who knows—your next masterpiece might be hiding on your old phone case or even your backpack!
Leave a Reply