
With Posca markers, anyone can give boring stuff a major glow-up! Try doodling wild zigzags on rocks, making coasters from wooden slices, or putting funky monsters on a phone case. Turn a plain canvas into wild abstract art, jazz up notebook covers, or whip up customized bookmarks. You can paint magnets, frame edges, or even mix stencil shapes with playful patterns on jars and tote bags. There’s so much fun packed into these 14 ideas, and the next ones get even cooler!
Key Takeaways
- Decorate rocks and wooden slices with vibrant Posca marker patterns, sealing them for durability and outdoor display.
- Personalize tote bags and notebooks using Posca markers, fabric medium, and mixed media elements for unique, everyday accessories.
- Create custom phone cases and greeting cards by layering complementary colors and bold outlines, then protecting with clear acrylic sealant.
- Design colorful fridge magnets and shrink plastic keychains with playful patterns, finishing with Mod Podge for lasting wear.
- Upcycle glass jars and canvases with geometric stencils, freehand doodles, and layered colors for eye-catching home décor.
Decorating Rocks With Vibrant Patterns

Even if someone has never tried it before, decorating rocks with vibrant patterns using Posca markers can feel like revealing a secret superpower.
First, rocks need a quick bath—nobody wants dirt messing up their masterpiece! A layer of gesso primer, especially on those dark, mysterious surfaces, helps the colors from paint pens really pop.
With paint markers in hand, anyone can draw wild zigzags, funky dots, or even tiny animal faces. Layering and blending colors gives each rock a cool, eye-catching effect.
For extra drama, outlining with thicker paint markers turns every design into a mini comic book panel.
Once the masterpiece is finished, a coat of clear sealant or Mod Podge keeps the colors bright, rain or shine.
Customizing Wooden Slices as Coasters
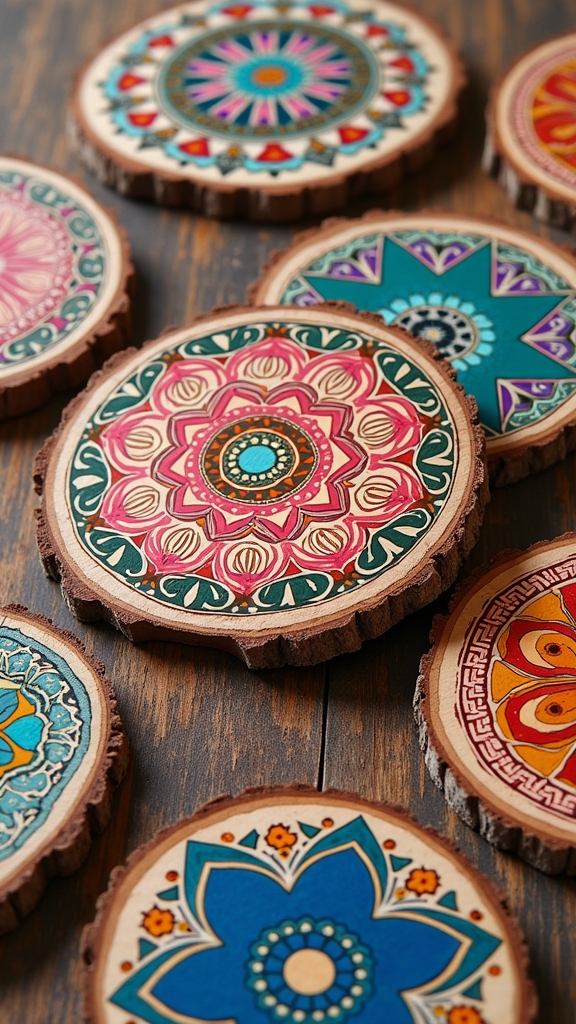
When it comes to customizing wooden slices as coasters, there’s something seriously cool about turning a simple piece of wood into a tiny work of art.
First, you’ll want to grab smooth wooden slices—make sure they’re clean, because nobody wants dust in their art! A quick layer of gesso acts like a magic primer, making those Posca colors pop.
Start with clean, smooth wooden slices and a swipe of gesso—your colors will thank you with serious vibrancy.
Planning your design helps, but honestly, markers work just as well for spontaneous doodles or wild patterns. Layering different Posca colors adds depth, and don’t forget bold outlines—they really make designs stand out.
Once you’re finished, seal your masterpiece with a clear spray so your coaster survives spilled drinks and snack attacks. Suddenly, coasters aren’t just useful—they’re little pieces of your personality!
Creating Abstract Art on Canvas

Although abstract art might look wild and mysterious, creating it on canvas with Posca markers is actually a blast.
With just a blank canvas and some gesso primer, anyone can dive right into these wild canvas techniques. Start by sketching abstract shapes—think squiggles, blobs, or whatever pops into your mind.
When it comes to color layering, patience is key. Let each color dry before adding the next for cool depth, or, if you’re feeling bold, overlap colors while they’re still wet for smooth blends and funky gradients.
Outlining shapes with bold strokes adds a punch of structure to the madness. If you want to go even wilder, glue on scraps of paper or textured bits for a mixed media masterpiece that’s totally unique.
Personalizing Phone Cases With Doodles
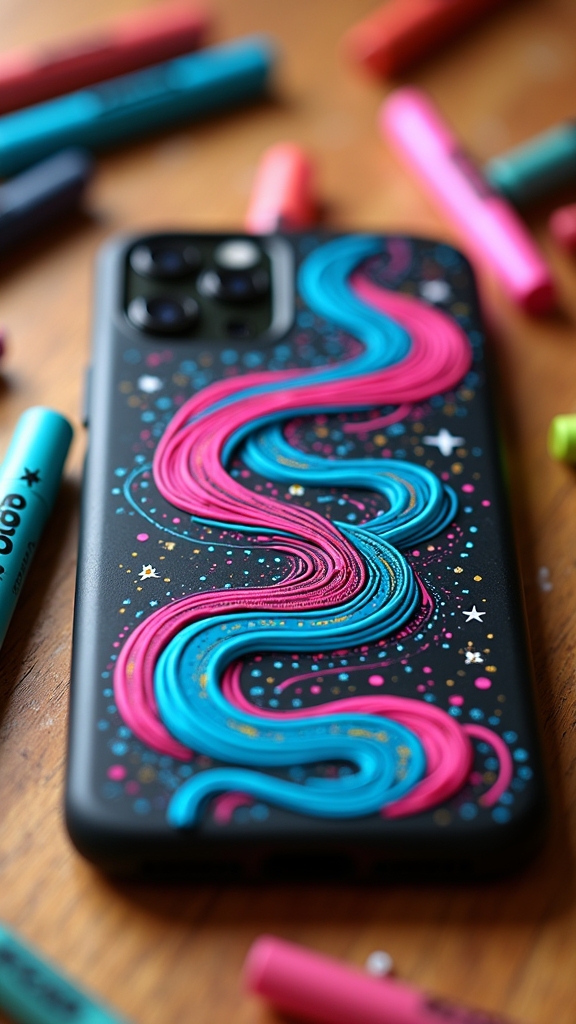
After going wild on canvas, it’s hard not to look around and wonder what else could use a burst of color—like that boring phone case sitting on the table.
Personalizing phone cases with doodles is the perfect way to turn something plain into a piece of art. For phone case designs that really stand out, choosing a smooth, paint-friendly case is key. Thin Posca markers are great for custom doodle inspirations with tons of tiny details, while thick markers add bold outlines.
Transform any plain phone case into a mini masterpiece with bold outlines and intricate doodles using the right markers and a smooth surface.
Don’t be shy—try layering and marker blending techniques for awesome effects like shadows or crazy gradients!
- Pick a smooth, compatible phone case
- Use thin markers for details, thick ones for bold lines
- Experiment with layering and blending colors
- Add personal touches: symbols, quotes, or patterns
- Protect it all with a clear acrylic sealant
Designing Bookmarks With Bold Colors

Bright bookmarks can totally transform the way books feel—suddenly, flipping to a saved page is like finding a tiny piece of art hiding in your story. Creating bookmarks with Posca markers starts with sturdy cardstock, perfect for experimenting with wild bookmark themes and bold color blending. Artistic techniques like layering, outlining, and doodling keep things fresh and fun. Want your bookmark to really pop? Try mixing patterns—maybe stripes with polka dots, or a surprise doodle. Add a favorite quote in a funky font for extra sparkle! When the masterpiece is finished, a quick seal with clear acrylic spray keeps those colors looking bright, even after a hundred page-turning adventures.
| Artistic Step | Pro Tip |
|---|---|
| Cut Cardstock | Use 2″x6″ for most bookmarks |
| Color Blending | Layer colors for cool effects |
| Outlining | Use black for bold contrast |
| Add Quotes | Play with fun, wavy fonts |
| Seal Bookmark | Use spray for lasting vibrancy |
Painting Flower Pots With Fun Motifs
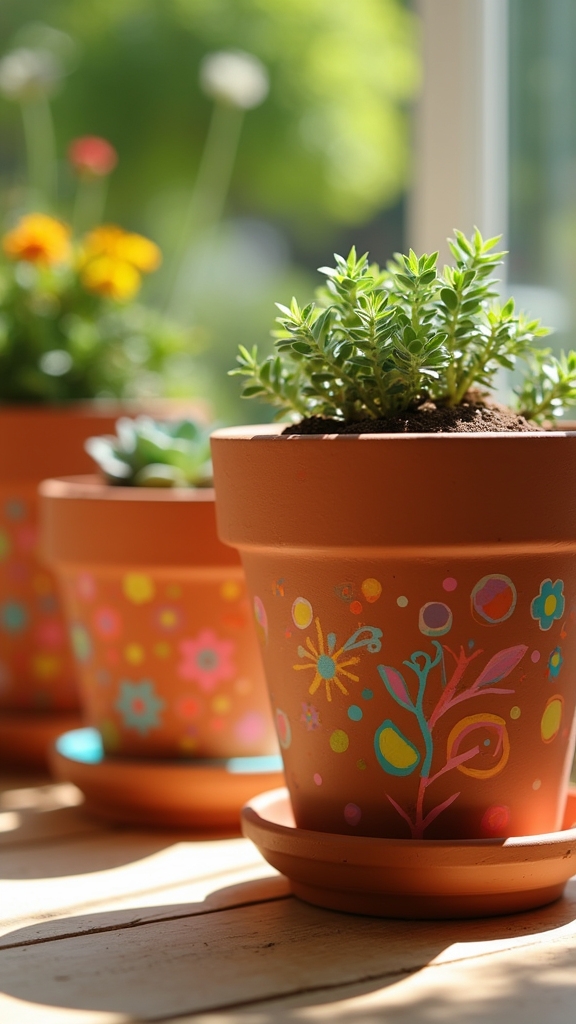
When it comes to jazzing up plain flower pots, Posca markers totally change the game—they’re like magic wands for anyone who wants their plants to live in style.
First, clean the pots well and slap on some gesso for a smooth, vibrant base. Flower pot techniques get really fun here: use skinny markers for tiny doodles or switch to thick ones for big, bold outlines.
Try paint layering methods—stack colors, blend for cool gradients, and add depth to your designs. Need design inspiration sources? Nature, cartoons, or even geometric patterns work great.
Once you’re done, seal it all with clear acrylic spray so the weather doesn’t ruin your masterpiece.
- Clean and prime with gesso
- Use skinny for details, thick for bold
- Experiment with layering colors
- Get inspired by nature or patterns
- Seal with acrylic spray
Making Shrink Plastic Keychains
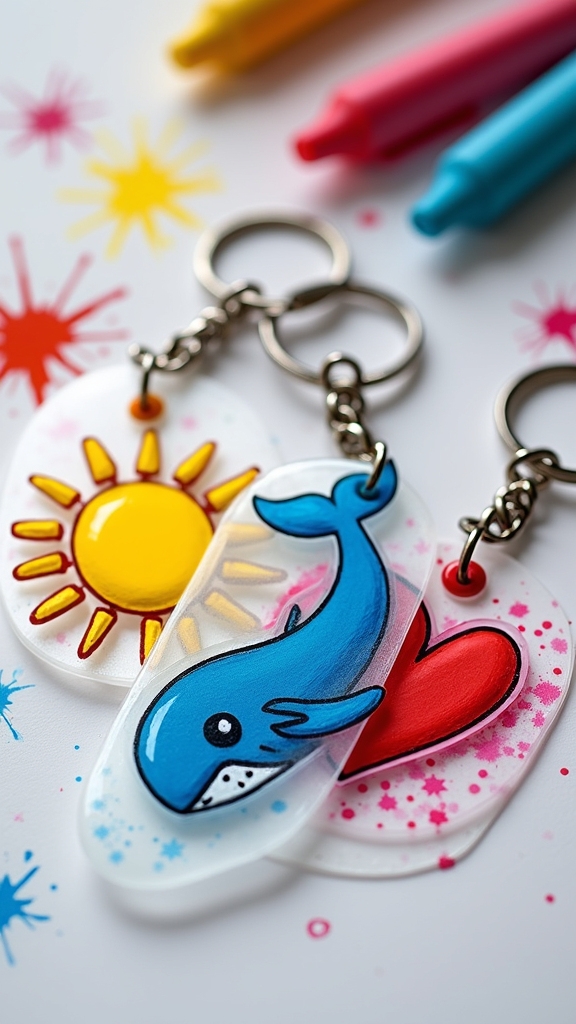
Making shrink plastic keychains with Posca markers is seriously fun, especially when you get to pick the perfect shrink plastic and sketch out adorable characters or wild creatures to bring to life.
Once the designs are colored in and cut out (watch those fingers!), the real magic happens in the oven, where everything shrinks down and gets tough as nails.
A shiny coat of Mod Podge and a keyring finish the job—so your pocket monsters, smiley tacos, or whatever else you dream up can tag along wherever you go.
Choosing Shrink Plastic
Even though plastic might sound boring at first, shrink plastic is actually a secret weapon for creative people who love making custom keychains. Not all shrink plastic types are the same—some are clear, some are frosted, and others are even colored, so it’s smart to experiment to see which one looks best with your Posca markers.
When picking your shrink plastic, remember that smooth surfaces work best for clean coloring, and sturdy sheets are easier to cut. Cutting techniques matter too—neat cuts make the final keychain look polished after shrinking.
Once everything’s shrunk, sealing methods are key for durability and shine.
- Try clear, frosted, or colored shrink plastic types
- Use sharp scissors for smooth cutting techniques
- Test small pieces before big projects
- Avoid over-coloring to prevent weird textures
- Seal with Mod Podge for extra protection
Designing Cute Characters
Tiny masterpieces, that’s what shrink plastic keychains can become in the hands of a creative person.
Designing cute characters starts with a sketch—think big, because size scaling strategies matter! Remember, your drawing will shrink a lot, so go bold with details and exaggerate those adorable features.
Want your character to look super happy, shocked, or sleepy? Try out different character expression techniques, like wide eyes, goofy grins, or tiny blush marks.
Posca markers make it easy to play with color palette choices; neon pink cheeks or pastel blue hair can really pop when everything shrinks down.
After coloring, cut carefully along the outlines—no one wants a lopsided cat.
The goal? A little keychain that’s packed with personality and color!
Baking and Finishing
Once the characters are drawn and colored, it’s time for the most magical part—watching the designs shrink in the oven!
The baking techniques are simple but super fun to watch. Preheat the oven to 325 degrees Fahrenheit, pop your creations in, and keep your eyes glued to the action as the plastic curls, wiggles, and finally flattens out.
After cooling, sealing methods come into play—brush on a thick layer of Mod Podge to protect your art and make it shine.
To finish, grab some cool keychain accessories and attach your masterpiece.
- Preheat oven to 325°F for perfect shrinking results
- Watch the plastic dance, curl, and flatten in just a minute
- Use Mod Podge to seal and protect your artwork
- Let everything cool before handling
- Attach rings or loops to complete your unique keychain
Upcycling Glass Jars With Geometric Shapes
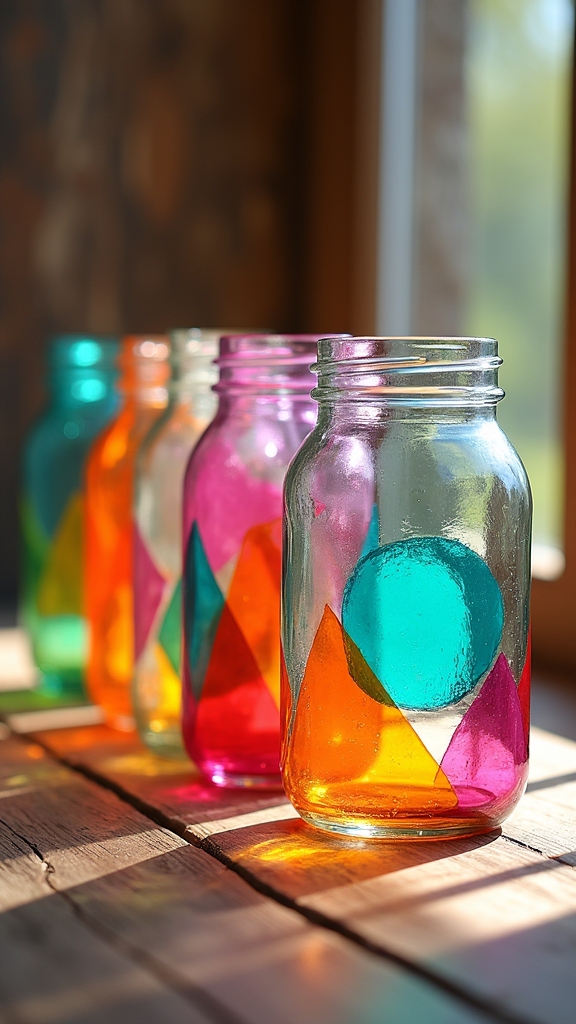
Sometimes, plain glass jars just beg for a little excitement, and what better way to jazz them up than with some bold, geometric shapes? By starting with clean, dry jars, artists can make sure their Posca markers stick like magic.
A quick pencil sketch helps map out those triangles, squares, or wild zigzags—nobody wants wonky lines, right? For real pop, jar painting tips suggest picking bright Posca colors that scream contrast against the clear glass.
Here’s where color layering methods come in: overlapping shapes and colors add cool depth, kind of like a stained-glass window.
Once the design dries, a coat of clear acrylic sealer locks everything in, so the masterpiece survives kitchen duty—or even a wild sleepover snack raid!
Drawing on Tote Bags for Unique Accessories
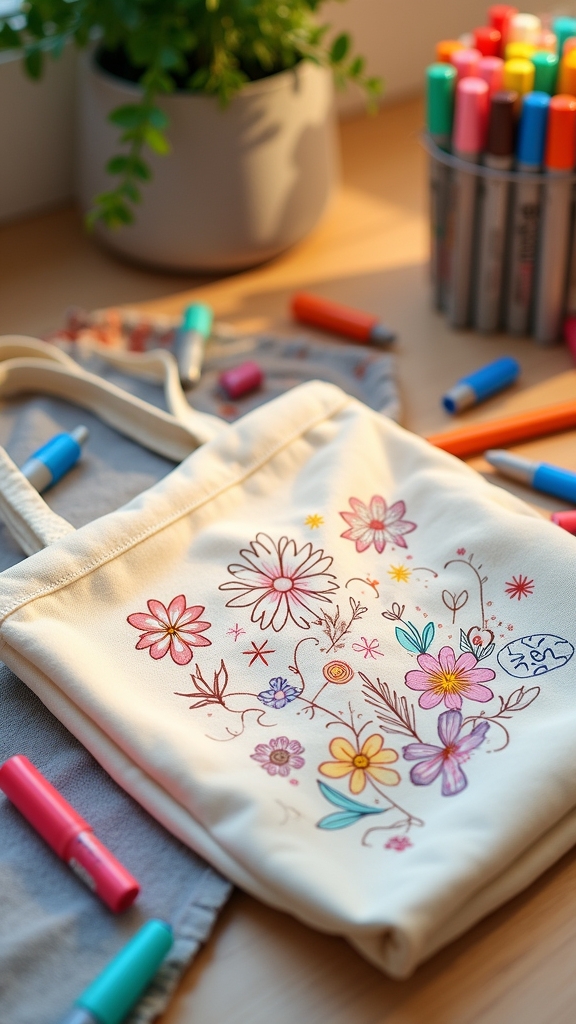
Glass jars aren’t the only everyday stuff begging for a burst of color—tote bags are practically calling out, “Paint me!”
With their sturdy cotton or canvas fabric, these bags are perfect blank slates for Posca marker magic. Tote bag customization lets anyone turn a plain bag into an eye-catching accessory, and with a little fabric medium application, those colors stick and stay soft, even after tons of grocery runs.
Layering techniques add depth and cool effects, so you can go simple or super detailed. To keep those lines sharp, just heat set the design by ironing on the reverse side. Plus, every personalized tote is a step closer to ditching boring plastic bags!
- Try geometric patterns or cute doodles
- Use stencils for crisp shapes
- Experiment with bold outlines
- Blend colors for ombre effects
- Add your favorite quotes
Crafting Illustrated Greeting Cards
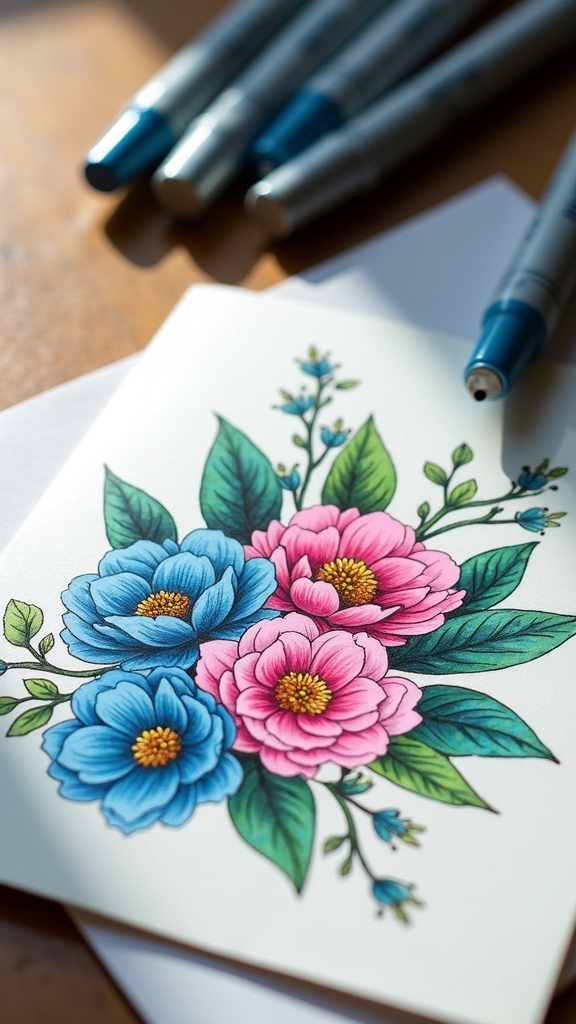
For anyone who loves sending a little extra cheer through the mail, crafting illustrated greeting cards with Posca markers is a total game-changer.
Picking out smooth, sturdy cardstock is the first step to making sure those marker colors pop, and layering bold shades lets each drawing stand out with serious flair.
Adding personal messages in your own illustrated style just takes things to the next level—no one can resist a card that looks this awesome and heartfelt!
Choosing Cardstock Surfaces
Even though paper comes in all shapes and sizes, cardstock is the real MVP when it comes to making illustrated greeting cards with Posca markers. It’s strong, sturdy, and doesn’t flop over like regular printer paper, so your artwork stays looking sharp.
The smoothness of cardstock makes Posca colors pop, and lines stay crisp—no fuzzy, wobbly disasters here! Picking the right cardstock matters, especially when you want your creations to last and look their best.
Here are some handy tips for choosing your cardstock:
- Go for a higher cardstock weight (like 80 lb or more) for durability.
- Try lightly sanding for an ultra-smooth finish.
- Play around with textured surfaces for cool effects.
- Experiment with different cardstock colors for unique backgrounds.
- Choose acid-free cardstock to keep colors bright.
Layering Vibrant Marker Colors
Once the perfect cardstock is picked out, the real fun begins—layering those bright, bold Posca marker colors. It’s like building a rainbow, one awesome streak at a time!
Start with lighter shades, laying down your base so the colors really pop, then use layering techniques to add darker hues on top. This not only makes your illustration depth stand out but also gives your card some serious wow factor.
For extra flair, try color blending—while the ink’s still wet, overlap strokes to create smooth changes and eye-catching gradients.
Don’t forget those bold outlines! They frame your art, making each element jump off the card (kind of like a cartoon superhero).
Experiment, mix it up, and let your creativity run wild!
Adding Personal Illustrated Messages
Nothing beats a greeting card that’s totally one-of-a-kind, especially when it’s bursting with hand-drawn art and a message straight from the heart.
Using Posca markers, anyone can turn a blank card into a mini masterpiece full of personalized messages and illustrated quotes. Bold outlines can make both doodles and words pop, letting artistic themes shine. Mixing in washi tape or a dash of glitter adds fun texture and sparkle—because who doesn’t love a bit of bling?
Layering colors builds depth, so your creations look even cooler. Plus, trying different card surfaces, from textured paper to fabric, can totally change the vibe!
- Brighten cards with bold, colorful illustrations
- Handwrite personalized messages for extra meaning
- Use illustrated quotes for inspiration
- Experiment with mixed media for flair
- Switch up surfaces for unique effects
Beautifying Notebooks With Cover Art
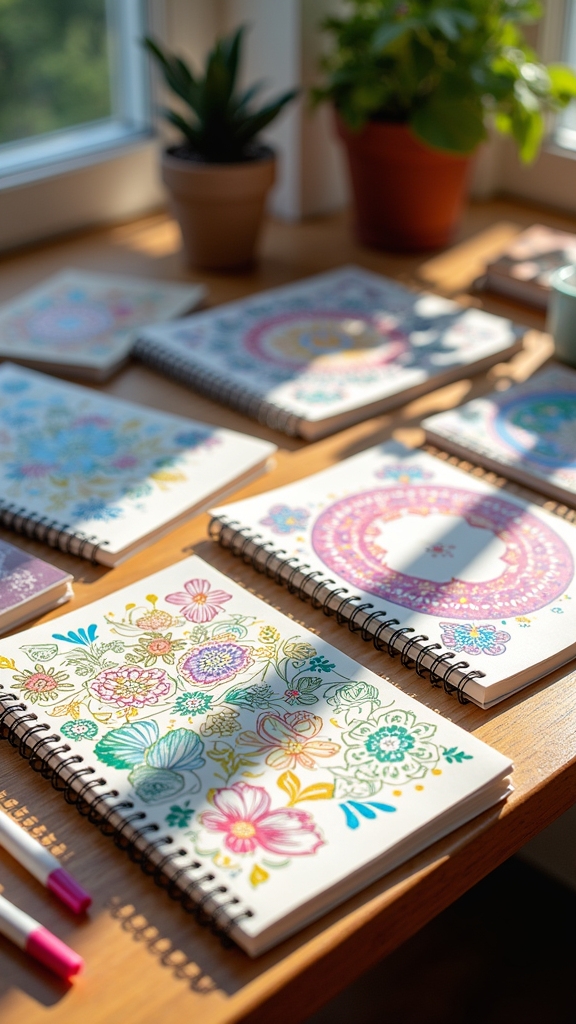
A fresh notebook with a plain cover is basically a blank canvas screaming for some personality, and Posca markers are just the thing to make it pop.
Before diving in, it’s smart to wipe the cover clean and slap on a layer of gesso—think of it as sunscreen for your art, making colors brighter and less likely to smudge.
Prep your canvas: clean the cover and brush on gesso for vibrant colors that stick and really shine.
With that set, artists can choose notebook themes that show off their style, whether it’s lush forests, funky geometric shapes, or their favorite meme.
Layering techniques let each design stand out—start with big, bold colors, then add finer lines or dabs for detail.
Want even more flair? Mixed media is your friend—stickers, washi tape, or even some sparkle glue can make the cover truly one-of-a-kind.
Designing Magnets With Miniature Scenes
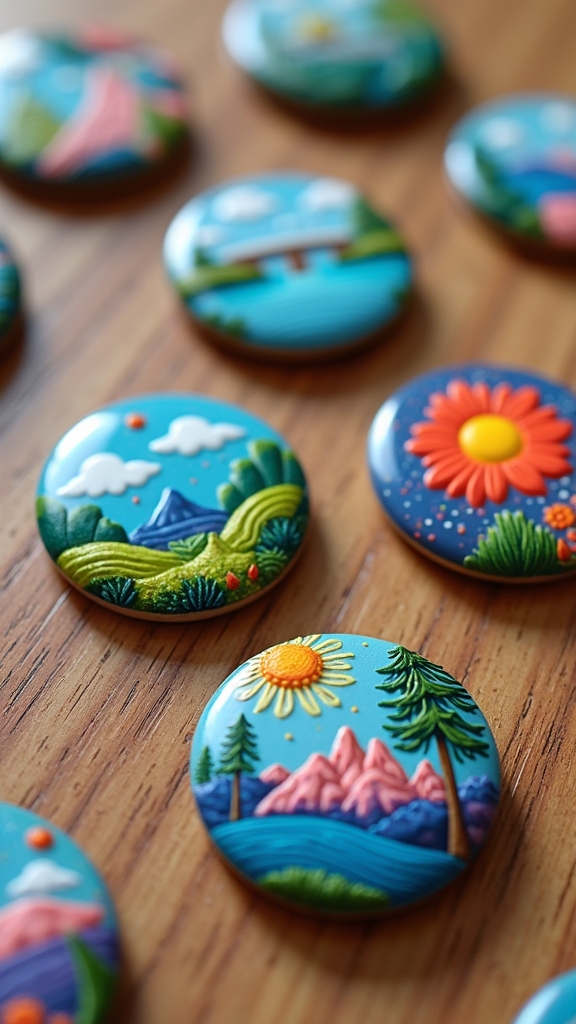
Tiny but mighty, magnets might seem simple, but with Posca markers in hand, they’re about to become the coolest art spots on the fridge.
Designing miniature environments or tiny character sketches on magnets is like squeezing a whole world into a bite-sized space! First, grab some small, flat magnets and give them a light background—think gesso or a pale Posca color.
Sketch out your scene on paper, keeping the space in mind. Immerse yourself with color blending, layering shades for depth and cool highlights. When your masterpiece is finished, protect it with a clear sealant so it stands up to sticky fingers and fridge raids.
Try these ideas:
- Starry night environments
- Cartoon pets
- Ocean waves
- Mini city skylines
- Whimsical forest scenes
Painting Frames With Playful Borders
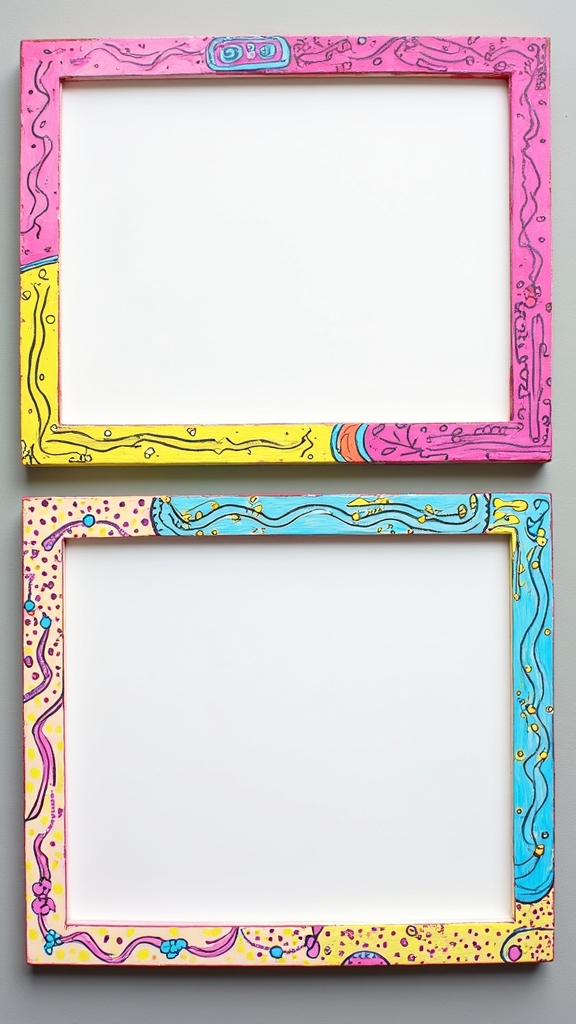
Painting frames with playful borders is all about picking bold, energetic color combos that make your art stand out, even from across the room.
Toss in some goofy patterns—maybe polka dots, zigzags, or even little cartoon faces—and suddenly, a plain frame turns into something that makes people smile.
The fun is in mixing and matching colors and patterns, so there’s no need to worry about making things perfect—quirky is totally the point!
Choosing Vibrant Color Combinations
Even though frames might seem like just a background for your art, choosing vibrant color combinations with Posca markers can turn them into show-stoppers all by themselves.
Color theory exploration starts with the color wheel basics—think about how blue and orange or purple and yellow are total opposites, but together they really pop!
Color harmony techniques help you mix and match shades that look awesome together instead of clashing.
Want some tips for playful borders?
- Try complementary color pairs for instant wow-factor.
- Layer lighter and darker shades from the same family for cool gradients.
- Use thick Posca outlines to make your border colors stand out.
- Mix and match bold color blocks for a modern twist.
- Seal your colorful creation so those vibrant hues last!
Adding Whimsical Pattern Details
Once a frame has those vibrant Posca colors in place, it’s time to crank up the fun with some truly whimsical pattern details.
Think about all the whimsical pattern inspirations out there—polka dots, zigzags, swirls, or even little lightning bolts if you’re feeling extra zappy. Bold outlines in bright, contrasting colors make playful design elements pop, transforming a plain frame into something totally unique.
Don’t be afraid to try layering techniques exploration, stacking patterns or mixing flowers, stars, or cartoon faces for extra flair.
Want your frame to look even cooler? Add tiny doodles or unexpected shapes in the corners.
Just remember: let the paint dry completely before showing off your masterpiece, unless you want your art to look like a smudgy modern mishap!
Creating Wall Art Using Stencils and Freehand Designs
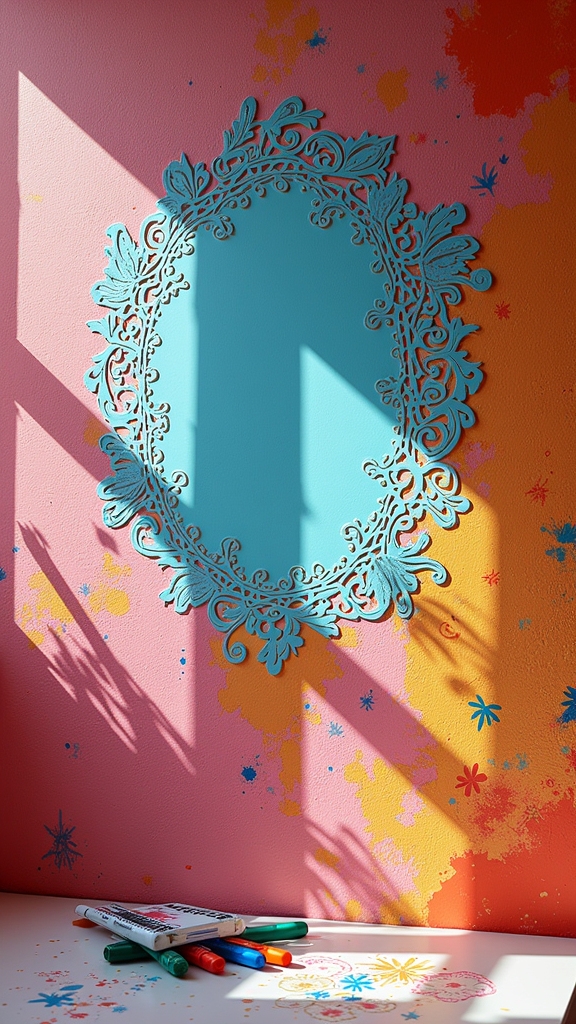
While some artists love the freedom of doodling wild shapes straight onto the wall, others might prefer the crisp, perfect lines that stencils can give.
Using stencil techniques makes it super easy to get cool, detailed patterns—no shaky hands needed! But if you’re all about freehand expression, just grab your Posca markers and let your imagination run wild.
Stencils make detailed patterns a breeze, but freehand with Posca markers lets your creativity shine without limits.
Mixing freehand with stencils can make your wall art pop, especially when you try color layering for extra depth. Don’t forget to prime the wall first, or your masterpiece might not stick around.
Want to try both styles? Here are some fun ideas:
- Trace geometric shapes with stencils
- Add freehand doodles inside shapes
- Layer different colors for a 3D look
- Highlight details with a white marker
- Combine patterns for a unique vibe
Frequently Asked Questions
What Easy Things Can You Do With Poscas?
Exploring easy options, one might use Posca techniques such as bold outlining or Posca blending for vibrant effects. Various Posca surfaces—wood, fabric, or rocks—offer versatility, while mixing media or layering colors enhances creative possibilities.
What Should I Draw With My Posca Markers?
When considering what to draw with Posca markers, one might explore nature scenes for vibrant scenery, experiment with abstract patterns for creative expression, or develop character designs to enhance storytelling and add personality to their illustrations.
Is POSCA Ok on Skin?
Regarding Posca safety concerns, Posca markers are not designed for skin use, as some individuals may experience Posca skin reactions. For best Posca usage tips, test on a small area and always follow manufacturer guidelines.
Why Is POSCA so Expensive?
The higher price of Posca markers reflects superior pigment quality, durability, and eco-friendly production. When making a Posca quality comparison, users find a longer Posca marker lifespan and consistent performance, often surpassing cheaper Posca vs alternatives in value.
Conclusion
With just a few Posca markers and some creativity, anyone can turn ordinary objects into awesome works of art. Whether it’s jazzing up rocks, notebooks, or even phone cases, there’s no limit to what can be created—except maybe running out of room to display it all! So, grab some markers, pick an idea, and let the colors fly. Who knows? Your next masterpiece might just be hiding on a plain old fridge magnet or a wooden coaster.
Leave a Reply