
Drawing pencil art flowers is way easier than it looks, especially if you break blooms down into simple shapes like circles and ovals for the centers, then sketch petals using soft ellipses or triangles. Start with a basic daisy or sunflower, using light construction lines and checking the empty spaces around your sketch to keep things balanced. Add detail with gentle curves, erase stray marks, and layer petals for a lifelike touch. Want juicy flower secrets and even cooler art tricks?
Key Takeaways
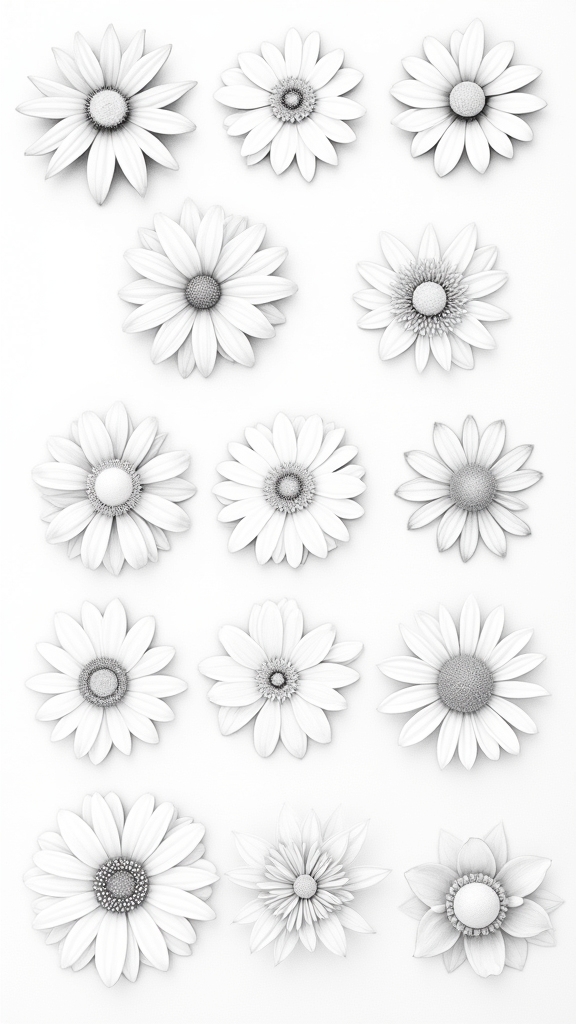
- Start with basic shapes like circles, ovals, and triangles to build the flower’s center, petals, and leaves.
- Use light construction lines to map out petal placement and make adjustments before adding details.
- Experiment with petal shapes—try teardrops for daisies, overlapping ovals for roses, and wavy lines for more dynamic flowers.
- Pay attention to negative space between petals and around the flower to maintain symmetry and proper alignment.
- Refine your drawing by erasing sketch lines, adding sharp edges, and shading for texture and realism.
Breaking Down Flowers Into Basic Shapes

Ever tried drawing a flower and ended up with something that looked more like a lopsided pizza? That’s where breaking things down into basic shapes comes to the rescue!
Before getting fancy with petals and leaves, start by spotting circles, triangles, or ovals in your flower photo. Grab your pencil—keep it light—and use these basic shapes as construction lines to map out your masterpiece.
Divide your flower into three sections: the center, the petals, and the leaves. Sketch them out as rough shapes, then double-check how they fit together by looking at the space around them (that’s negative space, and yes, it’s secretly very important).
Once everything’s lined up right, you’re ready to get creative and build up details with confidence!
Using Circles and Ovals for Flower Centers
Getting a flower center just right can be trickier than it seems, but sketching a tight circle helps keep everything balanced from the start.
Adjusting where the circles and ovals sit is like giving each petal its own comfy spot, which keeps the whole flower looking tidy instead of a wild hair day. If things look off, a small shift in placement can work wonders—no need to panic or call in a flower rescue squad just yet.
Sketching Balanced Flower Centers
While it might seem like drawing perfect flowers is magic, sketching balanced flower centers actually starts with something as simple as a circle. Grab your pencil and try it—making a small circle for the center is like calling “dibs” on the perfect spot. This circle sets the shape and position for where all the petals will crowd around.
But don’t stop there! Add larger circles or ovals around it to show where those petals will attach, kind of like building a launch pad for each petal’s big debut. Light sketching is key—you want room to fix mistakes without the drama of heavy erasing.
Playing with different circle sizes also lets you mimic real flowers, from tiny daisies to bold sunflowers. So, start sketching, and let flowers bloom!
Adjusting Placement for Accuracy
A good flower drawing starts with nailing the placement of the center, and circles and ovals are the secret weapons here. Grab your pencil, and gently sketch a circle or an oval—don’t worry if it’s not perfect; flowers aren’t robots! This central shape marks the heart of your flower, and it should look just right with the size you want.
Compare your shape to a reference image to check if you’re on track. Next, lightly add circles around this center to show where each petal will attach. Got too many petals squished together? No problem—hang back, adjust the size or angle using patient pencil strokes until the balance feels right.
Once you’re happy, erase those extra lines and get ready for details!
Sketching Petals With Ellipses and Triangles

Now for the fun part—petals! To get a great petal shape, artists start with light ellipses to outline where each petal should go, then add triangles at the tips for that cool, pointy effect.
These shapes work together as a map, helping to line up the petals just right and keep the whole flower from looking lopsided, like it’s had a bad hair day!
Outlining Petal Structure
Sketching petal shapes can feel like cracking a secret code, but it’s seriously fun once you get the hang of it. Outlining petal structure starts with loose ellipses—think of them like squished circles showing how wide or narrow each petal could be.
Next, triangles swoop in, letting you mark out sharp points or curvy edges, making the petals look lively instead of flat and boring. Artists use super-light construction lines at first, so if something looks a little wonky, fixing it is easy—no drama or eraser meltdowns needed.
Checking the negative space (those empty spots between petals) also helps make everything look balanced. Once the basics are down, sharper pencil lines define each petal, and extra details add natural texture and flair.
Guiding Petal Placement
Even though picking up a pencil feels simple, deciding exactly where each petal should go is a true artist’s puzzle. Guiding petal placement starts by sketching gentle ellipses for each petal—think of them as potato chips with a plan. These shapes help with petal size and which direction they’re facing.
Add in triangles to mark the angles and tips, pointing every petal outward from the flower’s center, almost like a sun with attitude. Don’t press too hard! Keep things light so you can erase parts if things start looking funky.
Check how petals overlap and notice the spaces between them—no scrunched-up petals here! Finally, compare each petal’s length and width to keep the flower balanced. Flower drama, meet pencil control.
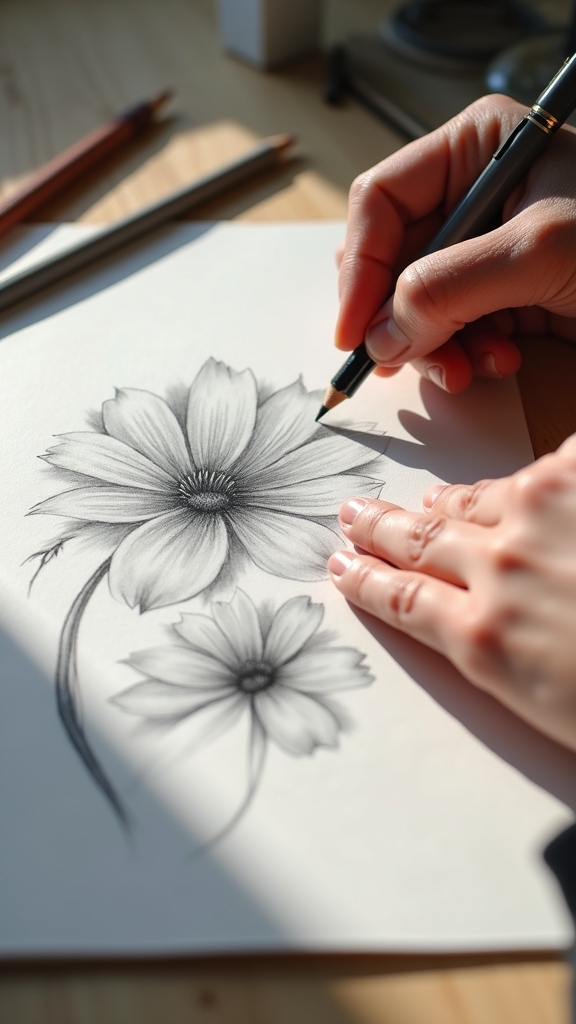
Drawing a Simple Daisy Step by Step
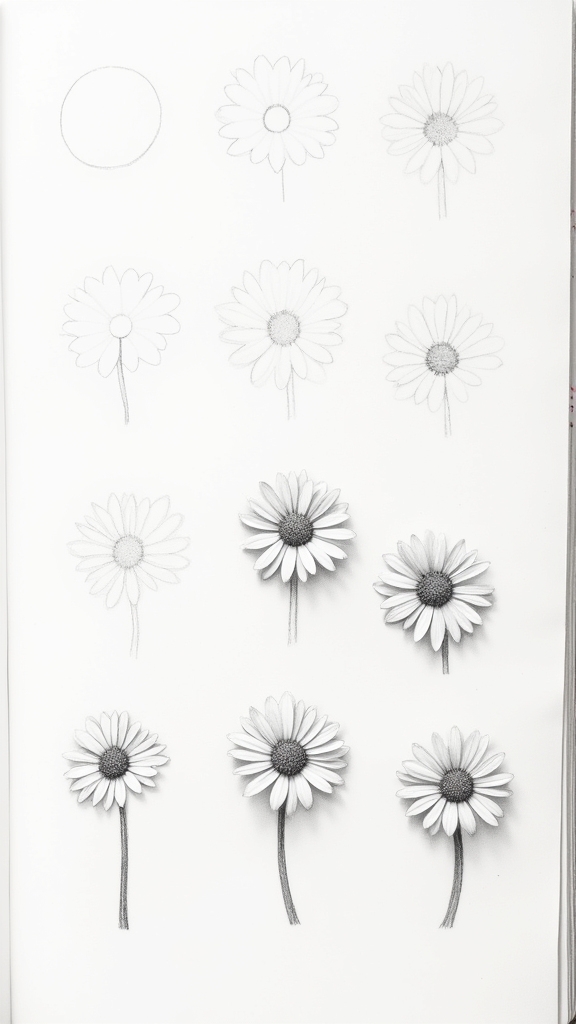
Although drawing flowers might seem tricky at first, creating a simple daisy is totally doable—no fancy art supplies or expert skills required!
To begin, sketch two overlapping circles for the daisy’s center, making sure they look just right for your flower size.
Next up: drawing the petals. Use elongated ovals or teardrop shapes for each petal, spacing them evenly around the center. Don’t worry if it looks a bit wonky at first—daisies are forgiving!
For the stem, go for clean straight lines and decide how thick you want it. Feeling bold? Try varying the stem width for realism.
Lightly erase any extra guideline mess, then jazz up the petals with gentle curves or a little shading.
High five—you’ve got a daisy!
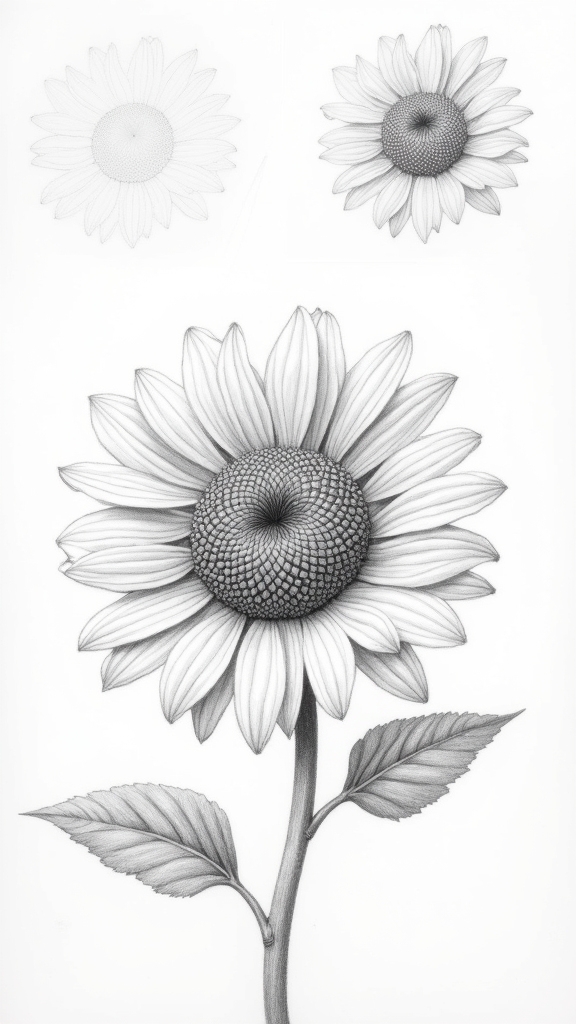
Creating a Realistic Sunflower in Pencil
Sunflowers are like the show-offs of the flower world—tall, bright, and packed with details that make them awesome to draw. When thinking, “I’m going to draw a sunflower,” it starts with two circles: a smaller inner one for the seeds and a bigger outer one for petal placement. Using ellipses for petals keeps them looking real—fatter at the base, thinner at the tip, just like actual sunflowers. Add a couple of guiding lines for the stem and big leaves. Pay close attention to all the negative space between each petal—sunflowers love to be symmetrical. The real magic is in the finer details; use shading and tiny lines so it almost looks like that sunflower might jump off the page.
| Step | Pro Tip |
|---|---|
| Draw two circles | Keeps everything even |
| Sketch petal ellipses | Wide at the bottom, pointy at the top |
| Add stem/leaf lines | Curved = more natural |
| Notice negative spaces | Symmetry is your friend |
| Add fine shading/details | Realism—those seeds won’t draw themselves! |
Building a Rose With Basic Shape Construction
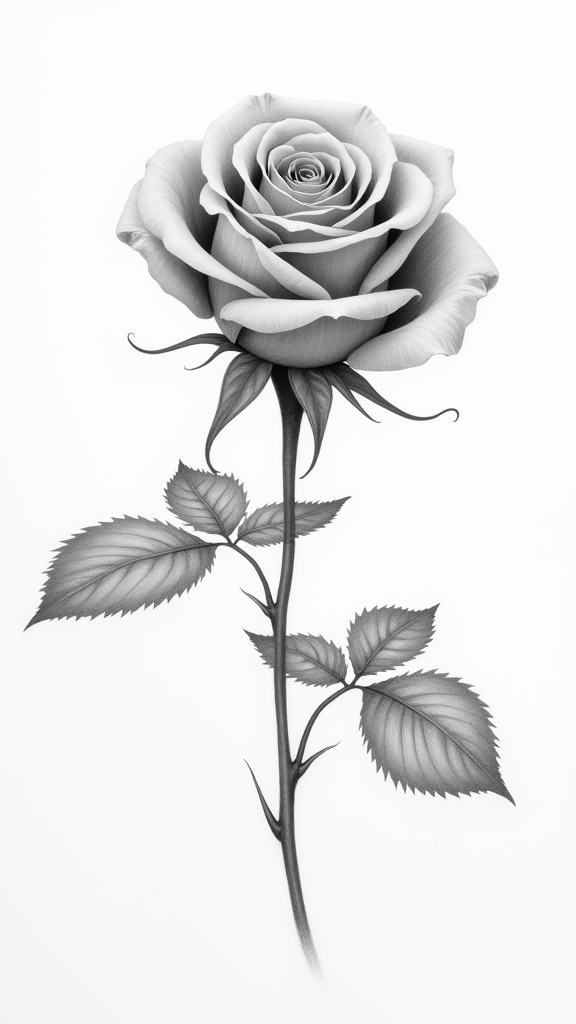
Now it’s time to tackle that tricky rose using some easy shapes to build its structure—think of it like stacking pancakes, only these ones have petals!
Start with a circle for the center, then layer ovals and triangles for those famous curling petals, making sure they overlap and twist like they’re playing a game of hide and seek.
With a few light lines for guidance, things might look messy at first, but stick with it and the rose’s shape will soon start blooming right before your eyes.
Outlining the Rose Structure
Most folks are surprised by how easy it is to start drawing a rose when it all begins with some simple shapes. Outlining the rose structure starts by sketching a big ol’ circle smack in the middle—think pizza, but, you know, for flowers.
Smaller circles get added around it for those mysterious inner petals. If you ever find yourself thinking, “I’m drawing a weird snowman,” you’re probably on the right track!
Next, use overlapping ovals and teardrop shapes to lay out the basic petal forms, mixing up their sizes for a more realistic vibe. A gentle, wavy central line can guide your petal placement, and super-light construction lines help control the chaos.
Once the setup looks good, gently erase the mess and begin refining those fancy petal edges.
Layering Petals With Shapes
Petal power is all about building a rose one simple shape at a time, like stacking puzzle pieces that just happen to be soft and wobbly. First, they sketch a big circle for the heart of the rose, then surround it with smaller semicircles—this is where the magic of layering petals with shapes starts. As the petals spiral outward, teardrops and ovals overlap, giving the rose a natural, fluffy look. Light construction lines keep all those petals from flying out of control. Paying close attention to negative space, especially those little gaps and openings between petals, makes the rose pop. Here’s a quick breakdown:
| Step | Shape Used | Why It Matters |
|---|---|---|
| Draw center | Circle | Sets foundation |
| Add inner petals | Semicircles | Shows depth |
| Overlap outer | Ovals, teardrops | Builds volume |
| Check negative space | Gaps/openings | Adds definition |
Easy Techniques for Drawing a Lotus Flower
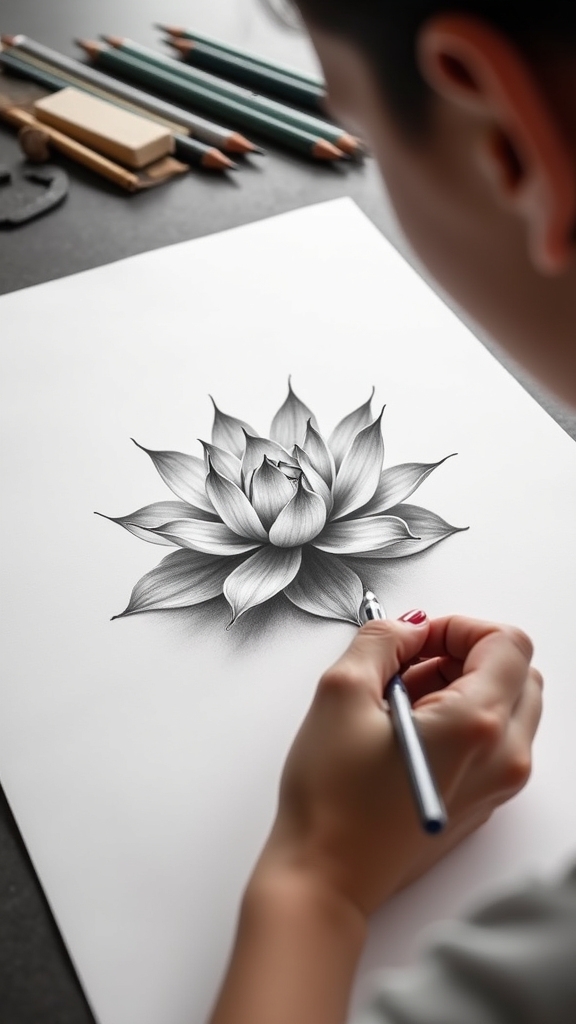
Imagine revealing the secret to drawing a lotus flower that actually looks like a lotus and not a confused daisy. For beginners diving into drawing tutorials, starting with a simple semicircle works wonders for capturing the lotus’s unique base.
Adding loose circles or ovals helps plan out those signature petals, and since your lines should be light and easy to erase, there’s no need to fear mistakes—just fix and move on.
Construction lines, lightly drawn, serve as placement guides, making symmetry a breeze. To make the flower pop, add curved lines for petal details and use ellipses for the seed pod in the center.
Once satisfied, erase any messy helper lines. It’s straightforward, stress-free, and surprisingly fun—a total win for pencil artists.
Analyzing Negative Space for Accurate Placement
Once those lotus petals have taken shape, the biggest challenge is making sure everything lands exactly where it belongs. Here’s where analyzing negative space comes to the rescue—kind of like having a secret map when drawing flowers.
Negative space is the area around the petals and stems, and by looking at the shapes made by those empty spots, artists can double-check if stuff is in the right place. If something looks off, it probably is!
Sketching the outlines of this space can help separate each part so petals don’t end up squished or floating in weird places. Comparing the “empty” space shapes with the flower itself is actually a clever shortcut for accurate placement.
Turns out, drawing what’s not there can really help draw what is!
Refining Details and Erasing Construction Lines
Say goodbye to all those messy sketch lines—this is where the real magic starts to happen!
Once the flower’s basic shapes are in place, it’s time to gently erase construction lines. A clean eraser is your secret weapon here, just make sure not to smudge your masterpiece.
Now, focus on refining details. Look at each petal and leaf, using softer pencil strokes to add texture, shadows, and even a few highlights. Try pressing your pencil lighter for thin, delicate lines and just a bit harder when you want bold shadows.
Don’t forget—the edges should be smooth and clear for an awesome finish. Step back every now and then to check your progress and make sure the proportions look right.
- Erase construction lines gently
- Add texture and depth with varied strokes
- Define edges for clarity
- Adjust details for balance and proportion
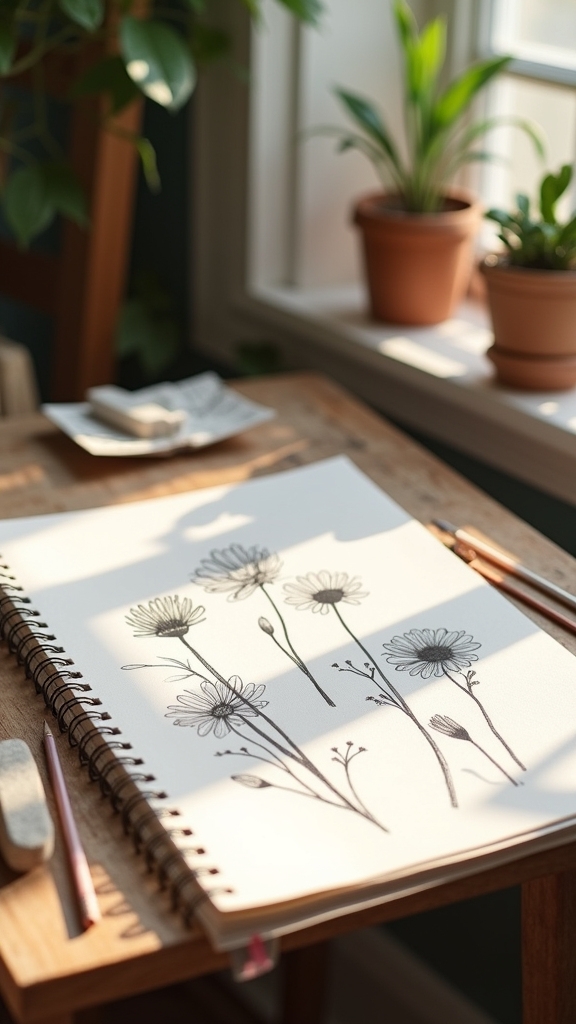
Practice Exercises for Different Flower Types
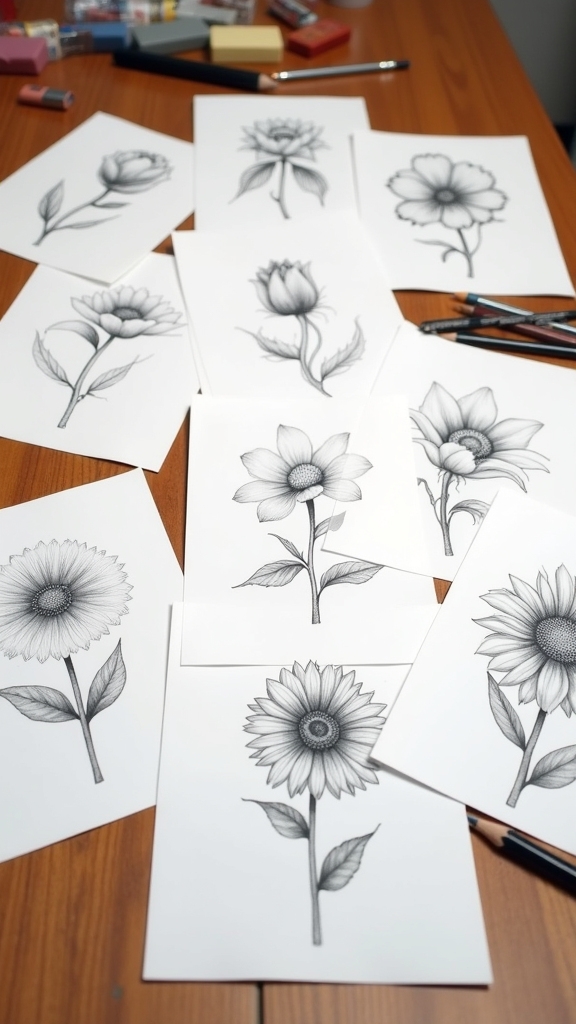
A bunch of different flowers might seem tricky to draw at first, but breaking them into simple shapes totally makes it easier (and, honestly, a lot more fun).
For practice exercises, start with a Purple Daisy: just sketch two circles for the center, then add petal ellipses. Boom—instant daisy foundation.
Try a Sunflower using two circles for the middle, plus an elliptical outline for that classic side view.
Feeling bold? A Yellow Rose becomes way less stressful if you use circles and trapezoids for the main shapes and ignore the squiggly petal details at the beginning.
For a Pink Lotus, a semicircle forms the base and you add grouped petal shapes.
These basic shapes make correction and improvement super easy, turning drawing practice into an adventure, not a chore.
Frequently Asked Questions
How to Draw a Flower Easy Step by Step With Pencil?
When approaching flower sketching with pencil techniques, one should outline basic shapes, refine petals with light lines, adjust using negative space, enhance details gradually, and finally erase guide marks for clean, balanced composition and realistic floral representation.
How to Draw a Flower in 5 Minutes?
To address rapid flower sketching, one should start with a quick drawing of a central circle, add teardrop-shaped petals, outline a basic stem and leaves, and refine the overall form, keeping strokes light for swift adjustments.
What Are the Easiest Flowers to Draw?
When considering the easiest flowers to draw, beginners often choose daisy drawing and tulip sketching due to their simple shapes. Basic roses, sunflowers, and daffodils are also approachable options, allowing straightforward pencil representations for novice artists.
How to Draw Rose Easy for Kids?
The current question explores rose drawing for kids art. Children can start with a simple circle for the rose center, add overlapping oval petals, and use light pencil guidelines, making adjustments and erasing as needed for an easy approach.
Conclusion
Drawing flowers in pencil isn’t some mysterious superpower—it’s totally doable! With a few simple tricks, like breaking flowers into shapes or sketching easy petals, anyone can make cool floral art. Sure, it can feel tricky at first—maybe even like your daisy is secretly a potato—but practice works magic. So keep your pencil moving, forget about perfection, and let the garden grow on your page. Who knows? Your next masterpiece could bloom from just a scribble!
Leave a Reply