
Ready for a sketchy weekend? Try expressive faces packed with emotion, fierce eyes, goofy curls, and even wild cat poses! Cherry blossom branches, chunky tree bark, street houses, and cool balconies will boost your background game. Don’t forget floral arrangements like tulips and irises—perfect for shading practice! Mix short, scribbly lines for animal fur or layer soft shadows for realistic petals. Each idea is more fun than the last, and you’re just scratching the surface of what’s possible!
Key Takeaways
- Experiment with expressive faces and eyes, focusing on capturing distinct emotions through unique shapes and shading.
- Practice sketching cherry blossom branches using soft shading techniques to depict delicate petals and intricate, twisting branches.
- Draw playful cats in various poses, emphasizing movement and personality with light lines and environment details.
- Create dynamic hairstyles by drawing curls and waves, using flowing strokes, varied thickness, and sectioned shading for realism.
- Illustrate architectural street houses and floral arrangements like tulips and irises, focusing on details, textures, and pencil shading for depth.
Expressive Faces: Capturing Emotion

Emotions—they’re what make faces fascinating to draw and even more fun to look at. Just think about it: capturing expressive faces in art drawings sketches is a perfect way to experiment with wild drawing ideas and flex those creative muscles.
Every feeling tells a different story. Want to show anger? Try furrowed brows, a scrunched nose, and tightly pressed lips—the “don’t mess with me” look. For happiness, wide-open eyes, lifted brows, and a huge grin scream, “Best day ever!”
Fear is a classic too—big eyes, raised eyebrows, and a mouth shaped like an “O” basically say, “Did that just happen?” Practicing different lip shapes is actually fun and totally important because mouths can transform feelings from gloomy to gleeful in one simple sketch.
Nature Study: Cherry Blossom Branches
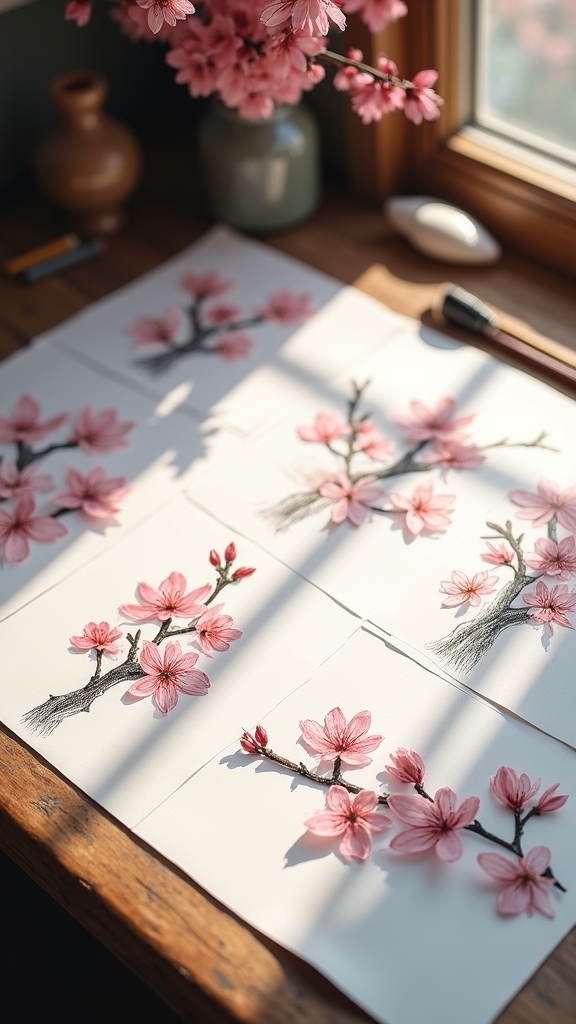
As spring rolls in and trees deck themselves out with fireworks of pink and white, cherry blossom branches turn into absolute superstars for anyone who loves to draw nature.
There’s something totally magical about capturing those tiny, fluffy petals and skinny, twisting branches. When working on a cherry blossom drawing, it helps to study the way petals overlap and the branches zig-zag under the weight of delicate blooms—kind of like nature showing off!
Breaking things down step by step, artists can start with soft pencil shading for those nearly see-through petals, then add stronger lines for the branch’s texture.
Flower drawing really shines when you sneak in a few buds and maybe even a peep of the sky behind. Suddenly, it’s springtime forever on your sketchpad!
Animal Focus: Playful Cats

Even the grumpiest person can’t help but grin at a cat zooming around the living room, chasing a crumpled paper ball. Capturing that playful spirit on paper is pure magic.
To create something memorable, artists can start by quietly watching their cat’s wild antics—rolling, pouncing, or even lazing on the windowsill. Light, sketchy pencil lines make it easier to map out their flexible bodies before getting into the nitty-gritty of fur, whiskers, and those always-surprised eyes.
Adding bits of the environment, like a favorite toy or a scratch post, brings life to the scene. Shading different areas helps a sketch pop, making the fur look soft and the moves almost real.
- Watch your cat’s playful moves.
- Use gentle lines for outlines.
- Practice shading for depth.
Unique Hairstyles: Drawing Curls and Waves
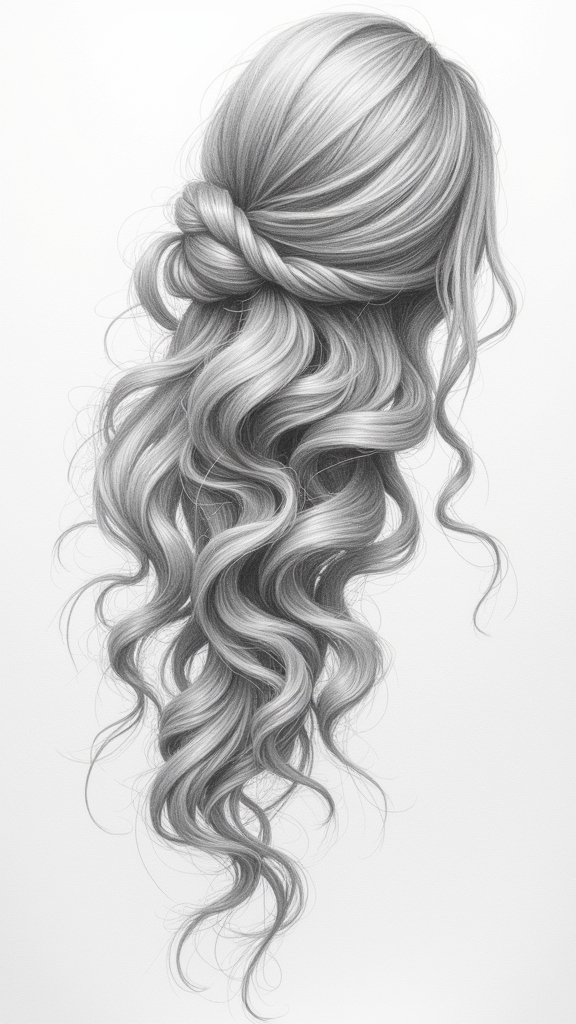
Hair can sometimes feel like its own wild creature, especially when it comes in curls and waves that bounce and swirl all over the place.
When sketching curly hairstyles, artists should let go of stiff lines and use loose, flowing strokes to show real hair movement. Curls do their own thing, so following their direction is key—think of them like tiny springs refusing to listen.
Wavy textures, on the other hand, are all about those S-shaped curves. Vary line thickness to give volume and dimension, and don’t forget to shade for drama—real hair has both highlights and shadows.
The trickiest part? Drawing in sections, starting broad then detailing each strand. Grab some reference photos and prepare to tame those wild locks!
Building Textures: Sketching a Balcony

Balconies are like tiny stages just waiting for a great sketch, each rail and floorboard hinting at stories and hidden details.
To start building textures, observe the balcony materials—does it creak with wooden planks, shine with shiny metal rails, or feel cool and solid like concrete? Capture each surface by picking pencil strokes that match: maybe rough cross-hatching for wood or careful stippling for metal.
Notice how each balcony material tells its story—sketch texture with pencil strokes that echo rough wood or shimmering metal.
Next, don’t let your balcony look flat! Try perspective techniques by choosing a viewpoint that makes the rails closer and the floor vanish into the background.
For that wow-factor, experiment with shading methods to bring out shadows and beams of sunlight, giving your sketch amazing depth.
- Notice and sketch balcony materials.
- Use perspective techniques for depth.
- Try shading methods for realistic light.
Botanical Beauty: Roses in Detail
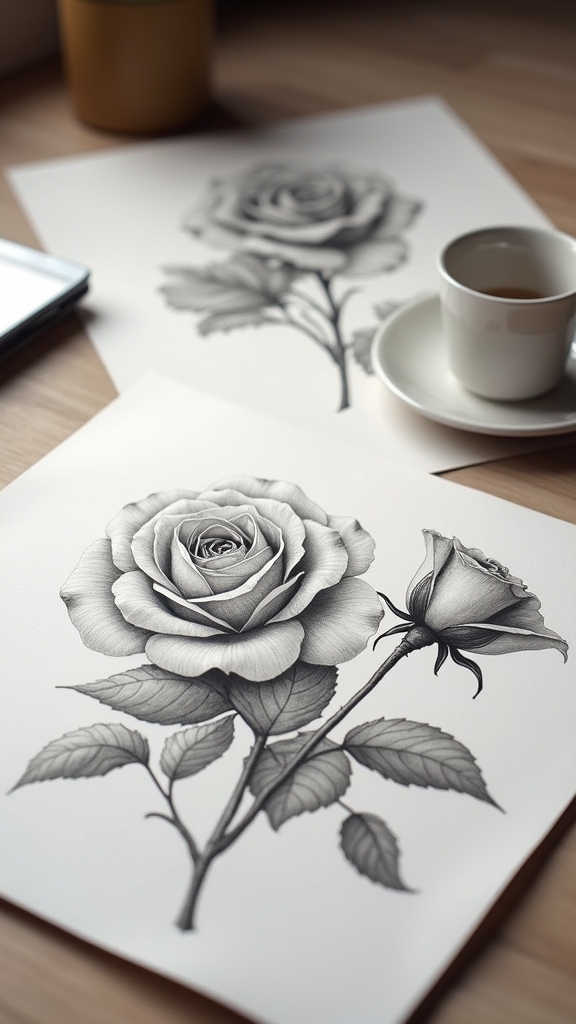
Roses, often called the drama queens of the garden, are a blast to draw because every single petal seems to have its own secret personality.
To capture those rose petal intricacies, start with light pencil strokes, mapping out each layer like you’re solving a flowery mystery. Shading techniques exploration is key—grab a range of pencils, from hard and sharp to soft and crumbly, and watch your drawing go from flat to wow.
Use hatching and cross-hatching, kind of like weaving a nest of shadows, to boost that three-dimensional vibe. Don’t forget to balance your sketch with leaves and stems; a rose rarely travels solo.
The magic is in achieving botanical composition balance—so every part feels intentional. Drama AND beauty, right there on your page!
Still Life: Crumpled Paper Challenge

Who would’ve guessed a boring old piece of crumpled paper could turn into such an epic pencil art challenge?
Watching those wild crumpled textures form under a pencil is actually super satisfying! The secret is all about shadow play—seeing how the light bounces off each crazy fold and then figuring out how to show that just with pencil pressure.
Start by lightly sketching the general shape, and then add more details as you go along. Want to level up? Try using a few different types of paper for even stranger wrinkles and marks!
Here are three tips to crush the crumpled paper challenge:
- Observe the light source and highlight each fold.
- Control pencil pressure for both soft and sharp shadows.
- Experiment with paper textures for unique effects.
Dynamic Poses: Human Figure Gestures
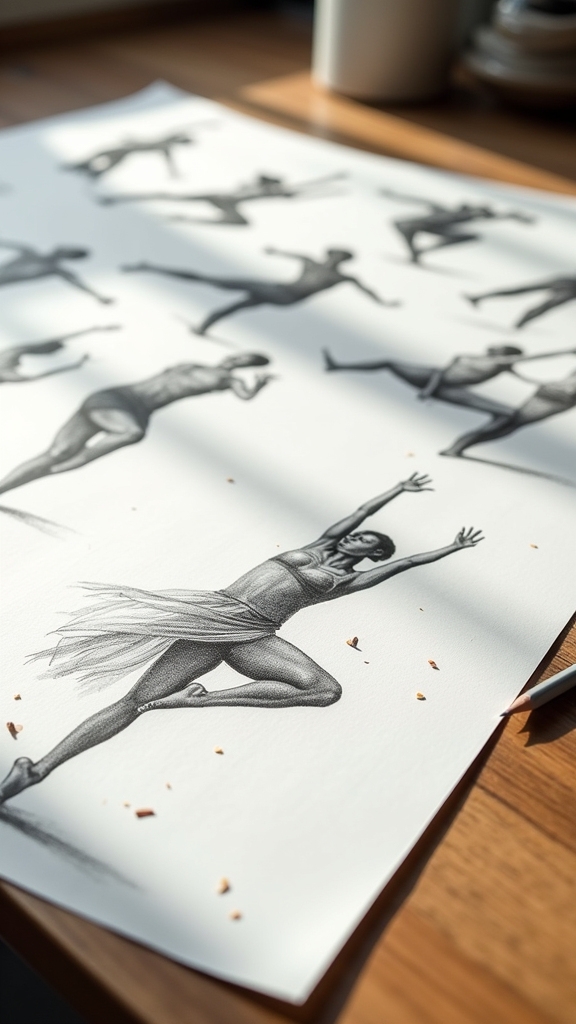
After wrestling with the wild shadows and folds of crumpled paper, it’s time to tackle something even more epic—sketching human figures in super dynamic poses.
Imagine capturing the exact moment a skateboarder propels off a ramp or a basketball player leaps for the hoop. That’s where gesture dynamics come in, focusing on the line of action to release movement energy and anatomical flow in every sketch.
Quick gesture drawings, sometimes just a few swoopy lines, help pin down the excitement before diving into details. Foreshortening isn’t just a fancy word; it makes arms and legs shoot out at you like they’re popping right off the page!
Using reference images or even a wiggly sibling as a model helps sharpen both skills and laughs.
Birdwatching: Kingfisher and Bee-Eater
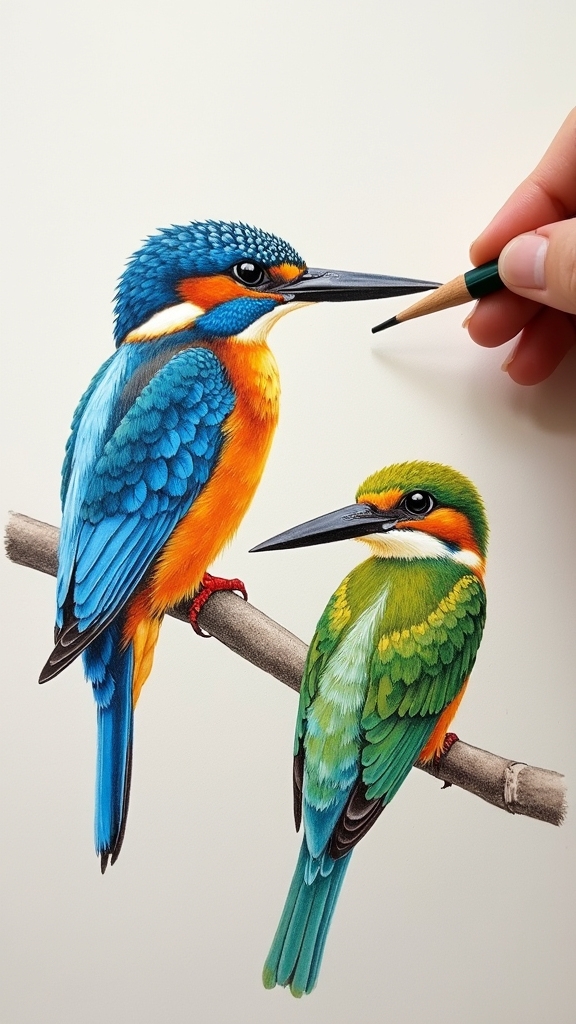
If anyone’s ready for a real challenge with colored pencils, just wait until they spot a Kingfisher or a Bee-Eater perched by the water’s edge or zipping through the air.
These birds flash stunning color patterns—Kingfishers sporting electric blues and fiery oranges, Bee-Eaters rocking vibrant greens, yellows, and blues.
To catch those wild moves and colors takes some sharp sketching techniques, but it’s worth it!
Whether they’re plunging for fish or snatching bugs mid-flight, both birds make eye-popping drawing subjects, especially if found in their favorite hangouts like wetlands or open fields.
Ready to give it a try? Here are must-know birdwatching tips for artists:
- Bring binoculars for closer details.
- Observe movement before sketching.
- Focus on plumage color patterns.
Textured Trees: Bark and Leaves
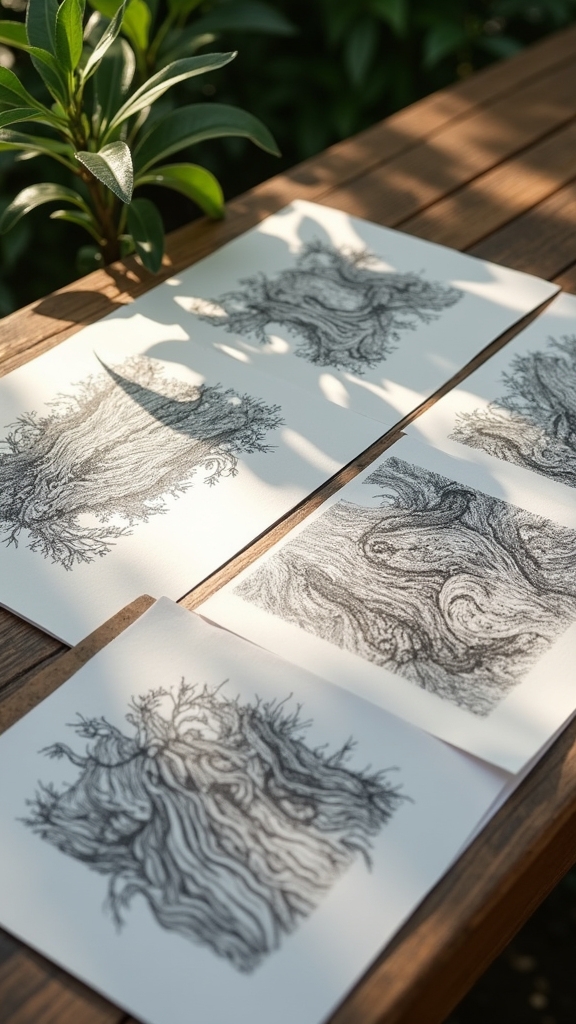
Even though it might look tricky at first, drawing textured trees—especially getting the bark and leaves just right—can be a seriously fun adventure for any pencil artist.
Start by lightly sketching the trunk and branches, mapping out the tree’s basic shape before you plunge into all those juicy details. For awesome bark texture, try short, vertical pencil strokes and mix up the pressure to mimic real bark’s bumpy patterns—think tree “skin” with a wild personality!
When it comes to leaves, remember: not all leaf shapes are created equal. Try different forms and sizes, using shading techniques and some sneaky cross-hatching for depth.
Finally, amp up the realism by adding tiny knots, wiggly bark lines, or delicate leaf veins. Suddenly, your tree has serious character!
Architecture Spotlight: Street Houses
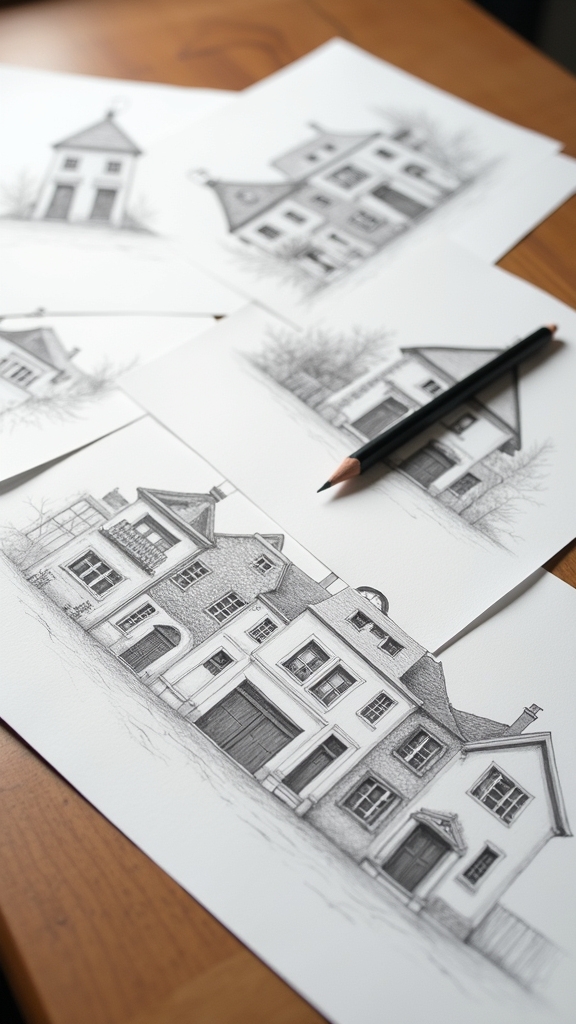
While walking down any lively street, someone might notice that the houses lining each side aren’t just buildings—they’re full-on characters, each with their own story to tell.
Street house styles can range from old-school Victorian with their fancy trims to ultra-modern minimalism, adding bursts of personality to those urban aesthetics.
From fanciful Victorian trims to sleek, modern lines, every street house splashes a little extra personality into the city’s unique vibe.
Want to see real art in action? Take a closer look at architectural details—find bay windows, quirky doorways, or beat-up brick walls. These features don’t just keep rain out, they tell stories, too.
Artists love sketching them because street houses let them play with lines, shadows, and light. For a fun sketching challenge, try these:
- Capture a row of unique street house styles
- Focus on one dramatic architectural detail
- Sketch the scene with bold urban aesthetics
Floral Arrangement: Tulips and Irises
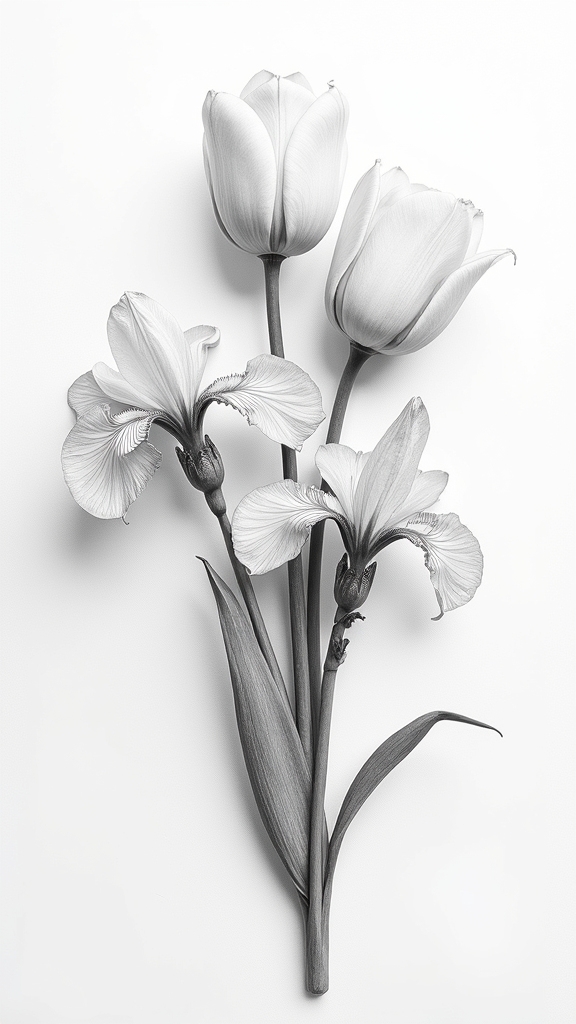
Here’s where things get really cool—pencil shading techniques totally bring tulips and irises to life, making petals look as real as the ones in your grandma’s garden.
Capturing the smooth curves of a tulip or the wild, twisty edges of an iris means paying close attention to details, like shadows and those super fine lines.
If you shade just right, you can almost trick your eyes into thinking the flowers are about to pop off the page (no watering can needed!).
Pencil Shading Techniques
A handful of pencil tricks can turn a plain drawing of tulips and irises into something that looks almost alive. Using shading techniques like hatching, cross-hatching, and stippling, any artist can create serious wow-factor, layering shadows and highlights for super pop.
Start with feathery outlines—don’t bulldoze in with heavy lines—and build up your tones with patience. The real magic comes from experimenting with pencil grades, jumping between hard Hs for gentle lights and softer 2Bs for deep, moody shadows.
And don’t underestimate the power of blending tools—tortillons, cotton swabs, even your finger, can all smooth those pencil marks into buttery soft gradients.
Here’s how to make shading work for you:
- Try out multiple shading techniques.
- Play with different pencil grades.
- Blend with tools for smooth shifts.
Realistic Petal Details
Some petals just beg to be looked at up close—tulips with their silky, curved surfaces and irises rocking all that wild veining are crazy cool to draw.
Getting realistic petal details down is all about noticing the tulip textures and iris patterns in front of you. Hey, don’t let those smooth tulip petals fool you; pencil shading can capture those soft curves if you gently shift the pressure as you draw.
Irises, though, are totally extra—those veins! Use fine lines to sketch out the wild, zigzaggy patterns. Play around with light interaction, layering strokes to show light sneaking through the petals like a ninja.
Don’t forget some crisp negative space. It makes your fearless petal details pop right off the page!
Realistic Eyes: Practice With Detail
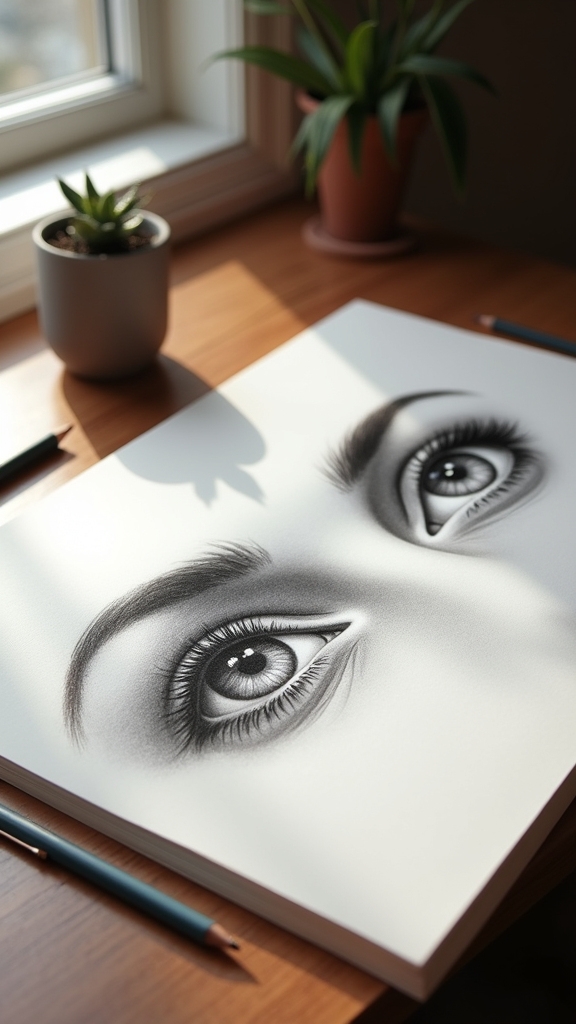
When it comes to pencil sketches, drawing realistic eyes is like revealing the secret entrance to the world of detail—nobody’s getting in without some practice and a sharp eye for observation!
The trick starts with understanding eye anatomy, so sketch out that classic almond shape before adding the iris and the dark, mysterious pupil in the center.
Shading techniques are super important—think about adding gentle shadows on eyelids and underneath to make the eye look 3D, not flat like a pancake!
Don’t forget those shiny bits—light reflections make eyes sparkle, so leave tiny white spots to catch the light.
Here’s how to level up your eye drawings:
- Study real eyes from photos.
- Practice different light reflections.
- Experiment with blending and layering pencils.
Frequently Asked Questions
Which Drawing Is Trending Now?
The Current Question highlights the popularity of realistic portraits, minimalist line art, and nature-inspired sketches as popular drawing styles. Current art challenges on social media often feature trending sketch themes that spotlight personal expression, mindfulness, and collaborative creativity.
What Can I Draw in 5 Minutes?
For those seeking quick sketch ideas or minute drawing challenges, options include simple objects like mugs or fruit. Fast doodle tips suggest focusing on basic shapes and outlines, using single-pencil shading, and utilizing five-minute prompts for creative practice.
What Is the Best Thing to Draw Right Now?
In considering the best drawing ideas, many turn to popular sketch subjects such as natural elements, expressive faces, or geometric patterns. Seasonal art inspiration, like scenes reflecting the current environment, can also guide artists seeking fresh, relevant concepts.
What Can an 11 Year Old Draw?
An 11-year-old can enjoy fun drawing ideas like sketching favorite animals or experimenting with facial expressions. Easy art projects, such as drawing simple fruits or exploring nature sketching with trees and scenery, help build skills and creativity.
Conclusion
So, with these thirteen pencil sketches, the weekend suddenly looks a lot more interesting. There’s no need for fancy materials—just grab a pencil, some paper, and a sprinkle of wild imagination. Mistakes? That’s just your eraser’s time to shine. Whether it’s fierce cats or funny faces, these ideas turn plain sheets into mini-masterpieces. Everyone starts somewhere, so just jump in, laugh at your doodles, and see what stories your pencil can tell!
Leave a Reply