
Beginners looking for awesome mandala sketch ideas can try a basic circle mandala, petal patterns, radiating triangles, or layered humps. Simple spirals and overlapping leaves also look great, while geometric grid mandalas and negative space designs crank up the wow factor. Try repeating waves or symmetrical dot mandalas if you like satisfying, balanced looks. Each idea is simple to start but leaves room for creative flair—grab a pencil, get sketching, and the next bunch of ideas might surprise you!
Key Takeaways
- Start with a central circle and build outward using simple shapes like petals, triangles, or dots for easy symmetry.
- Use dot grid paper and a compass or circle maker for precise, evenly spaced designs.
- Experiment with negative space and shading to add depth and visual interest without complex details.
- Layer basic geometric patterns such as triangles or humps to create vibrant, radiating mandalas.
- Practice outlining with fine-tipped pens to achieve clean lines and enhance your finished mandala’s appearance.
Basic Circle Mandala

A mandala sketch can seem mysterious at first, but the basic circle mandala is actually a perfect starting point for anyone who wants to immerse themselves in this relaxing art form.
To get started, all you need is a blank page and something round—maybe a compass or even the bottom of a cup—to draw your central circle. That circle is your bullseye, your launchpad!
Mandalas thrive on symmetry, so sketch light guidelines to keep everything balanced as you work outward. Try simple shapes first—triangles, dots, or even wobbly petals.
Leave some space between your shapes; negative space isn’t just artsy talk, it really makes your design pop. Play with patterns, repeat shapes, and remember: making mandalas is about enjoying the process, not perfection.
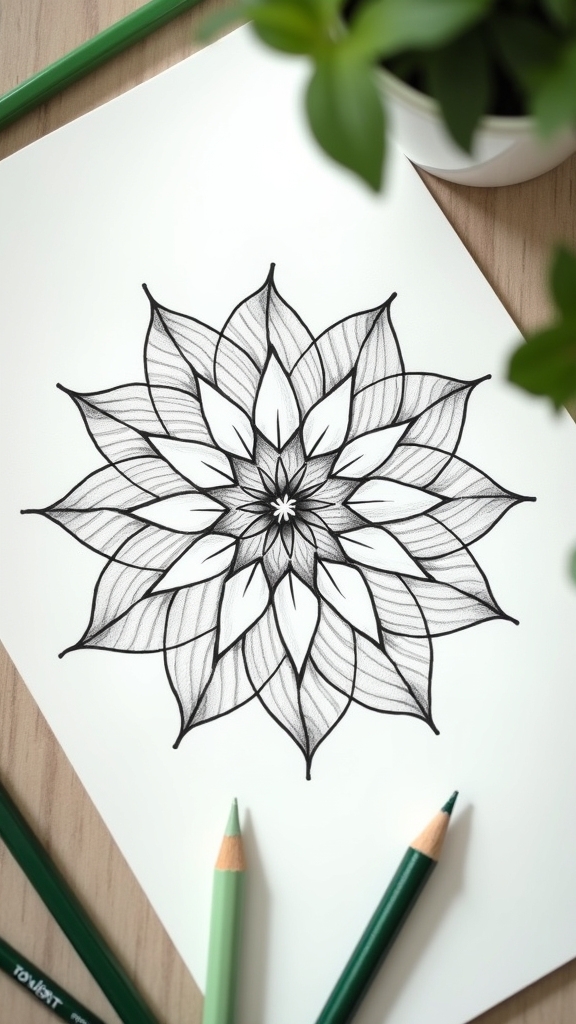
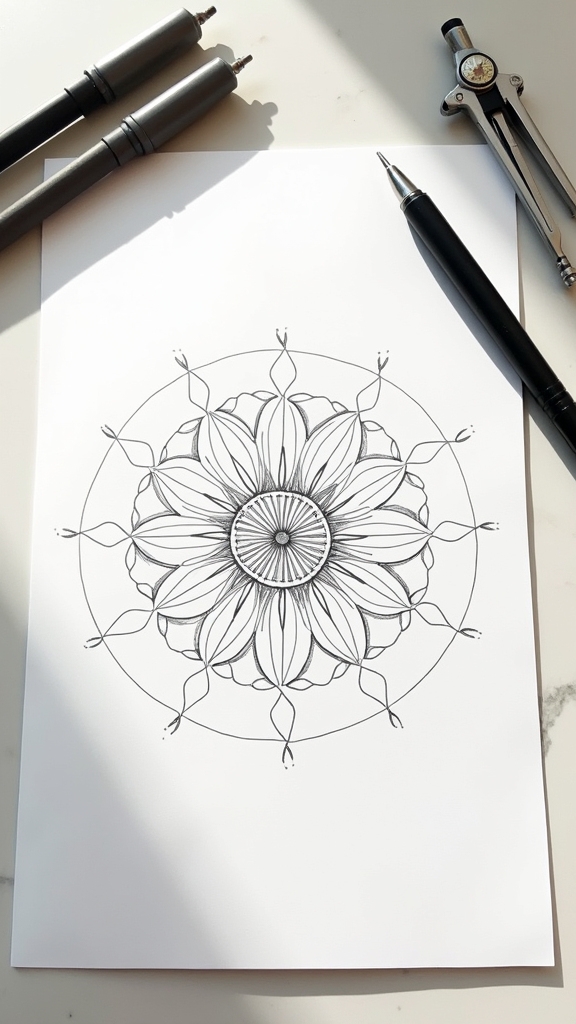
Petal Pattern Mandala
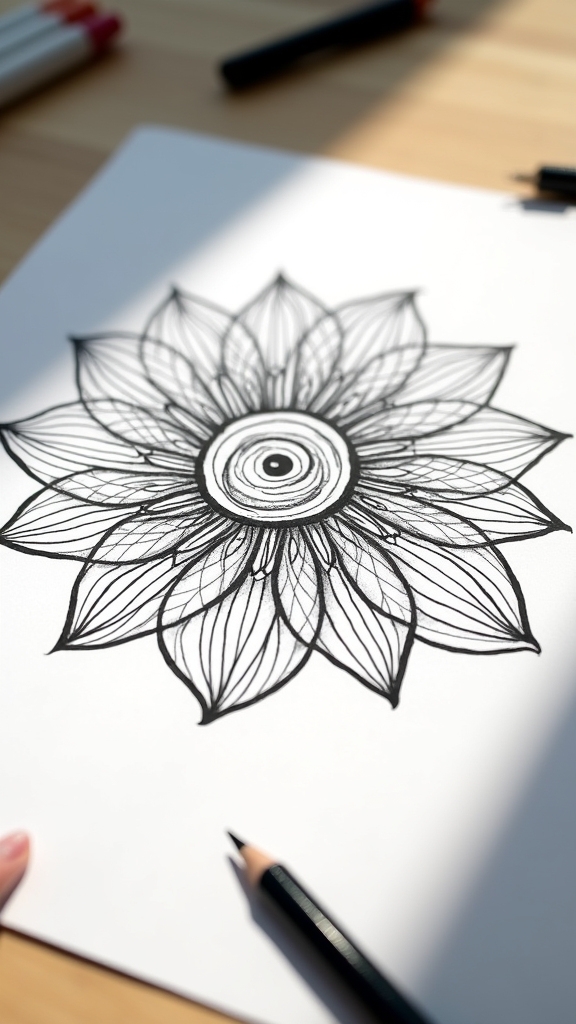
Petals bursting out from a center circle—now that’s the magic behind a petal pattern mandala. When drawing mandalas like this, everything starts with a small circle right in the middle.
Grab a Helix 360 Degree Angle and Circle Maker to whip up some evenly spaced lines, and suddenly, you’ve got perfect guides for your petals. Each petal can be a simple teardrop shape, and nobody says they all have to look the same—try mixing up the size and curve for a little extra flair.
Don’t crowd them, though; leaving some negative space between petals really makes the design pop. Once the pencil work’s done, trace over with a fine-tipped pen and go wild adding extra details or cool embellishments.
Radiating Triangle Mandala

Triangles take center stage in the radiating triangle mandala, turning a simple doodle into something seriously eye-catching. Creating Mandalas like this starts with a single triangle in the middle, then fans out triangles from that point, almost like sun rays or a spiky pizza! Using tools like the Helix 360 Degree Angle and Circle Maker really helps keep those triangles evenly spaced, so the whole thing looks totally pro. Sketch lightly with a Tombow MONO Graph Mechanical Pencil—mistakes happen, and it’s easy to fix them before you go over everything with a Tombow MONO Drawing Pen. Want it to pop? Color each triangle a different shade. Mixing triangle sizes adds cool depth, so the mandala feels alive and full of energy.
| Tool/Step | Purpose |
|---|---|
| Helix 360 Angle Maker | Even triangle spacing |
| Tombow Mechanical Pencil | Easy sketching and adjustments |
| Drawing Pens | Clean, precise outlines |
| Coloring Triangles | Adds vibrancy and visual impact |
Layered Hump Mandala
Creating a layered hump mandala is all about stacking those curvy hump shapes in neat rings, each one getting a little bigger as you move out from the center—kind of like a funky ripple effect.
To really make each layer pop, thicker outlines on the edges can bring some serious drama, while thinner lines inside add just the right amount of detail.
It’s like giving your mandala a bold haircut and a fancy necklace at the same time!
Building Hump Layer Patterns
Lots of mandalas look super cool, but nothing beats the satisfaction of stacking those hump layers just right. Here are some simple steps:
First, grab a compass or the Helix 360 Degree Angle and Circle Maker to draw a perfect little circle in the center. That’s your home base!
Next, use a MONO Graph Mechanical Pencil and sketch a ring of humps radiating out, keeping them evenly spaced all the way around, like petals on a super-organized daisy.
Don’t stress about perfection—just follow the curve of the last layer for a smooth look. If you want to get wild, fill the spaces between with tinier shapes or leave some empty for cool negative space.
When you’re happy, ink with a MONO Drawing Pen 03.
Adding Depth With Outlines
A dash of outline magic can totally level up any mandala, especially when working with those classic layered hump patterns.
Mandala drawing gets way more exciting when you go beyond simple lines and start playing with outlines. First, sketch overlapping humps lightly with a pencil, keeping things symmetrical—no one wants a lopsided mandala! Tools like the Helix 360 Degree Angle and Circle Maker help keep your humps perfectly spaced, so your design looks pro.
When you’re happy with the base, grab a Tombow MONO Drawing Pen 03 to outline each hump. For serious wow factor, use thick lines on the outer edges and thinner ones inside the pattern.
Want even more pop? Add shading with finer pens for depth and wild, eye-catching dimension!
Simple Spiral Mandala

A simple spiral mandala starts with building spiral guidelines, which is a bit like sketching a snail’s path across your page—it’s all about that smooth, even swirl.
Once the spiral is set, layering repetitive patterns like petals or teardrops along the curves turns it into a real eye-catcher, kind of like decorating a giant cinnamon roll (minus the sticky fingers).
For the finishing details, outlining with a fine-tip pen and playing with negative space makes your spiral pop, giving the whole design that wow factor every mandala deserves.
Building Spiral Guidelines
Spirals have a way of pulling the eye in and making everything look just a bit more magical, don’t they? The first step to building spiral guidelines for a simple mandala is drawing a set of concentric circles with a compass or a Helix 360 Degree Angle and Circle Maker. This is like creating the launchpad for your spiral adventure! Next, a pencil sketch of a spiral radiates from the center—think of a snail shell, but a lot less slimy. Keeping the spacing even is key, unless you want your mandala to look like it tripped over its own feet. Here’s a quick look at the process:
| Step | Tool | Tip |
|---|---|---|
| Draw Circles | Compass/Helix Maker | Start from the center |
| Sketch Spiral | Pencil | Keep spacing consistent |
| Add Shapes | Pencil | Use petals and triangles |
| Outline | Drawing Pen | Go slow for neat lines |
| Finish | Colored Pens | Fill negative spaces |
Layering Repetitive Patterns
Once the spiral guidelines are sketched and looking neat, it’s time for the real magic—layering those eye-catching repetitive patterns. This is where a plain spiral turns into a show-stopping mandala.
Start by adding simple shapes, like circles, petals, or wavy lines, around your spiral. The trick with layering repetitive patterns is to keep each layer the same distance apart, so your design looks balanced—kind of like making sure your pizza slices are even, but way more chill.
Grab that Helix 360 Degree Angle and Circle Maker if you want your circles and angles to look super sharp. Mix it up with large and small shapes to keep things interesting.
Once you’re happy, trace over everything with a fine-tipped pen for bold lines.
Adding Finishing Details
Time to level up that spiral mandala with some finishing touches! This is where the magic happens—tiny details can totally transform a simple spiral mandala from “meh” to “mesmerizing.”
After sketching the spiral design in pencil and making sure those loops are spaced just right, it’s time to grab a Tombow MONO Drawing Pen 03. Outlining the spiral with different line thicknesses adds awesome depth—think bold and skinny lines dancing together!
Next, small embellishments like dots or mini petals can be sprinkled around the spiral. Not too many, though—you want to boost the design, not bury it!
Once everything’s in place, gently erase any leftover pencil marks with a Tombow MONO Eraser. Voilà! The simple spiral mandala now looks sharp, polished, and seriously cool.
Symmetrical Dot Mandala
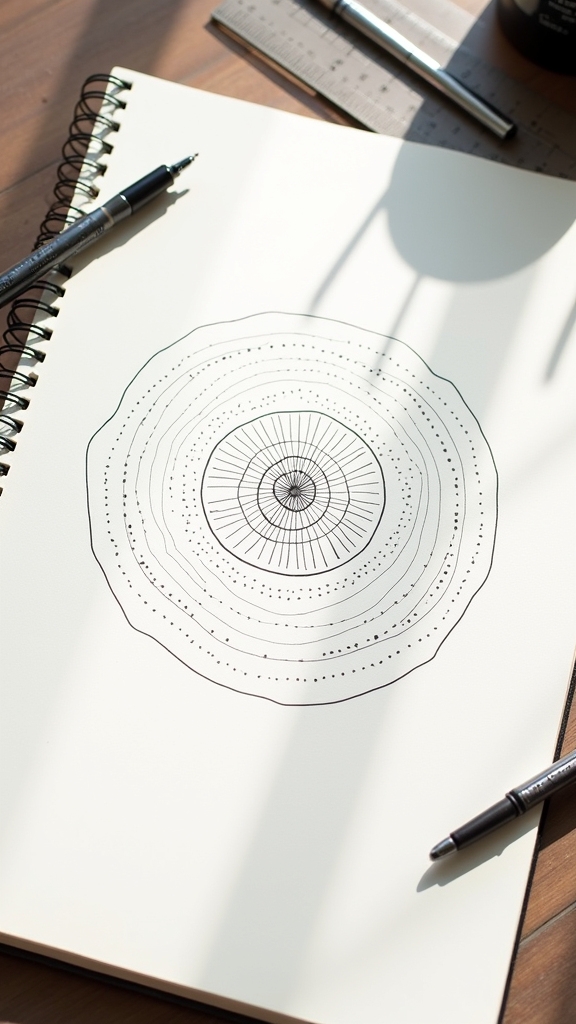
Balance takes center stage in a symmetrical dot mandala, where every single dot finds its perfect partner across the circle. Creating one starts with drawing guidelines using a compass or a cool tool like the Helix 360 Degree Angle and Circle Maker—trusty sidekicks for perfect circles!
Artists place dots at equal intervals, starting tiny at the center and making them bigger as they move outward. Symmetry is everything here, so each dot needs a matching buddy on the opposite side. Mixing up patterns—like bunching dots together or lining them up—adds pizzazz but still keeps everything looking even.
Practicing on dot grid paper first is like a rehearsal before the big show. With patience, the symmetrical dot mandala becomes a stunning masterpiece of order and harmony.
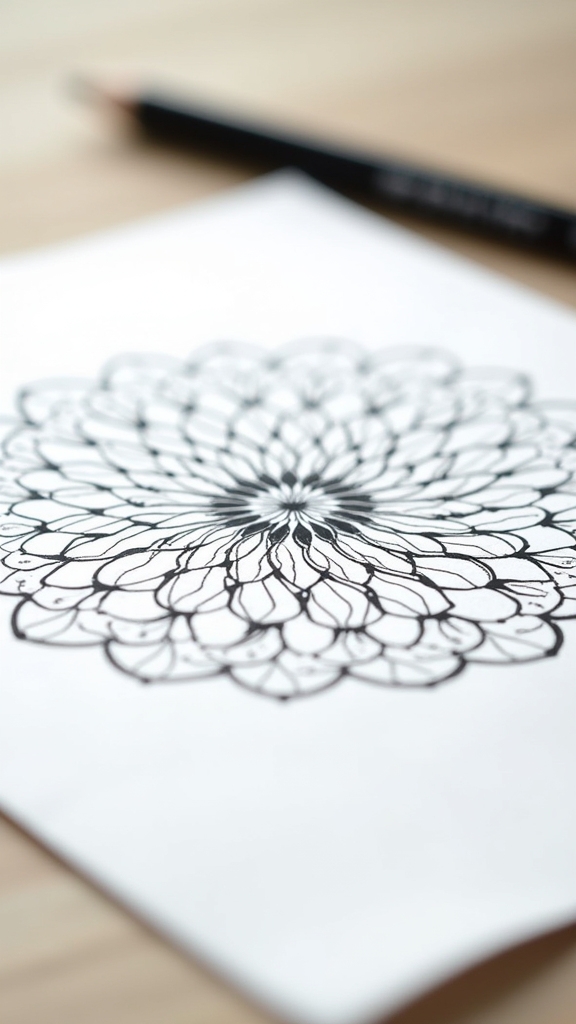
Overlapping Leaf Mandala
Overlapping leaf mandalas are all about stacking cool leaf shapes on top of each other, almost like nature’s version of a pile of autumn leaves.
By shading where the leaves cross and overlap, artists can make the design look extra bold and three-dimensional—almost like the leaves could pop right off the paper!
It’s fun to play around with which leaves go in front, which ones hide behind, and how a little bit of shadow can totally change the whole vibe.
Drawing Overlapping Leaf Shapes
Leafy wonders take center stage when starting an overlapping leaf mandala, and there’s something seriously cool about watching simple shapes turn into a wild, hypnotic pattern.
To begin, sketch a central leaf shape with your pencil—try to make it as symmetrical as possible, because balance is key. Grab a Helix 360 Degree Angle and Circle Maker and draw some light circular guidelines. These will help keep your overlapping leaf mandala looking neat and spaced just right.
Start adding more leaf shapes, letting them overlap a bit for that tangled, magical vibe. Stick to similar sizes so it doesn’t turn into a jungle mess. Outline the leaves using a Tombow MONO Drawing Pen 03, and sprinkle in extra details with finer pens for texture and flair.
Enhancing Depth With Shading
Crank up the drama in your mandala by diving into the world of shading—it’s like giving your overlapping leaves a secret superpower!
When it comes to intricate mandalas, shading is the trick that makes your leaves pop right out of the page. Start by drawing leaves in different sizes and directions to create a wild, layered look.
Grab those Tombow MONO Drawing Pens, especially the 01 and 02 tips, and shade the spots where leaves overlap. Imagine where the light would hit, then darken the edges to create cool shadows.
Don’t forget about negative space—leave some areas plain to make your shaded parts stand out, like a magic trick! Blend gently for smooth gradients, and watch your mandala go from flat to fabulous.
Geometric Grid Mandala
Symmetry fans, get ready—geometric grid mandalas are all about crisp lines, sharp shapes, and patterns that look super impressive (even if you’re just starting out).
Building these mandalas starts with a central point and some basic shapes. Use dot grid paper and tools like the Helix 360 Degree Angle and Circle Maker to sketch perfect circles and keep everything even.
Triangles, squares, and hexagons can be repeated and spun around your center, creating wild, hypnotic designs with just a few moves. Play around with line thickness, add bold or delicate touches, and get creative with color.
- Start with basic shapes for easy symmetry
- Use tools for perfect circles and angles
- Experiment with line styles for depth
- Color sections for extra pop and personality
Negative Space Mandala

Even though most people focus on the patterns inside a mandala, the empty spaces between the shapes—called negative space—are where the real magic can happen. A negative space mandala isn’t just about drawing cool shapes; it’s about letting the “nothing” around them make the “something” pop! Beginners can start by outlining their mandala and then decide which areas to fill, color, or leave blank. Tools like a Helix 360 Degree Angle and Circle Maker help keep things neat—no one wants wobbly circles, right? Try playing with shading, doodles, or just plain blank space for awesome effects. Here’s a quick look at ways to use negative space in mandalas:
| Technique | Difficulty | Effect |
|---|---|---|
| Leave blank | Easy | Clean, bold look |
| Shading | Medium | Adds soft depth |
| Patterns | Medium | Fun, textured |
| Color blocking | Hard | Striking contrast |
| Outline only | Easy | Light, airy feel |
Repeating Wave Mandala

While some mandala designs can look super complicated, the repeating wave mandala is like catching a chill ocean vibe on paper—no surfboard needed. I’m going to show how this easy style uses smooth arcs that grow out from the center, layering waves that feel almost hypnotic.
Beginners will love that you don’t need perfect lines; just keep things flowing. A dot grid notebook totally helps you keep those waves in sync, like a pattern in the sand. Leaving space between waves isn’t just for style—it actually makes the whole design pop.
Here’s why the repeating wave mandala is worth trying:
- Builds visual rhythm that’s relaxing to draw
- Layers create cool depth, even with simple shapes
- Dot grids make symmetry easy
- Outlining and coloring negative spaces adds major wow-factor
Frequently Asked Questions
How to Draw Mandalas Easily for Beginners?
To draw mandalas easily for beginners, one should embrace mindful practice, starting with basic symmetrical shapes and using grid guides. Gradually refining outlines in pencil before inking, and thoughtfully applying color, fosters both skill development and creative relaxation.
What Is the Rule for Creating Mandalas?
The rule for creating mandalas centers on symmetry principles, requiring designs to radiate from a central point with balanced repetition. Artists maintain consistent shapes and spacing, often using tools to guarantee precise symmetry and harmonious, meditative patterns throughout the process.
How to Start Mandala Art With a Pencil?
To start mandala art with a pencil, one should utilize precise pencil techniques, such as drawing lightly and confidently. Using structured guides like dot grid paper, circles, and basic shapes helps maintain symmetry and allows easy adjustments.
What Are the Three Types of Mandalas?
When considering Mandala Variations, three primary types emerge: Geometric Mandalas, characterized by precise shapes and symmetry; Natural Mandalas, inspired by organic forms; and Psychological Mandalas, which explore inner thoughts and emotions through abstract, expressive designs.
Conclusion
So, with these ten mandala sketch ideas, anyone can jump right in and start creating cool art. Whether it’s petals, triangles, or funky spirals, each design is simple enough for beginners but still looks awesome. Mistakes? Totally normal—just laugh it off and keep going. Mandalas aren’t about perfection; they’re about having fun and letting creativity loose. Grab a pencil, pick a pattern, and see where your imagination takes you. Who knows? You might surprise yourself!
Leave a Reply