
To create a colorful mandala art piece from start to finish, first gather supplies like paper, pencils, a ruler, and coloring tools—crayons welcome! Find a calm spot, then use a compass to draw circles and section them evenly, like slicing a perfect pizza. Sketch neat patterns, ink them carefully, and let loose with vibrant colors, blending and shading as you go. Add cool details, like secret doodles, and display your masterpiece. Want the full step-by-step magic? Stick around!
Key Takeaways
- Gather essential supplies like paper, a compass, coloring tools, and set up a peaceful, organized workspace.
- Find and mark the paper’s center, then draw concentric circles and guidelines for structural accuracy.
- Divide the circle into equal sections using precise angles to ensure symmetry and balance.
- Design repetitive patterns within the sections, then ink the outlines with fine-liner pens, letting the ink dry before erasing pencil marks.
- Apply a harmonious color palette, add intricate details, and display or share your finished mandala for personal satisfaction or community engagement.
Gathering Your Mandala Art Supplies
Before jumping into the fun of making a colorful mandala, everyone needs to gather the right supplies—otherwise, the whole project could turn into a giant doodle disaster!
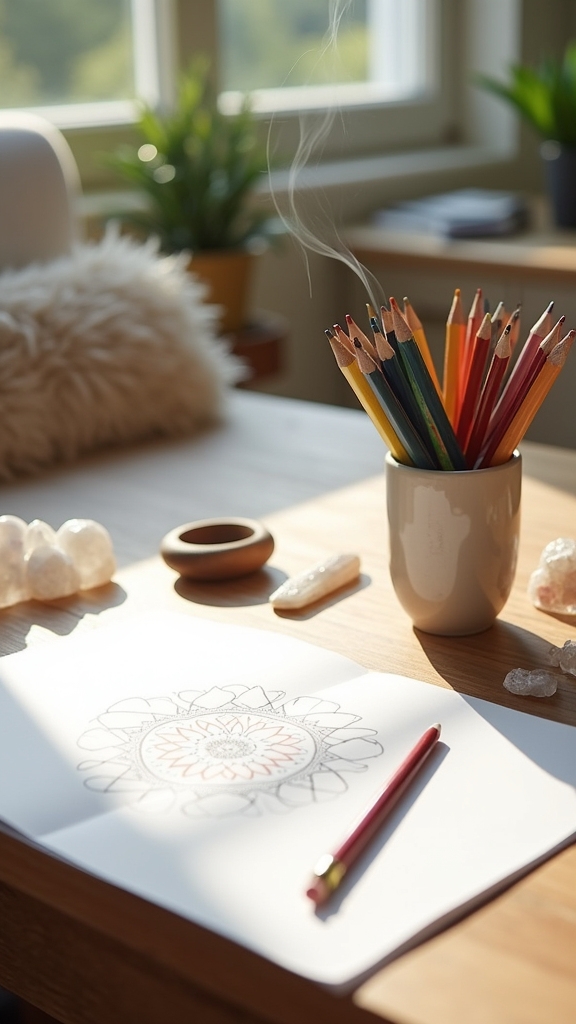
The materials you will need are pretty basic, but choosing the right ones makes all the difference. Start with paper, a pencil, a ruler, and an eraser for sketching out the first shapes. Using your compass or a circle ruler is key for getting those perfect, even concentric circles that every awesome mandala has.
Don’t forget coloring tools like colored pencils, markers, watercolors, or even wild gel pens to make your colorful mandala pop! Grab some fine-tipped pens for cool details, and maybe print out a few mandala coloring pages for extra practice or inspiration.
Preparing Your Workspace and Setting Intentions
Before starting your colorful mandala, picking the right spot is a big deal—think somewhere peaceful, where your dog won’t crash in and your phone won’t beep every five seconds.
Setting up a chill mood with soft music, a candle, or maybe even your favorite fuzzy socks can make the whole experience feel more special.
Take a moment to set your intentions, whether it’s to relax, express yourself, or just have fun, so you’re ready to make something truly unique.
Choosing a Creative Environment
Ever wonder why some spaces just feel perfect for creating art? It’s not magic—it’s all about finding a calm, creative environment that helps ideas flow.
When picking a spot to work on a mandala, quiet is key. Distractions are creativity’s worst enemy! Soft lighting or even a single candle can turn a regular room into a serene, inspiring zone.
For a little extra mood, whale songs or gentle rain sounds can help anyone relax and focus (plus, who doesn’t like pretending they’re painting in a rainforest?).
Before diving in, a few deep breaths or a quick meditation can clear away stress and set positive intentions.
Don’t forget to keep materials close by—nothing kills inspiration faster than searching for a missing marker!
Cultivating a Mindful Atmosphere
Sometimes, all it takes is a few special touches to turn an ordinary space into a zone where creativity can really shine.
Before starting your mandala, finding a calm and happy space is key. This isn’t just about having a clean desk—it’s about creating an atmosphere that invites mindfulness and relaxation.
Maybe light a candle for a soft glow, or put on some gentle whale sounds (seriously, it’s surprisingly chill). Setting intentions, like focusing on relaxation or self-expression, can help guide your creative energy.
Even just a minute of silence or deep breathing can clear your mind and get you ready to create.
Try these steps:
- Choose a calm and happy space.
- Use calming sounds and gentle lighting.
- Set an intention for relaxation and creativity.
Mapping Out the Mandala Center and Basic Structure

Before the fun really gets going with colors and patterns, it’s super important to find the exact center of your paper—think of it as the “heart” of your mandala.
Using a ruler and a pencil, the artist marks this spot, then grabs a compass or circle ruler to draw a series of circles that ripple out from the center like magic.
These circles aren’t just for looks—they’re the secret guides that help keep everything balanced, so your mandala doesn’t end up looking like a wobbly pizza.
Finding the Mandala Center
Finding the perfect center for a mandala is like kicking off an epic adventure—everything starts here, and getting it right makes the whole journey smoother.
To begin, artists usually grab a ruler and measure their paper into a neat square. The magic happens when they mark the midpoint, creating a center dot that’s basically the heart of the whole design.
Next, a compass steps in to help draw circles around this dot, slowly building up the basic outline. Now, things get interesting: they decide how many sections or “arms” the mandala will have, spacing out dashes around the circles for perfect symmetry.
Here’s how it goes:
- Mark the center dot.
- Draw concentric circles as a basic outline.
- Add evenly spaced dashes for symmetry.
Drawing Guideline Circles
Guideline circles are like the secret skeleton of any awesome mandala—they do all the heavy lifting so the final design can shine.
When drawing a mandala, start by measuring and cutting your paper into a perfect square—no wobbly rectangles allowed. Mark the very center with a pencil; this is your mandala’s heartbeat.
Next, break out a compass or circular ruler and start making the circles from the center out, like ripples in a pond. Vary the spacing for extra coolness and complexity.
To create a mandala that looks balanced, divide the biggest circle into 12 equal slices using 30-degree angles. Connect those points with straight lines.
Think of these guidelines as your mandala’s secret superpower—they make everything look sharp and totally symmetrical.
Drawing Concentric Circles and Guideline Frameworks
A blank sheet of paper can feel a little intimidating at first, but that’s where the magic starts—turning it into a stage for your mandala masterpiece.
Before anyone can draw designs, creating a mandala needs a bit of careful setup. Grab a ruler and measure out a perfect square, marking the exact center with a tiny dot—this is the heart of your design!
With a compass or a circular ruler, draw concentric circles radiating out from the center, keeping the spaces nice and even. Now, it’s time for some straight lines! Use your ruler to draw a vertical and horizontal line through the center, then add extra dots at 45-degree angles for more detail.
- Measure and mark your center
- Draw evenly spaced circles
- Add vertical, horizontal, and diagonal guidelines
Dividing the Mandala for Symmetry and Balance
Getting perfect symmetry in a mandala is like slicing the world’s most important pizza—every piece has to line up just right!
Marking even sections and making sure angles are spot-on helps the whole design look balanced, not wobbly or lopsided.
With some careful measuring, a steady hand, and maybe a little bit of patience, anyone can pull off those super-precise lines.
Marking Even Sections
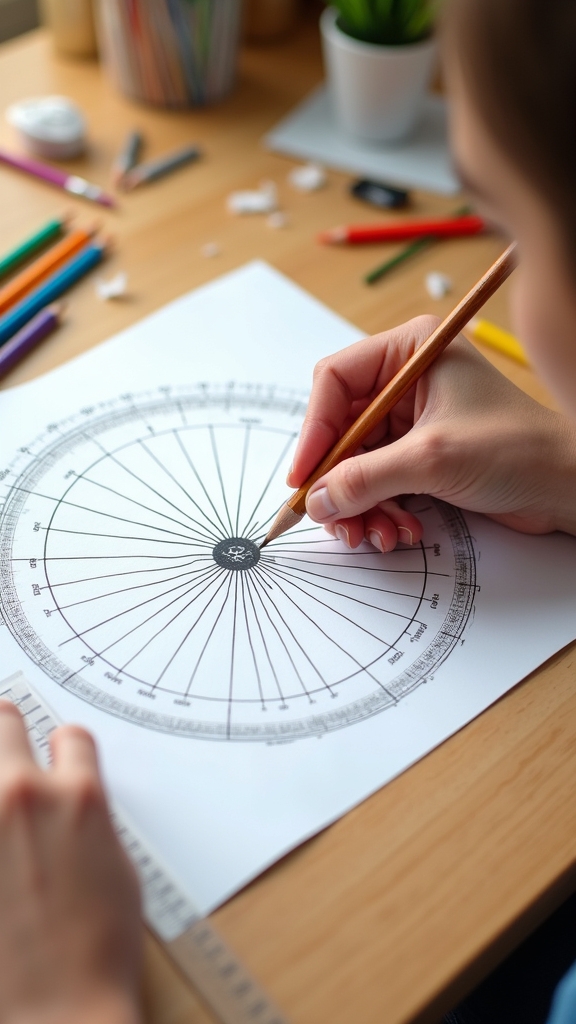
Every mandala’s magic starts with a solid plan for symmetry, and this is where marking even sections comes into play. First, artists divide their circle into 12 equal slices—almost like a pizza—by calculating angles of 30 degrees each. This step is key because it helps create a well-structured foundation for the entire mandala.
With a straight edge ruler, lines are drawn from the center to the edge at every marked angle, making sure each section is the same size. This careful setup lets patterns stay consistent, balanced, and neat. For extra precision, tools like a compass or angle maker come in handy.
Here’s a quick breakdown:
- Mark twelve equal sections (every 30 degrees).
- Use tools for accuracy.
- Draw straight center-to-edge lines for consistent pattern placement.
Ensuring Precise Angles
Slice through the mystery of mandala symmetry by mastering those all-important angles! When creating mandalas, ensuring precise angles is what keeps the whole thing from turning into a lopsided pizza.
Start by dividing your circle into 12 equal parts—think of it as slicing a cake, but with math. Each section gets a 30-degree wedge (because 360 divided by 12 gives 30). Grab a protractor or angle maker tool to mark these angles accurately, making sure your lines reach all the way to the circle’s edge.
Use a ruler to draw straight lines from the center out. As you work on your mandala designs, always check your patterns against these angle lines. That way, every petal and swirl stays perfectly balanced and beautiful!
Exploring Pattern Ideas for Each Mandala Ring
Although it might seem tricky at first, picking out patterns for each ring in a mandala is actually one of the most exciting parts of the whole process.
Imagine working with a series of circles—each one begging for a new design! Artists can play with different sized shapes to use, like tiny dots, chunky petals, or wavy swirls.
The secret to a cool mandala is symmetry and repetition, so whatever pattern is picked, it should repeat around the entire ring. Mixing thick and thin lines or adding texture can make patterns pop.
When feeling stuck, a pattern dictionary or a sketchy sheet of doodles can spark new ideas.
Here are three pattern ideas to try:
- Petal bursts
- Spiraling dots
- Zig-zag lines
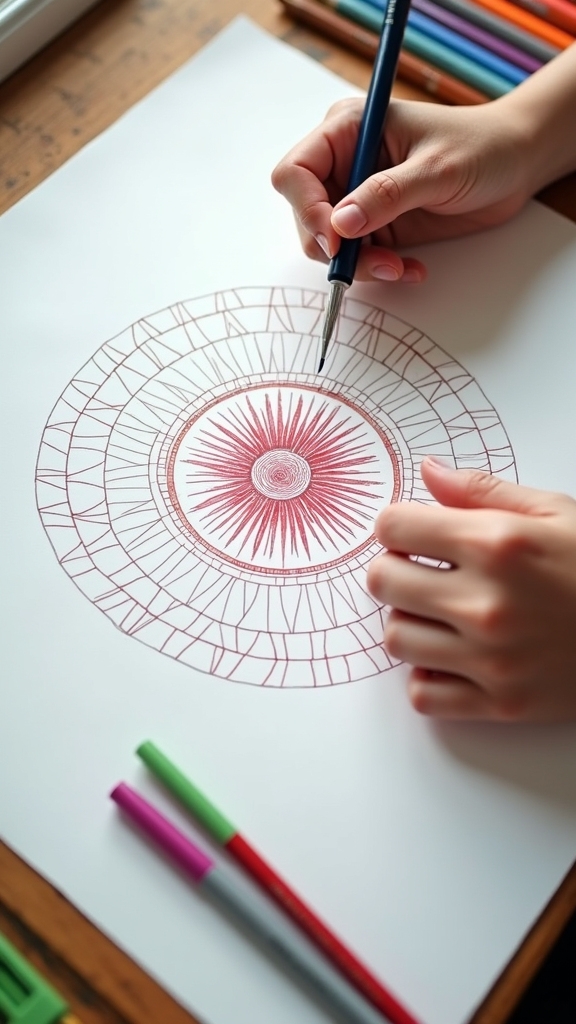
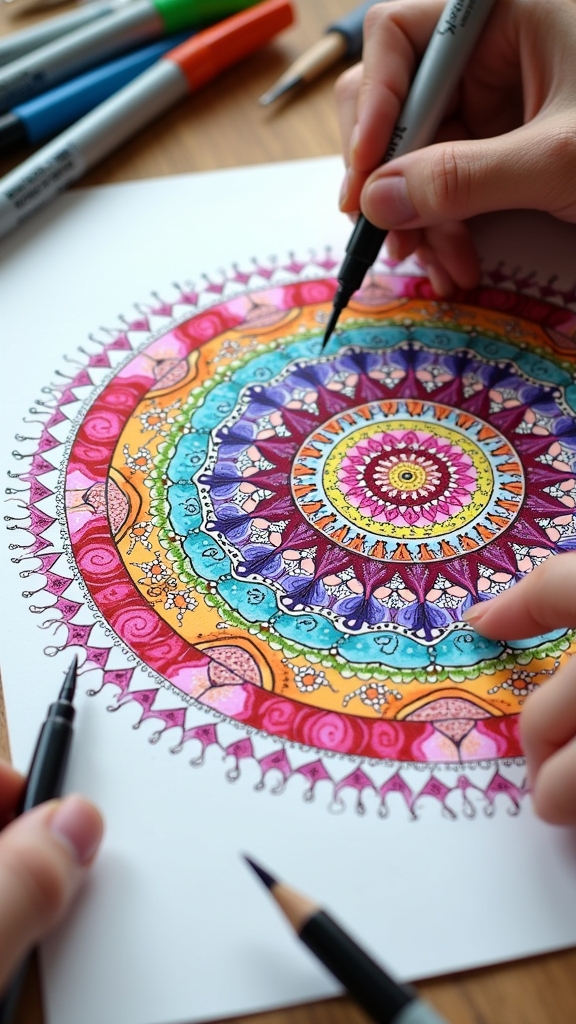
Inking Your Mandala With Fine-Liner Pens
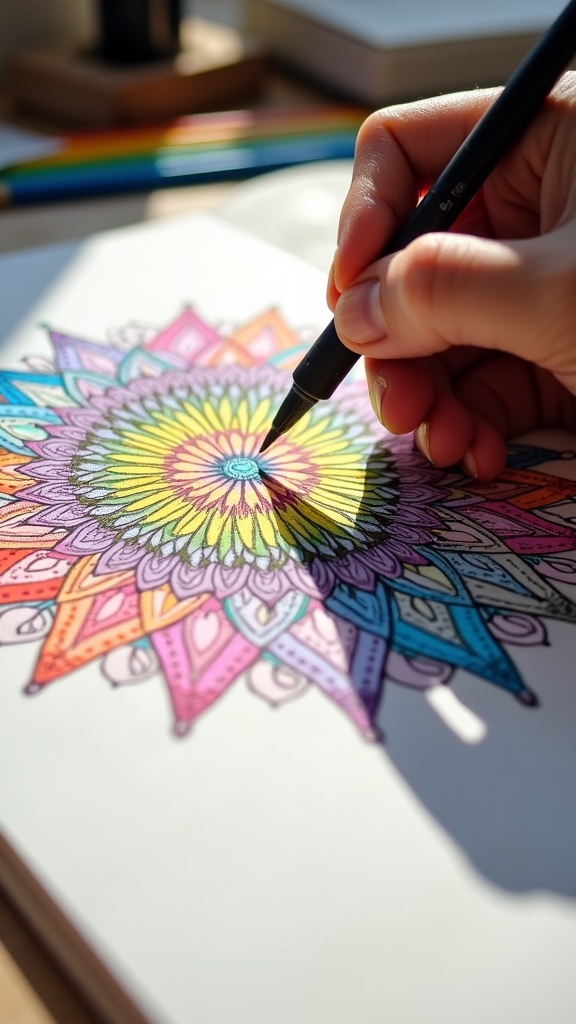
Grab a fine-liner pen and get ready for the most satisfying part—making those pencil lines pop! Inking a mandala is like tracing over a secret map, revealing a whole new world with every line.
Start in the center and work your way out, using fine-liner pens with different nib sizes—maybe a skinny 0.1 for tiny details, and a 0.3 for bold outlines. Keep your hand steady and apply even pressure for crisp, clean lines.
Black fine-liner pens are classic for strong contrast, but colored ones can bring unexpected magic to your mandala. Don’t rush—let the ink dry completely before erasing any pencil marks, unless you enjoy accidental smudges (most don’t!).
Inking is where your mandala truly comes alive!
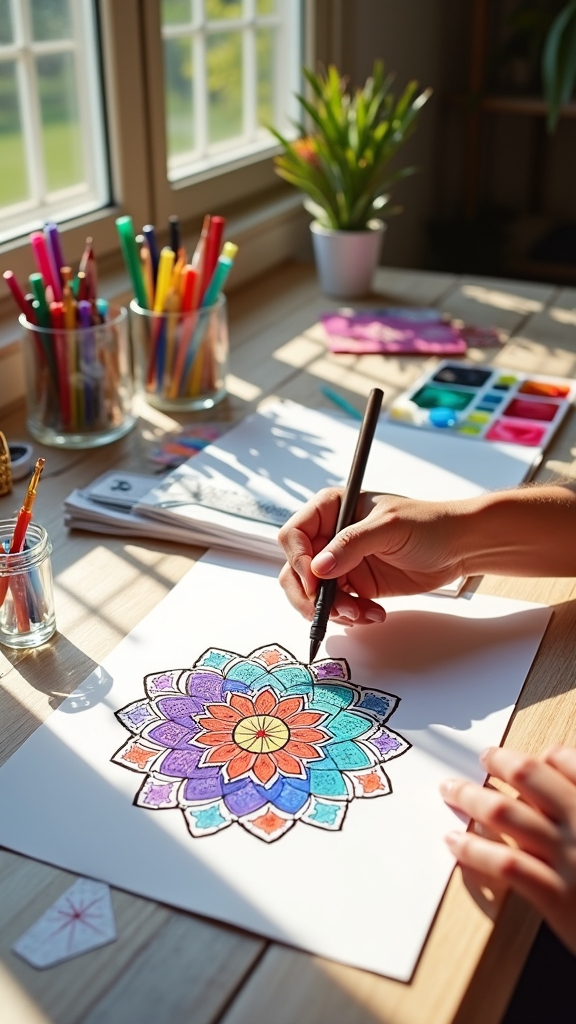
Choosing and Applying Color to Your Mandala
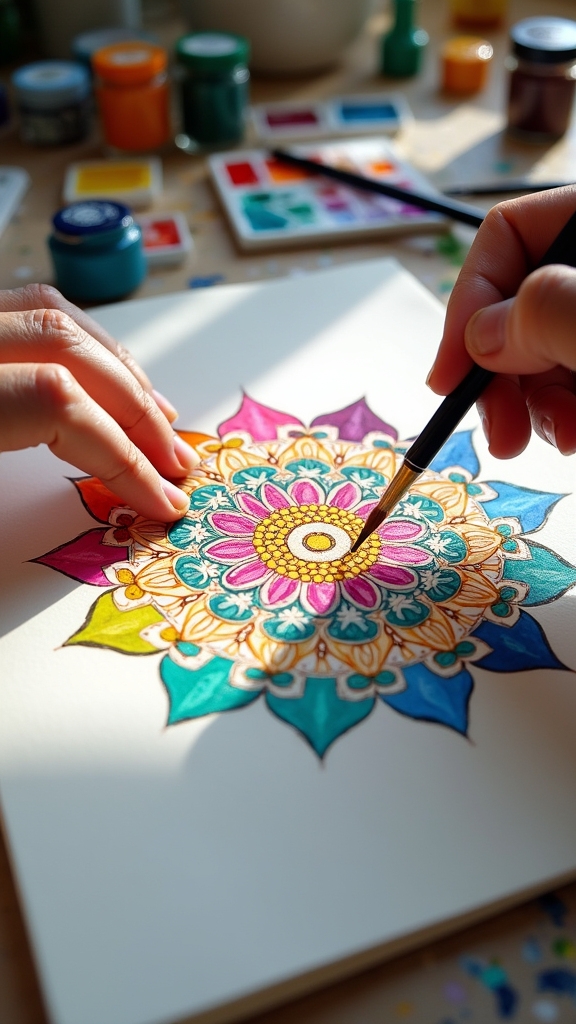
A burst of color is where the real magic happens in a mandala. Once the black lines are set, it’s time to choose to use a color palette that makes your eyes happy!
Grab a color wheel, pick out some primary and secondary colors, and get ready to create something beautiful. Colored pencils are great for applying color smoothly, and they let you blend or layer easily.
You might want to use one color per ring or alternate colors for a cool effect. Want depth? Shade by pressing harder or adding more lines in certain spots.
Check out these tips:
- Use colored pencils for precision and blending.
- Alternate or layer colors for a lively look.
- Try different shading techniques for extra dimension.
Enhancing Your Mandala With Details and Personal Touches
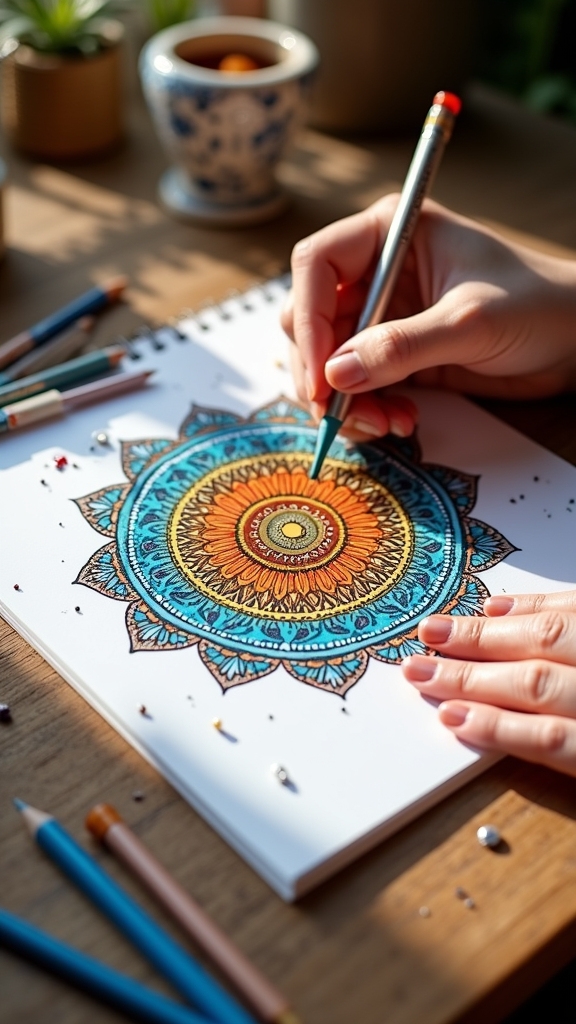
Some mandalas really come to life when artists start adding those extra little touches that make them stand out.
Enhancing your mandala with intricate details turns a simple design into something magical and totally unique. Grab a thin pen—maybe a 0.1 or 0.3 fineliner—and start drawing tiny patterns, dots, or swirls in each section.
Don’t be afraid to fill empty spaces with color or shading, because that’s where your personal expression really starts to shine. Want to make things pop? Change up the line thickness or color intensity for extra depth—darker, closer lines add a cool shadow effect.
Just remember, symmetry is your friend, so repeat those patterns all around. Most importantly, have fun and let your creativity take over!
Displaying, Sharing, and Further Resources for Mandala Art

Even after all the hard work of finishing a mandala, the fun isn’t over—now comes the exciting part of showing it off and connecting with others.
Displaying your art can turn a blank wall into a burst of color, and sharing your masterpiece online might just spark a new friendship or inspire someone else’s creativity.
Don’t forget about cool resources, either—there’s a whole world of workshops, online courses, and books out there to help you level up your skills.
Here are some ways to make the most of your finished mandala:
- Frame your mandala for displaying at home or work.
- Start sharing your art on social media or in art communities.
- Check out resources like workshops, online courses, and art books to keep learning.
Frequently Asked Questions
How Do You Color Mandala Art for Beginners?
When coloring mandala art for beginners, color choice tips include selecting harmonious palettes and limiting colors. Recommended coloring techniques involve blending and layering. Common beginner mistakes are rushing, using too many colors, or neglecting gradual shading for dimension.
What Is the Rule for Creating Mandalas?
The rule for creating mandalas centers on achieving symmetry through balanced geometric patterns radiating from a central point. Mandala symbolism often reflects spiritual significance, with repeated shapes and structured designs emphasizing harmony, unity, and a meditative creative process.
How to Fill Color in Mandala Art?
When filling color in mandala art, artists apply color selection techniques for visual impact, use blending methods for smooth changes, and follow color harmony principles to achieve balance. Symmetry, varied patterns, and shading techniques further enhance the mandala’s depth.
Can Mandala Art Be Colourful?
Mandala art can indeed be colorful, utilizing color psychology and mandala symbolism to convey emotions and meanings. Artists employ creative techniques, blending vibrant hues and contrasting shades, to enhance visual depth, symmetry, and overall artistic expression in mandalas.
Conclusion
And that’s how a colorful mandala comes to life—from a blank page to a burst of swirling color and design. Every circle, every detail, is a piece of your creativity released. It’s not just about making art; it’s about feeling calm, focused, and maybe a little bit proud, too. So grab those pens, let your imagination go wild, and remember: mistakes are just new patterns waiting to happen. Who knows what masterpiece you’ll create next?
Leave a Reply