
Brighten up your art with 10 colorful doodle painting ideas perfect for beginners! Start with spiral Op-Art doodles that twist and turn, or try clover field patterns full of happy shapes. Get bold with Keith Haring style abstracts, or doodle whimsical flowers and mountain vistas. Dripping paint effects and rainbow waves add wow-factor, while wagon wheel motifs and creative spoke patterns mix in cool geometry. Even cow print blobs bring quirky fun. Curious for fresh inspiration and easy how-tos?
Key Takeaways
- Start with Spiral Op-Art doodles using varied line thickness and colors for an easy, mesmerizing effect.
- Create whimsical floral patterns by mixing different petal shapes and clustering colorful flowers together.
- Experiment with dripping paint techniques to blend vibrant shades and achieve dramatic, beginner-friendly results.
- Doodle geometric wagon wheels or spoke patterns using bold outlines and playful gradients for lively, circular designs.
- Try Keith Haring-inspired abstracts with bright blobs, wiggly lines, and layered colors for a fun, energetic vibe.
Spiral Op-Art Doodles
Ever wonder how a simple doodle can suddenly look like it’s swirling right off the page? Spiral Op-Art Doodles do exactly that! They start with a small dot in the center, and then wavy lines swoop outward like a crazy rollercoaster ride.
To make sure your spiral really pops, you add upside down “u” shapes in every section, creating a three-dimensional twist that almost jumps at you. The cool part? You can mess around with how thick or curvy the lines are, so each doodle turns out different.
Even if you’re just starting, it’s super easy and looks awesome in color. If you check out some affiliate links for art supplies, a small commission helps creators, but your cost stays the same!
Clover Field Patterns
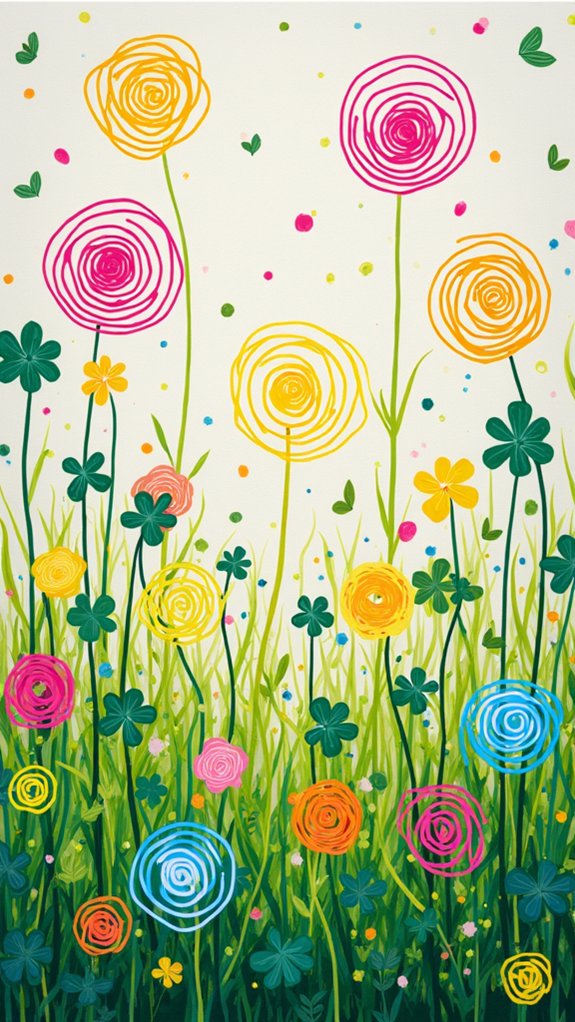
Green meadows bursting with little clovers can turn any doodle page into a mini field trip for the eyes.
Drawing clover field patterns starts out simple—just sketch three or four connected teardrop shapes to form each clover. Add extra teardrop shapes inside and outside the petals for depth, and before you know it, a whole field blooms on your page!
To make things pop, be sure to check how different colors look on each clover. Combining bold, bright shades with softer hues makes the pattern vibrate with energy.
Varying the sizes of your clovers keeps the design interesting—big ones, tiny ones, even medium ones in between. Repeat the pattern until the whole space feels full and fantastic, like a hidden meadow waiting to be explored.
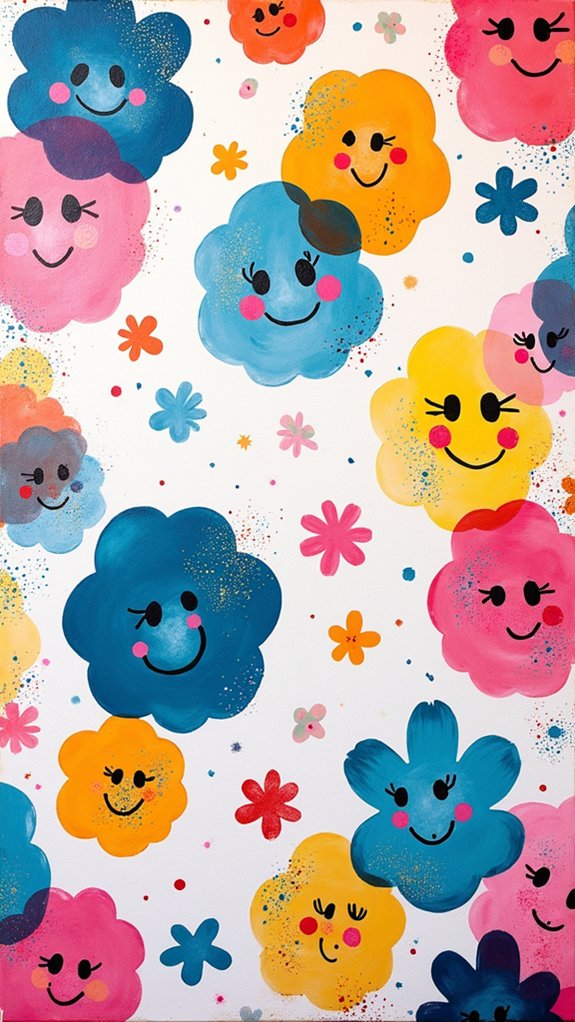
Keith Haring Style Abstracts

After exploring those breezy clover fields, some might want their doodles to jump off the page with movement and wild colors.
Keith Haring style abstracts are perfect for this! The fun thing about Haring’s art is just how energetic it feels, thanks to smart doodle movement techniques like squiggly lines and bold shapes.
Try doodling big circles, squares, or blobs, then weave wiggly lines between them—like funny dancers at a wild party.
Next, grab your brightest markers or paints, layering color strategies with thick swipes of yellow, red, and blue to keep things vibrant.
Don’t forget to toss in figures or kooky abstract symbol meanings—maybe a smiley face riding a zigzag!
Keep things playful, bold, and let your imagination lead the dance.
Whimsical Flower Doodles
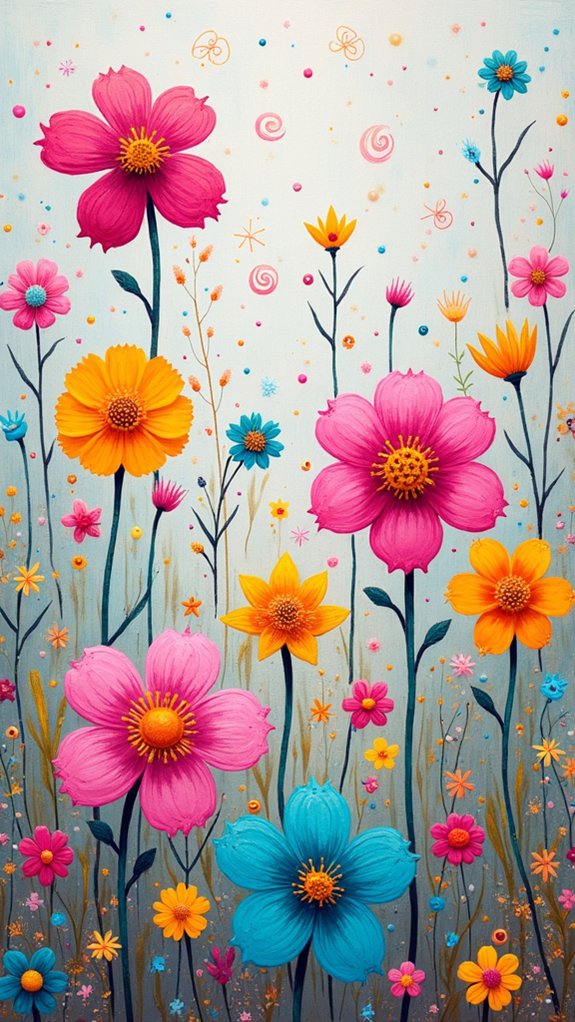
If anyone ever wanted to fill a page with pure happiness, whimsical flower doodles are like an instant ticket to sunshine—even on the cloudiest days. Creating these doodles starts with a simple circle for the center, then bursts into life as petals of all shapes—wavy, pointy, or squiggly—unfold around it. Bold flower color combinations like sunny yellows with hot pinks, or chilly blues paired with lively greens, bring everything to life. For more personality, artists can add dots, tiny leaves, or even silly swirl details. Doodle composition tips include mixing large and small flowers, overlapping petals, and arranging clusters for a playful “garden look.” Here’s a quick table of ideas to get you started:
| Color Combos | Petal Variations | Composition Tips |
|---|---|---|
| Red+Orange+Pink | Wavy Edges | Clustered Blossoms |
| Turquoise+Yellow | Pointed Petals | Overlapping Petals |
| Purple+Lime Green | Heart-Shaped | Doodle in Groups |
| Blue+Lavender | Zigzag Edges | Odd Numbers Best |
| Hot Pink+Mint | Teardrop Petals | Scatter Tiny Leaves |
Simple Mountain Landscapes

Want to doodle something epic but still easy? Simple mountain sceneries are a super cool choice, especially if you want your art to look dramatic and colorful.
Begin by sketching mountain shapes using a thicker marker—think slightly wavy triangles, so nothing looks too stiff or boring. To add depth, try mountain shadowing techniques: Divide each mountain with a wavy line, then use closely spaced lines and darker shades on one side to make it pop. The lighter side gets spaced lines and softer colors—suddenly, your mountains have dimension!
Don’t forget layering color gradients. Use lots of shades for the sky or foreground—rainbow patterns, anyone? Creating textured backgrounds with abstract doodles or blended colors makes your mountains look like they belong in a storybook!
Playful Rose Illustrations
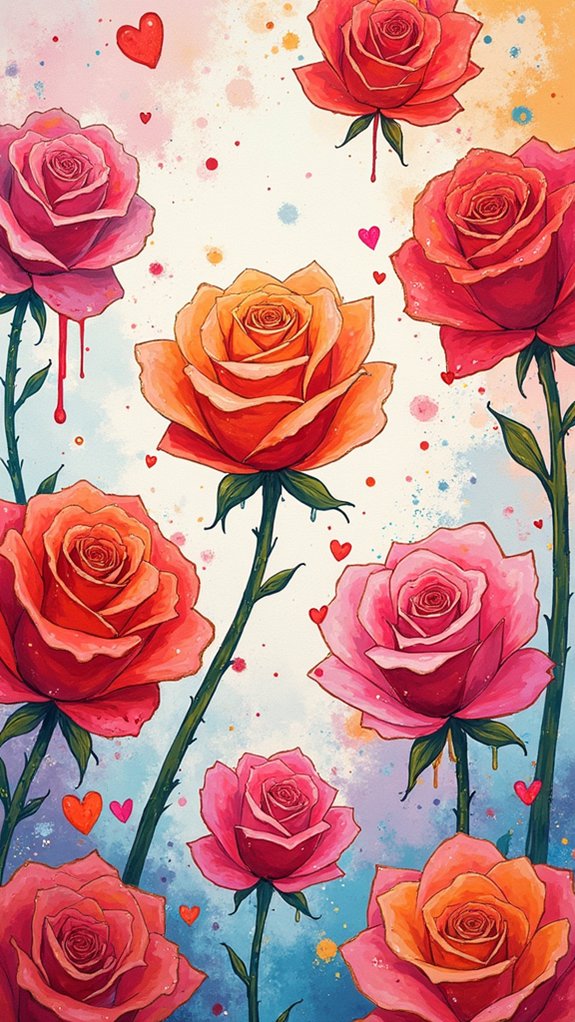
Playful rose illustrations are a blast to create, and it all starts with some super simple sketch steps.
Adding layers of bold and bright colors makes each rose look way more interesting, almost like it’s popping off the page (bonus points if your mom mistakes it for a sticker).
Mixing up how you draw the petals—maybe some swirly, some spiky—keeps things fun and gives each rose its own unique personality!
Simple Rose Sketch Steps
A bold rose doodle can transform even the plainest page into something special, bursting with color and personality.
To start, just draw a small circle in the center of your page—that’s the secret lair where your rose begins! From there, add some overlapping petal shapes around the circle, making each one a little bigger than the last. This trick creates that cool, layered rose vibe.
If you want your rose to really pop, play around with petal shape variations—pointy, wide, wavy, you name it. Grab a thinner pen to sketch flower details inside each petal, adding those natural lines and textures.
Now, bring your rose to life with your favorite rose color techniques—markers or watercolor both work! Try drawing a group of roses with crazy angles, too!
Layering Colors for Depth
There’s something extra magical about watching a doodled rose come to life just by playing with color layers. Start with a soft, light base—maybe a pink or peach.
Then, using clever color layering methods, add deeper shades in the folds of each petal for that “wow” pop of depth. Color blending techniques, like using markers or watercolors, help make those changes super smooth—almost like the colors are melting into each other.
To boost dimension, try varying your line thickness and toss in a contrasting background with complementary colors, making your rose really stand out. These depth enhancement strategies can transform a flat sketch into a blooming masterpiece.
And hey, don’t stress—every time you practice, your skills and your style grow along with your roses!
Creative Petal Variations
Although roses are famous for their classic look, artists can totally toss that rulebook out the window and invent petals with a twist. When it comes to playful rose illustrations, experimenting with rose petal shapes—think rounded, spiky, or super swirly—can make every doodle unique and full of personality.
Add some zing with artistic color choices; maybe try an electric blue rose or go wild with neon markers. Using shading and highlighting gives petals a cool, three-dimensional vibe, almost like the real thing, but way more magical.
For extra fun, play with floral composition techniques—layer in doodled leaves, curly vines, or even wild sparkly dots. Before you know it, your roses will be bursting with creativity and energy!
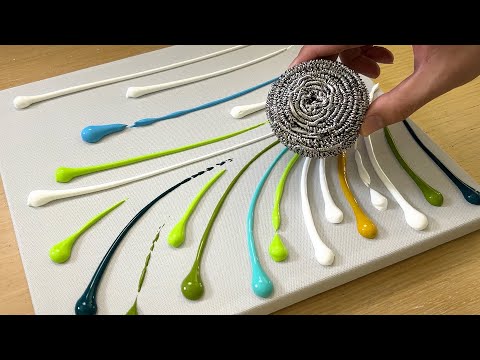
Dripping Paint Effects
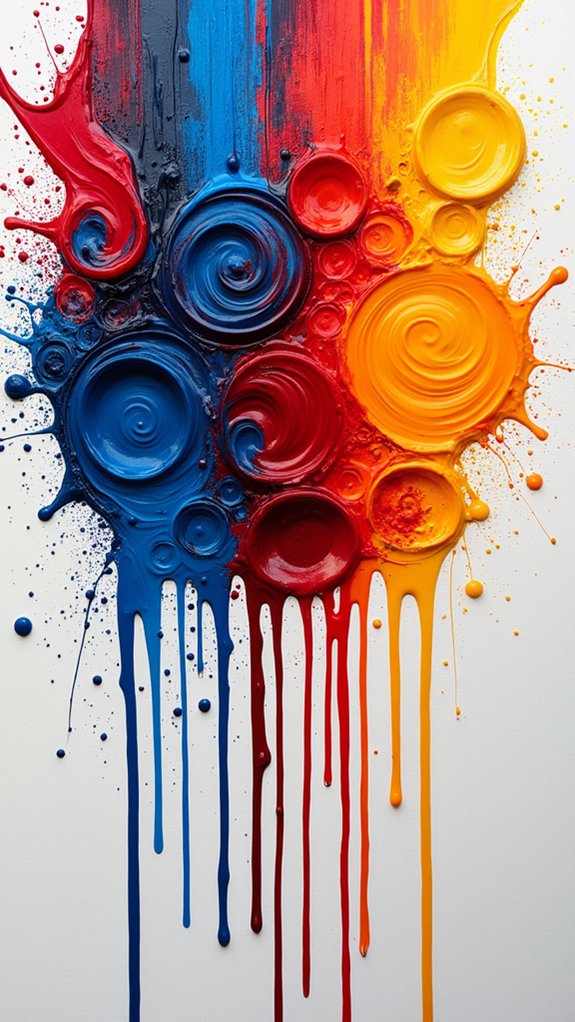
Imagine paint oozing down a wall or a canvas, frozen in time—that’s the super-cool vibe of dripping paint effects!
Using different drip techniques, artists can make their doodles look like liquid color is about to slide right off the page. Start by grabbing a wider marker and drawing curvy lines, as if real paint is dripping.
Then, level up by adding smaller drips inside with a thinner marker—this trick gives extra pop and crazy depth. Play around with line thickness to add even more energy.
Want to take it a notch higher? Try color blending by shading the drips with different hues or even cool gradients.
Dripping paint effects are fun, easy for beginners, and sure to catch anyone’s eye!
Rainbow Wave Designs
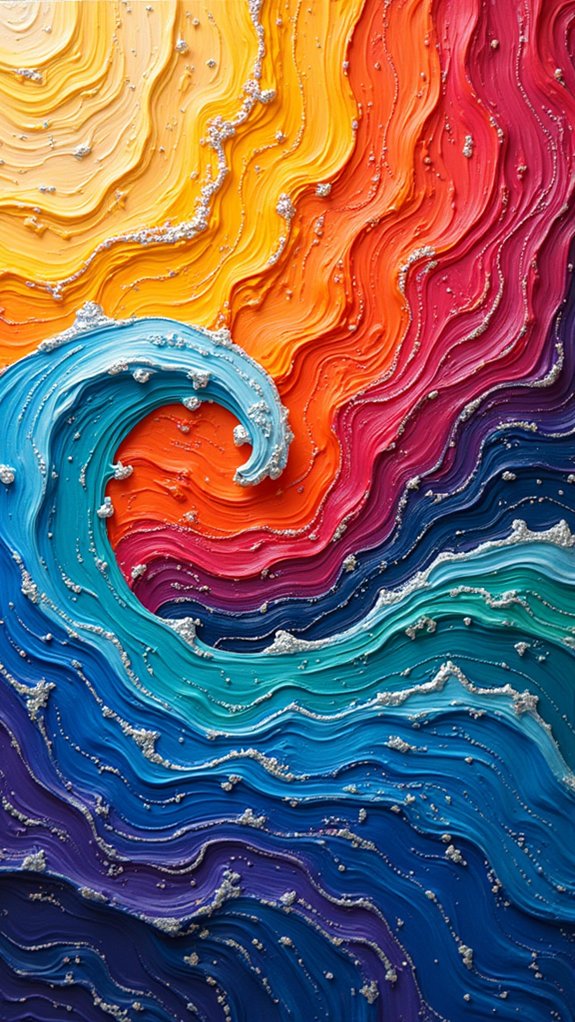
Once those paint drips have had their dramatic moment, it’s time to let the whole color spectrum crash the party—enter rainbow wave designs!
These colorful wave patterns are all about drawing wavy lines—think rolling hills, but supercharged with color. Start by sketching wavy stripes across your page. For even more eye candy, alternate normal and upside down waves, like a roller coaster for your markers!
Fill each section with vibrant color blending using markers like TwinTones or Tombow Dual Brush Pens, and don’t be afraid to go wild with the hues. Spice things up with little doodles or patterns within the waves—swirls, dots, or tiny hearts.
Anyone can do this. There’s no pressure for perfection, so just let the colors flow!
Wagon Wheel Motifs
Wagon wheel motifs are a blast to draw, starting with a neat circle and building out those classic spokes like the coolest art engineer.
Mixing up spoke patterns or playing with bold and skinny lines makes your wheel look way more interesting—who says every wheel has to match?
Bright colors and fun gradients can turn a simple wagon wheel into the star of your doodle painting, catching attention like a rainbow rolling down the street.
Drawing Perfect Wagon Circles
Even though drawing a perfect circle might sound like something only a robot could do, anyone can master the art of wagon wheel motifs with just a little practice. First, plop a dot in the center of your page—this is your secret weapon for awesome radial symmetry techniques! Grab a compass or trace around a cup to get that smooth circle outline. Next, slice your circle into equal segments with straight lines, like pizza but with fewer calories. Bring your design to life by adding smaller wagon circle variations inside, making each wheel feel extra 3D. Fill the spaces with wild circle doodle patterns or simple shading to keep things interesting.
Here are some cool ways to start:
| Step | Tool Needed | Pro Tip |
|---|---|---|
| Mark center | Pencil | Use erasable marks |
| Draw outline | Compass or object | Go slow for smooth curves |
| Add segments | Ruler | Divide equally for best symmetry |
| Inner circles | Small objects | Use coins for mini circles |
| Embellish | Pen/Markers | Mix patterns for extra pop |
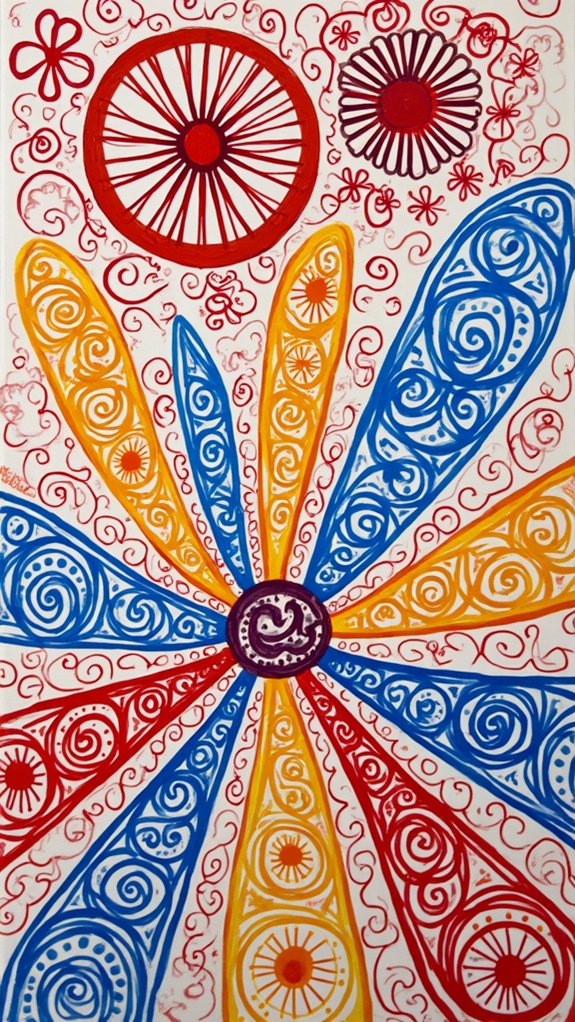
Adding Creative Spoke Patterns
Perfect circles and crisp pizza-slice segments are a total win, but now comes the really fun part—channeling all that wagon-wheel energy into creative spoke patterns that make your doodles pop off the page.
Begin by planting a bold dot at the center of your circle—that’s the hub. Next, use basic spoke arrangement techniques by drawing lines radiating out like sunbeams.
Ready for some serious variety? Try wheel design variations: add extra sets of concentric circles, each stacked with their own batch of spokes, cranking up the design drama.
Color contrast exploration is key here—mix thick and thin spokes, swap colors, and fill in the gaps with doodle classics like dots or swirls.
Suddenly, your wagon wheel motif looks less like math homework and more like art magic!
Color Techniques for Wheels
Color brings the real excitement to wheel doodles—it’s like giving your art a double shot of espresso. When working with wagon wheel motifs, artists start by drawing a circle, adding a center dot, and using bold radial line techniques to set the stage. The magic happens when experimenting with wheel color combinations between those lines—think rainbow pockets, splashy patterns, or even subtle fades using Copic markers or watercolor. Want some awesome 3D vibes? Enhancing wheel depth is a breeze if you alternate contrasting colors on either side of each radial line, and shade just one side with greys for epic dimension. Plus, sprinkle on some dots or swirls for a wow-factor finish.
| Technique | Artistic Effect |
|---|---|
| Radial line techniques | Dynamic composition |
| Wheel color combinations | Visual energy |
| Contrasting colors | Pops off the page |
| Shaded sides with greys | Enhancing wheel depth |
| Dots and swirls | Playful intricacy |
Cow Print Blob Creations
Plenty of doodlers are fans of animal prints, but cow print blob creations take things to a whole new level of fun.
Just imagine splattering your page with wild, wonky blobs—big ones, tiny ones, or in-between, all spread out for dramatic effect. If there were awards for “blob shape variations,” cow prints would definitely win!
After outlining random shapes, fill each one with smaller, uneven splotches to copy the real patterns found on cows—nature’s own funky doodlers.
For real pop, go with classic contrasting color combinations like bold black and bright white, though purple and yellow could be hilarious, too!
Extra creative points for background enhancements: color behind your blobs for serious stand-out style.
It’s a fun way to personalize doodles and moo-ve your art forward!
Frequently Asked Questions
How to Doodle Art for Beginners?
When exploring how to doodle art for beginners, one should start with basic doodle techniques using simple doodle tools. Engaging with fun doodle prompts helps foster creativity and confidence, gradually guiding novices to develop their unique artistic style.
What Are the Five Styles of Doodling?
When exploring five styles of doodling, one finds Zentangling, StenDoodling, Op-Art Doodles, Floral Doodles, and Cartoon Doodles. These doodle techniques offer creative inspiration and diverse pathways for artistic expression through structured patterns and imaginative forms.
What Are the Shapes for Doodle Art for Beginners?
The most common basic doodle shapes for beginners include circles, squares, triangles, and teardrops. These shapes, combined with simple doodle techniques, can form fun doodle patterns and help build confidence in doodle art exploration.
Can Doodle Art Be Colourful?
Doodle art can be highly colorful, as artists often use vibrant color palettes to enhance visual appeal. Layering techniques and varied doodle themes allow for experimentation, transforming simple sketches into dynamic, expressive artworks enriched with personal creativity.
Conclusion
Trying out doodle painting isn’t just fun, it’s like opening a door to your own wild imagination. Whether someone swirls spirals or drops blobs like cow spots, every new pattern is a tiny adventure on paper. Mess-ups? Just part of the magic. Beginners can mix colors, doodle mountains, or even rock some drip paint, all while laughing through those “oops” moments. With each doodle, they’re crafting art that’s totally, uniquely, and hilariously their own. So, ready, set—doodle!
Leave a Reply