
To doodle alphabet letters in Inkscape, start by typing your word using a chunky, bold font—think big, bubbly letters that look fun to draw on a notebook. Turn off the fill and bump up the stroke, then transform the text into editable paths so you can twist, tilt, and decorate each letter however you want. Add squiggles, swirls, and doodly marks—imperfection just makes it cuter! Organize them in groups, and you’ll be ready for awesome digital art adventures up next.
Key Takeaways
- Choose a chunky, easy-to-read font to give your doodle letters bold, playful outlines.
- Convert the typed letters to editable shapes and adjust stroke thickness for prominent, hollow-style outlines.
- Rotate and space out letters creatively, allowing room for embellishments and consistent negative space.
- Add cute doodles and decorative elements around the letters using freehand tools, embracing imperfections for charm.
- Group and organize your letter designs, then export them as high-quality PNG, SVG, or PDF files for sharing or printing.
Setting Up Your Workspace in Inkscape

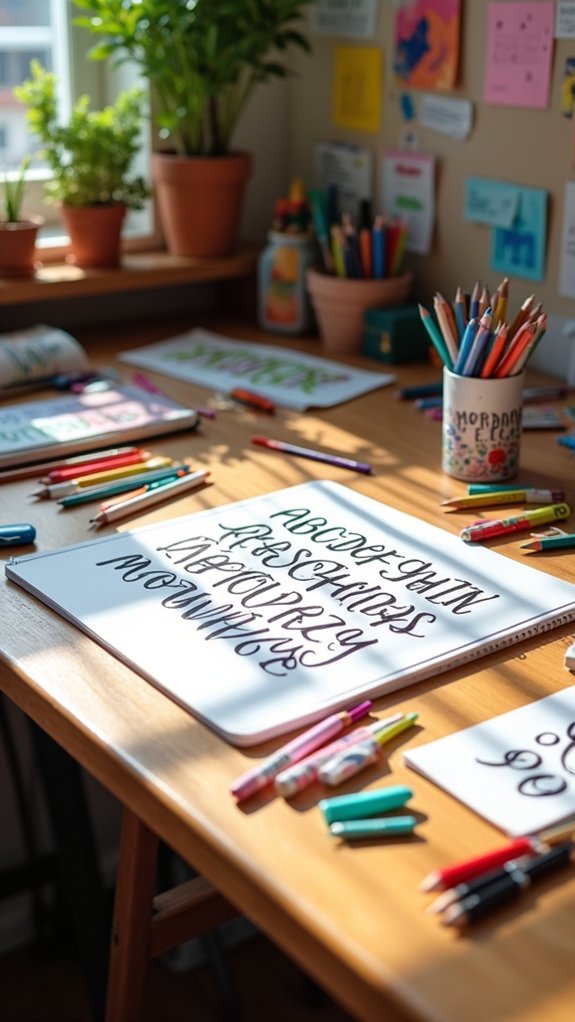
Before the magic of doodling even begins, a proper workspace is a must—think of it like prepping your desk before tackling a mountain of homework, but way more fun.
First, they need to download and install Inkscape—it’s free, which is always a plus! Once inside Inkscape, it’s smart to start a new document and set the size just right, so there’s room to make doodles big and bold.
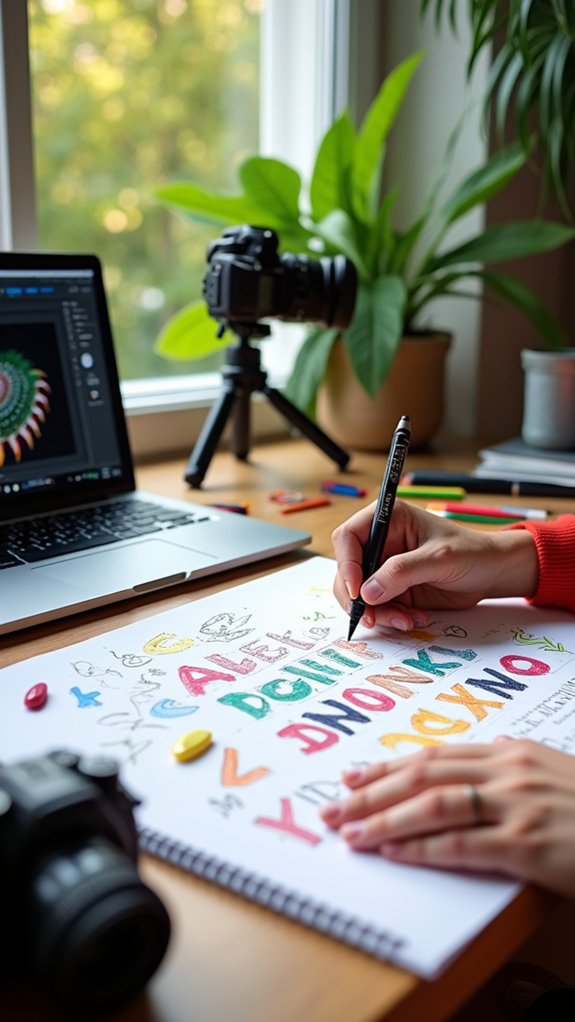
Writing their chosen word with the text tool is step one, especially if they use a chunky font like “Ask Y.” Messing with fill and stroke settings allows the letters to pop—hello, personality!
With the selector tool, it’s super easy to move, resize, and tweak letters before diving into the fun part: actual doodling.
Choosing the Right Font for Doodle Letters
Picking the perfect font is like choosing the main character for a comic book—it sets the whole mood and gives personality to the letters.
When doodling, chunky, bold fonts instantly make things feel more playful and give you tons of space for adding those cute little embellishments—like stars, dots, or even tiny pizzas if you’re hungry for creativity!
Look for fonts in the display or decorative categories on sites like Creative Fabrica. These are designed for art and usually amp up your doodle game. Fonts such as “Ask Y” are great choices because they’re thick and easy to read, which is super important.
Mixing up font weights and styles is a smart move too, because it helps you discover what fits your vibe best.
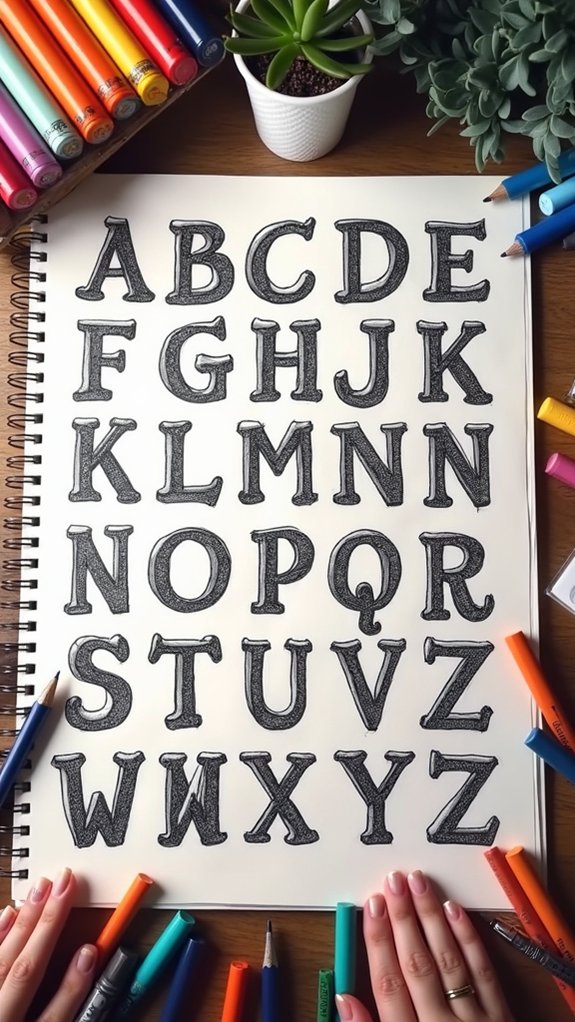
Creating Hollow Alphabet Outlines

Magic happens when hollow alphabet outlines start taking shape—they’re like empty rooms just waiting for someone to move in and throw a party!
To pull this off in Inkscape, begin by typing out your favorite alphabet letters using a chunky font such as “Ask Y.” Big, bold letters give the best hollow outlines.
Next, head to the fill and stroke tool—shut off the fill by clicking the ‘x’, then add a bold stroke by picking the first solid box. Crank the stroke thickness to around 1.65; hello, awesome outlined letters!
Convert your text to paths using “Path” > “Object to Path,” so you can shape and size each letter. Duplicate, tweak stroke widths, and layer the outlines for a funky, standout look.
Group everything together—mission accomplished!
Transforming Text Into Editable Paths
Time to supercharge those basic letters—by turning them into editable paths, suddenly every letter becomes your playground in Inkscape!
Just select your text, then hop over to “Path” and choose “Object to Path.” Boom: each letter is now a flexible vector shape, ready for all your creative doodle ideas!
This means you can stretch a letter, spin it around, or move it anywhere on your canvas—each one acts independently, no teacher supervision required.
Want hollow letters for that doodle flair? Easy! Just turn off the fill and add a stroke. Bring that stroke thickness up to about 1.65 to really make those outlines pop.
Pro tip: Use Ctrl+G to group your new doodle letter friends so managing them is a breeze!
Arranging and Customizing Individual Letters

Now comes the really fun part—messing around with each letter to make your doodle pop!
Rotating a letter at a wild angle, playing with spaces between them, or even grouping a bunch to move them as a squad can totally change the vibe and catch people’s eyes.
Sometimes a letter just needs a little tilt or a buddy right next to it to go from “meh” to “whoa, look at that!”
Rotating Letters Creatively
Even though regular letters just sit in a boring, straight line, doodle letters like to break the rules!
Inkscape users know that rotating letters creatively can totally change the mood of a word—from silly and wild to cool and mysterious. Just grab the selector tool and click on any letter, then give it a little twist to the left or right.
Try spinning individual letters at all kinds of different angles for an arrangement that feels alive and fun, not stiff like those lines on a notebook page.
Want to go one step further? Layer a couple of letters with a tiny overlap, making them look like they’re jumping over each other.
Once the letters look perfect, group them together with Ctrl+G—so they’ll stay exactly how you want!
Spacing for Visual Impact
Once letters are twisted and overlapped in fun ways, there’s another trick that brings any doodle word to life—spacing!
Spacing for visual impact isn’t just about chunking letters side by side. Instead, each letter gets its own personal space, kind of like how siblings fight for the best seat on the couch.
In Inkscape, using the selector tool to rotate, slide, and spread out each letter lets you play with distance, totally changing the vibe of your doodle.
Think about negative space—those blank spots between letters actually help your design breathe, making it pop instead of looking squished.
For an extra polished look, keep the gaps mostly consistent, creating a beat that guides eyes across the word. Suddenly, your letters look lively and planned, not just tossed together!
Grouping for Easy Management
Grouping is like giving all your wild, wiggly letters a secret handshake so they’ll stick together and cooperate.
In Inkscape, grouping for easy management means you can work with your creative alphabet as a team instead of as lone wolves.
First, select all your cool creations by dragging a box around them or clicking each one while holding Shift—it’s like herding cats, but more satisfying.
When they’re all highlighted, press Ctrl+G or use the Object menu to lock them into a single group.
This way, you can move, resize, or duplicate all your doodle letters at once.
Need to tweak one sneaky letter later? No biggie!
Un-group them with Ctrl+Shift+G, fix what you want, and group them again.
Easy peasy masterpiece magic!
Designing and Placing Decorative Letter Outlines

While diving into the creative world of doodling, designing and placing decorative letter outlines is where things really start to get exciting.
Picture yourself opening a toolbox packed with fun options—suddenly, your letters can wear their own fancy “jackets!” To start, artists convert letters to paths, letting them tweak each letter like pieces in a puzzle.
Next, making a duplicate of the letters helps create an outline around the originals. This outline can be made skinnier or thicker for a cool layered look. Getting a little wild, artists even tilt or rotate these duplicated outlines to add visual pop.
Here’s how to make your outline around stand out:
- Convert text to paths for full control.
- Duplicate letters for your outline.
- Adjust stroke widths for layering.
- Play with position and rotation for extra style!
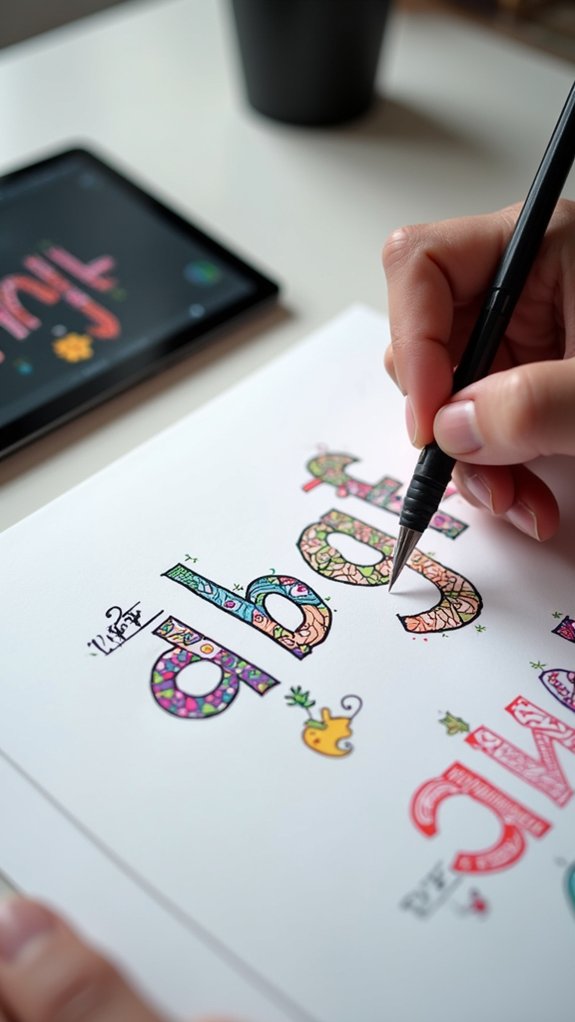
Enhancing Letters With Stitch Marks and Squiggles

Jump right in and watch your letters come alive with playful stitch marks and wild squiggles!
Imagine each letter on the page getting its own cozy sweater: just whip out the Bezier curve tool in Inkscape, click to lay some points, and bend them until they look like a real thread was stitched along the edge. Set the stroke width to .65 and pick the middle join for rounded, friendly ends—almost like tiny, adorable noodles.
Feeling lazy? Hit Ctrl+D to duplicate your favorite stitch marks, then go wild moving the points with the nodes tool for extra flair. Change up the size and spacing to keep things unpredictable.
Before you know it, your letters will have more personality than your class hamster.
Creating Swirls and Freehand Embellishments
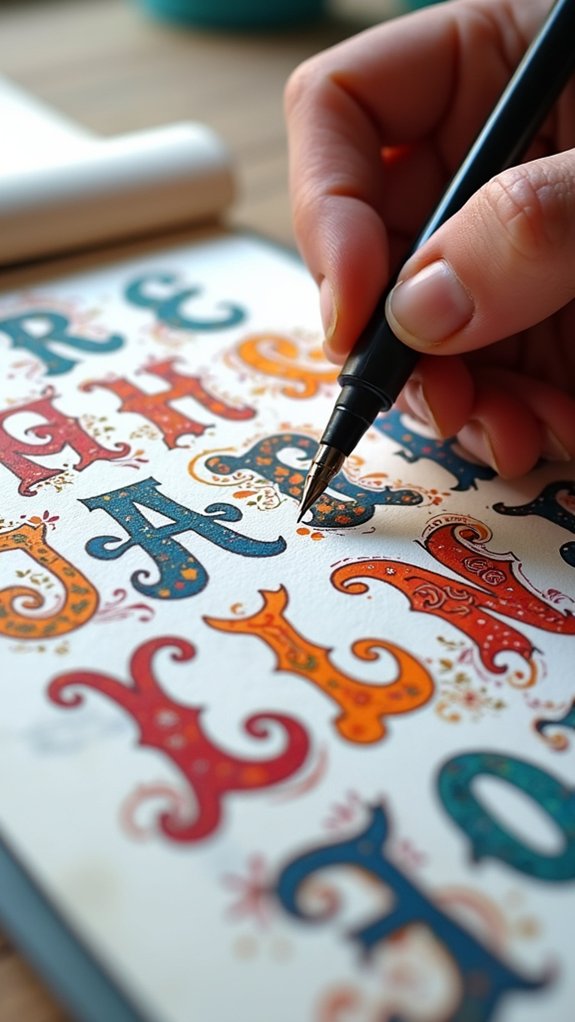
Not every letter has to be all straight lines and boring shapes—sometimes, it’s the wild swirls and wonky curls that make the whole word pop off the page!
For anyone wanting a cute doodle effect, adding swirls and freehand embellishments is the secret sauce. In Inkscape, using the calligraphy pen tool with a dip pen preset makes those defined, swirly strokes shine.
Ready for some magic? Here’s how it’s done:
- Choose the calligraphy pen and set width to 3 or 6 for bold, eye-catching squiggles.
- Draw your swirls freehand with the mouse—imperfection is a part of the charm!
- Accidentally added a wild wiggle? Just hit delete to tidy up.
- Duplicate (Ctrl+D), rotate, and move squiggles for maximum cute doodle variety!
Grouping and Organizing Your Doodle Letter Design
After piling on all those flashy swirls and cartoonish squiggles, things can start to look a bit wild and messy—kind of like your snack drawer after movie night. To tame that artistic chaos, grouping becomes your magic trick in Inkscape. First, organize each doodle letter—give them some space, line them up, make them shine. Then, select everything, and hit Ctrl+G or use the Object menu to group. This lets you move or scale your whole doodle alphabet at once, keeping everything neat. But wait, layers help too! Use them to separate outlines from decorations. Labeling groups and layers means you’ll never lose track, even when doodle mania strikes.
| Grouping Tip | Purpose |
|---|---|
| Use Ctrl+G | Group letters for easy moving |
| Separate with layers | Keep outlines/doodles organized |
| Label everything | Find pieces quickly later |
Exporting Your Doodle Alphabet Art for Use
Now comes the fun part—getting your awesome doodle alphabet out of Inkscape and into the world!
First, it’s super important to group your artwork so nothing gets left behind, and then you can pick just the section you want to export, which saves a ton of time (and possible headaches).
Next up is picking the right file type, because nobody wants their hard work looking like a pixelated mess in the wrong format!
Grouping Artwork Efficiently
The magic of putting all your doodle letters together can feel a bit like wrangling a group of hyperactive puppies—fun, a little chaotic, but totally worth it.
Grouping artwork efficiently means you can move, resize, or export every letter as a team instead of a scattered mess. Before anything else, make sure every part is lined up perfectly—crooked letters can throw your whole vibe off!
Here’s a handy list of what to do:
- Select all your doodle letter pieces by dragging a box around them.
- Press Ctrl+G or choose “Group” from the menu to lock them together.
- Double-check that everything is aligned for design integrity.
- Now your letters are a single unit—easy to move or edit!
This teamwork makes exporting totally stress-free!
Exporting Selected Artwork
Envision this: the doodle alphabet masterpiece is finally grouped up, lined perfectly, and it’s looking awesome—so what’s next?
Time to set it free from the art program by exporting selected artwork! To get started, make sure everything is actually grouped by selecting all the letters, then hitting Ctrl+G, or using the “Group” option in the object menu.
Next, bop up to the “File” menu and find “Export.” Here’s a big tip: make sure you’ve chosen to export only the selected area, so your beautiful alphabet doesn’t leave with any weird extra background.
Pick a file format and choose a crisp resolution for those epic details. Finally, name your file, select where it goes, and—bam! It’s ready for the world.
Choosing Export Formats
All right, with the doodle alphabet artwork grouped up and ready to roll, it’s time to figure out what kind of file it should become when you hit export.
Picking the right export formats isn’t just about techy stuff—it makes using or sharing your masterpiece way easier later on!
Check out these options for exporting doodle alphabet art:
- PNG – Great for a high-quality image that keeps all your colors bright—plus, it works almost everywhere.
- SVG – If you want your art super crisp, no matter how much you zoom in (perfect for T-shirts!).
- PDF – This one’s awesome for sharing or printing and keeps all the layers for any future tweaks.
- DPI settings – Boost resolution for clear prints; just don’t forget to name and save at an easy spot!
Frequently Asked Questions
How to Doodle for Beginners Easy?
When beginners seek easy doodling, they benefit from starting with simple shapes, gradually building confidence. Exploring basic doodle techniques, such as practicing lines and curves, experimenting with stroke widths, and duplicating elements, encourages creativity and mastery of fundamental concepts.
How to Do Bubble Letters for Beginners?
Creating bubble letters for beginners involves selecting bold letter styles, using tools to outline each shape, and rounding corners for a soft, inflated look. Personalization can be achieved by adding unique outlines or decorations to each letter.
How to Make Doodle Text?
Creating doodle text involves applying various doodle techniques to letters, such as adding bold outlines, playful decorations, or quirky shapes. Users typically modify fonts, adjust stroke thickness, and embellish text with creative doodle elements for unique results.
How to Doodle Patterns Step by Step?
When exploring doodle techniques, one can start by sketching basic shapes, then adding repetitive lines, dots, or patterns around them. Utilizing diverse tools and adjusting stroke widths creates texture, while grouping elements results in cohesive, visually interesting designs.
Conclusion
And that’s a wrap! With these easy steps, anyone can doodle fun, bold letters in Inkscape—no magic powers required. It’s all about experimenting, personalizing each letter, and not freaking out if your swirl looks more like spaghetti. Remember, mistakes can actually make your doodles cooler (happy accidents, right?). Now you’re ready to show off your alphabet art and make your friends say, “Whoa, did you really draw that?” Go wild and keep doodling!
Leave a Reply