
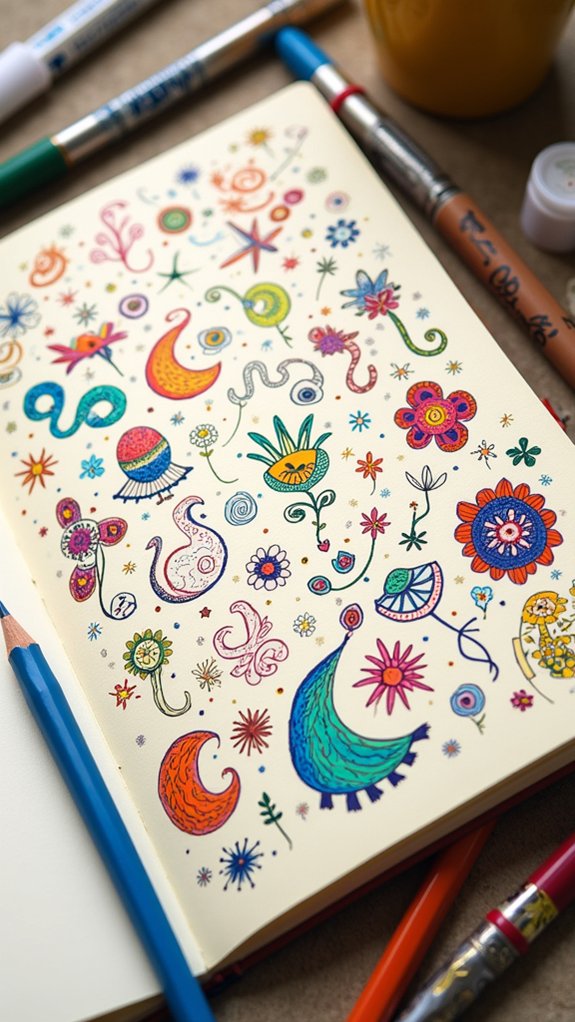
Anyone can have a blast with these 15 fun and easy doodle designs—think eye-popping spiral op-art, bouncy clover fields, and wild Keith Haring-inspired squiggles. Want cuteness? Try silly animal or snack sketches with big, goofy eyes! Into nature? Mountains and flowers are quick to draw, and ocean or space doodles add adventure. Even simple things like fruit or random objects become awesome with playful patterns and bold lines. Stick around and get ready to fill your page with pure creative joy!
Key Takeaways
- Spiral Op-Art doodles with wavy lines create hypnotic, relaxing patterns that are easy to start and endlessly customizable.
- Cute animal sketches use basic shapes and playful expressions, making them accessible and fun for all skill levels.
- Mountain and nature-inspired doodles add depth and adventure using simple triangles, squiggly lines, and creative shading techniques.
- Abstract Keith Haring style doodles incorporate bold shapes, thick outlines, and vibrant colors for energetic, mistake-friendly artwork.
- Fruit and snack doodles turn everyday foods into cheerful designs with bold lines, bright colors, and whimsical faces.
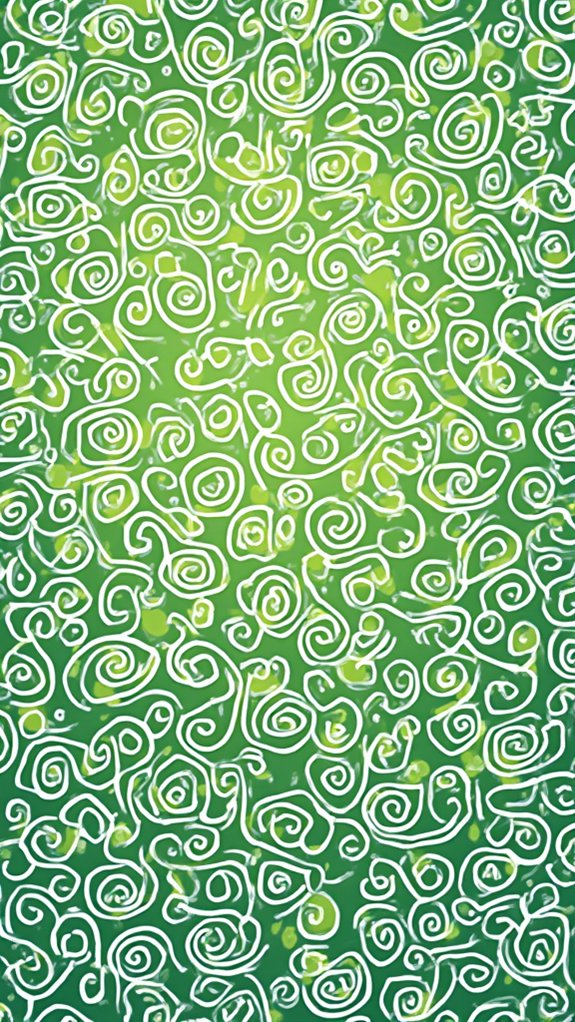
Spiral Op-Art Doodles

Curiosity springs to life when it comes to Spiral Op-Art doodles—these wild, eye-catching designs seem to dance right off the page.
Picture starting with something as simple as a dot, then letting wavy lines ripple out in every direction. Just like magic, these easy doodles turn into optical illusions that totally pop!
For a neat 3D twist, upside-down “u” shapes get tucked between the lines, adding a cool bouncy vibe. Changing up the line thickness or spacing keeps things fresh and lets creativity run wild—no two doodles end up the same.
Drawing Spiral Op-Art doodles is relaxing, almost like getting hypnotized by simple things.
And honestly? Adding color gradients or tiny patterns brings a whole new level of wow.
Clover Field Op-Art Doodles
A burst of green inspiration comes alive with Clover Field Op-Art doodles, turning any blank page into a garden of quirky shapes and mesmerizing patterns.
To start, make sure you use three or four teardrop shapes connected at the top—this forms the base of your clover. Then, inside each petal, draw a smaller teardrop to increase the wow-factor and visual detail.
But don’t stop there! Add extra teardrops around the outside for a super lush look. These little doodles work together to fill your space, turning every patch of white into a leafy pattern.
If you love mixing things up, try using different sizes or angles for your teardrops. And, if you want extra inspiration, be sure to check your own imagination!
Abstract Keith Haring Style Doodles

Abstract Keith Haring style doodles are all about letting loose with bold, spontaneous shapes—think wild circles, triangles, and lines that zip around the page like they’re late for class.
This style brings a burst of energy, as random shapes connect and mix together to form patterns that almost look like they’re dancing.
It’s the kind of doodling where mistakes don’t exist, so artists can just have fun and see where their squiggly lines and wild shapes take them.
Embracing Bold, Spontaneous Shapes
Color bursts onto the page in Keith Haring-inspired doodles, where bold, spontaneous shapes take center stage and rules seem to disappear for a while.
These abstract doodles love jumping from circles to triangles and everything in between, with each swoop of the pen making the design even better. Haring’s vibe means it’s not about making things perfect—it’s about mixing wild squiggly lines with big shapes for maximum fun and movement.
With a background full of these energetic forms, the page feels alive, almost as if it’s buzzing with ideas. There’s no stress about a story; it’s all about letting your creativity loose and seeing what appears.
- Try sketching random shapes of all sizes
- Let lines overlap, twist, and wiggle
- Splash on bright, happy colors
- Celebrate mistakes—they make art even better
Creating Energetic Abstract Patterns
When a pen hits the paper and starts throwing down wild lines and shapes, that’s when things really get exciting—especially in the style of abstract Keith Haring doodles. These energetic abstract patterns channel the wild heart of abstract expressionism techniques, turning doodling into a high-energy adventure. Start by sketching funky circles and sharp triangles, letting them overlap wherever they want. Drop in a squiggly snake-like line that weaves and wiggles all over the page—hello, spontaneous line exploration! Now, grab those markers or colored pencils and go wild with playful color combinations. Bold outlines and vibrant colors make everything pop, just like street art. The table below breaks down the essentials:
| Movement | Color Vibe | Doodle Secret |
|---|---|---|
| Squiggly energy | Neon + pastels | Random overlaps |
| Zigzag flow | Bold contrasts | Thick outlines |
| Free loops | Primary explosions | No rules allowed |
| Bounce shapes | Monochrome magic | Happy mistakes |
| Dash patterns | Rainbow sprinkles | Keep moving fast |
Flower Doodles
Flower doodles are a fun way to get creative, and they usually begin with a simple center circle before adding all kinds of petals around it.
Some artists like to add extra layers or funky petal shapes, then bump up the wow factor by sketching patterns or using different shades to make their flowers pop off the page.
Whether someone sticks with one flower or fills the whole page, there’s a lot to explore with new petal ideas and surprising details that keep things interesting (and way less likely to look like every other flower in the history of doodles).
Step-by-Step Flower Sketches
Even if someone doesn’t consider themselves an “artist,” drawing cool and creative flowers is totally within reach—no secret handshake required.
Step-by-step flower sketches start with a plain circle in the center (think donut or bagel vibes), jazzed up with tiny circles or swirls for a bit of texture. Next comes the fun: five or six bold petals radiate out, with room left for creative petal shape variations.
Layering extra petals and switching up their forms adds amazing dimension. Thin pen lines inside each petal instantly boost the look, making it pop off the page.
Experimenting with doodle composition techniques, like mixing different flower sizes and playing around with placement, helps make the whole doodle cohesive—and unforgettable.
- Try wild flower color combinations
- Outline petals with thick markers
- Mix up petal shapes every time
- Fill a page with different flower layouts
Creative Petal Variations
Petal power is where things really get interesting for any doodle artist, professional or not. Playing around with different petal shapes—like rounded, pointed, or double-layered—can totally transform basic flower doodles into wild floral patterns that seem to leap out at you.
For a splash of excitement, it helps to mix a bunch of flower types and sizes all in one spot. Want to go even further? Try out texture techniques by filling those petals with tiny dots, swirls, or zig-zags. The more patterns, the cooler your flowers look!
And, if someone grabs markers or colored pencils, petals can explode with color, popping right off the page. With just a bit of creativity, doodled gardens never have to be boring.
Adding Detail and Dimension
Whenever someone wants to take their doodled flowers from flat and simple to wow-worthy, adding detail and dimension is the secret sauce. It’s like giving flowers a 3D upgrade—suddenly, things look way cooler!
Start by using flower layering techniques: stack petals in layers, each with different shapes and sizes, for that dynamic “jumping off the page” effect. Don’t forget clever petal pattern ideas, like filling petals with swirls, dots, or zig-zags using a thinner pen for extra pop.
Mix up flower styles—think daisies one day, tulips the next. Doodle composition tips? Combine flowers with leaves or cool geometric shapes to complete the masterpiece.
Here’s a handy list to remember:
- Layer petals for depth
- Fill petals with patterns
- Vary flower types
- Add leaves or shapes
Mountain Sketches
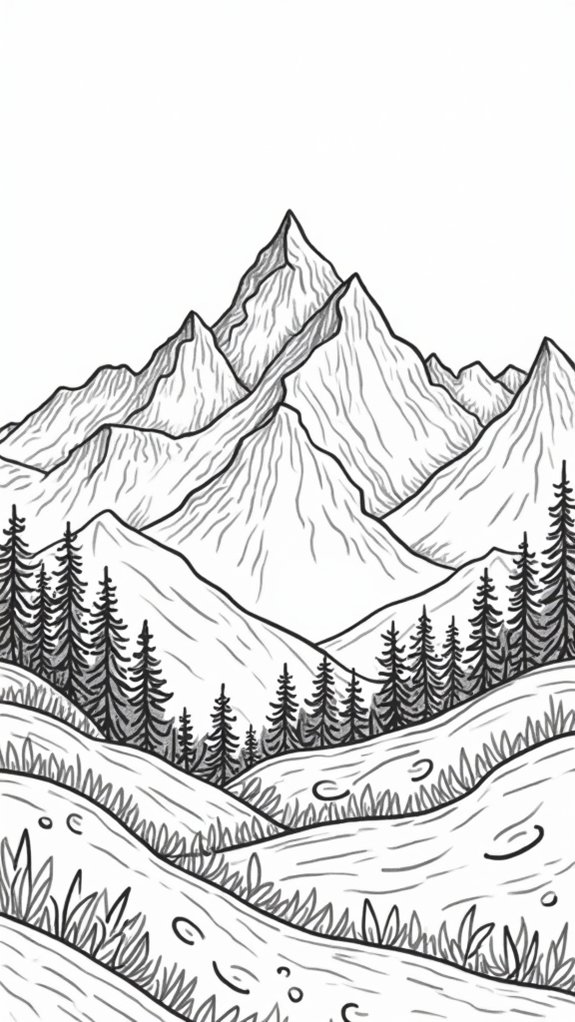
Adventure is waiting on a blank page, especially when it’s time to draw mountain sketches.
Think of mountain layering techniques like stacking your favorite sandwiches—each “layer” is a different mountain peak, with some tall, some short, creating a realistic mountain range. Start with wavy triangles, then divide them using squiggly lines to build depth.
Sketching mountain textures means picking the right marker: use a thicker one for the mountain’s base, and a thinner pen to add scratchy shadows or eye-catching patterns on one side, making it pop. Close lines equal shadows, wide lines scream sunlight!
Don’t forget about adding nature elements, like scraggly trees or goofy clouds. Together, they make your mountain sketches feel wild, adventurous, and totally alive!
Rose Drawings
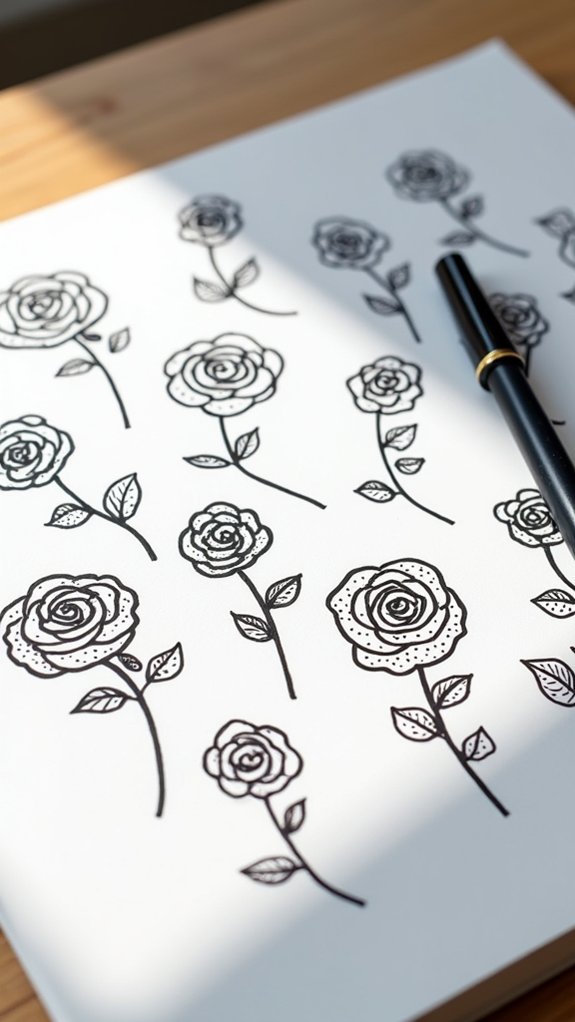
Drawing roses might sound tricky, but breaking it down into simple steps—like starting with a tiny circle and adding petals one by one—makes it way less scary and kind of fun, actually.
Layering the petals so they overlap (without making them look like a weird stack of pancakes) gives your rose some serious style, and throwing in a little shading makes the flower pop right off the page.
If you’ve ever wanted your doodles to look more like flowers and less like blobs, these tips can turn any so-so sketch into a seriously cool rose.
Simple Steps for Roses
Kick off a rose doodle, and suddenly, it feels like you’re doing a magic trick—turning circles and squiggles into an actual flower!
Drawing a rose starts with a tiny circle in the middle, which becomes the heart of your masterpiece. Around this, artists sketch overlapping petals, letting them grow and twist as the rose blooms across the page.
A mix of petal shapes—curved, pointy, a little wobbly—gives attitude and energy. Playing with rose color, whether classic red or wacky blue, makes each flower unique. Adding quick shading techniques or soft lines inside the petals creates that lifelike wow factor.
- Start with a small center circle for your rose.
- Use overlapping petals with varied shapes.
- Play with rose color for personality.
- Try basic shading techniques for depth.
Layering Petals Easily
Once the center of the rose is in place and a few petals are swirling out, things really start to get interesting—it’s like each new petal makes the flower come alive right on the page.
Using smart petal layering techniques, artists can stack petals around that first tiny circle, letting each new layer get a little larger.
Here’s a cool rose drawing tip: don’t be afraid to mix up petal shapes—try some rounded, some slightly pointy—to make your flower look naturally wild, kind of like it just grew there!
Adding thin lines or soft curves inside each petal really helps with enhancing floral designs, making the rose feel rich and full.
Play with colors, too, if you’re feeling bold—a splash of red or pink is never wrong!
Adding Dimension and Texture
Bring your rose drawings to life by giving them a real sense of depth and texture—it’s like turning a 2D doodle into something you could almost pluck off the page!
To get this magical effect, try starting your rose with overlapping petals around a central circle, making each petal grow larger as it moves outward. Depth creation really pops when you shade one side of each petal with a darker marker or pencil for that dramatic light-versus-shadow vibe.
Play with texture techniques: use thicker lines for outer petals and go thin for those tiny, inner curvy details. Amp up the visual interest by adding swirls or little dots inside the petals.
And don’t forget—leaves and stems with mixed greens make the whole thing feel seriously dimensional.
- Overlap petals for layered depth
- Shade one petal side for contrast
- Vary line weights for texture
- Add patterns for extra visual interest
Drip Patterns
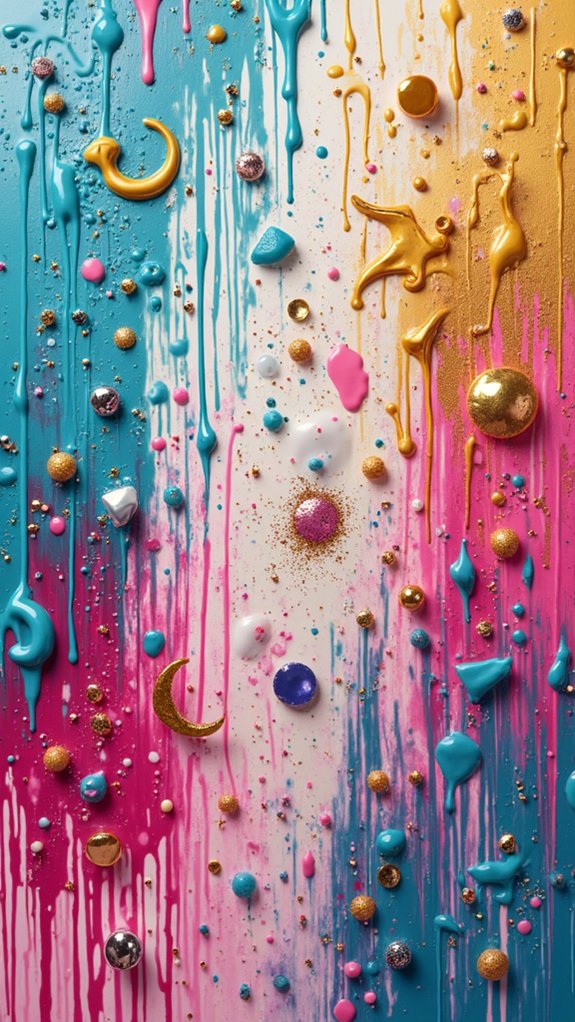
Even though they might look like a happy accident, drip patterns are actually a super cool doodling technique that lets artists play around with all kinds of looks. Drip techniques start with a bold, wide marker for those big, curvy drip shapes—think of gooey paint sliding down a wall! Add thinner, wiggly “drips” inside with a fine-tip pen to kick up the depth. Choosing wild color combinations or layering drips on top of other doodles reveals a whole new world of artistic layering (and chaos, in the best way possible). Drip patterns are super flexible: use them as funky backgrounds or stars of your page.
| Drip Tool | Color Combinations | Artistic Layering |
|---|---|---|
| Wide Marker | Blue + Green | Over Geometric Dots |
| Thin Pen | Red + Yellow | On Florals |
| Both Markers | Monochrome | Pure Drip Design |
| Mixed Tools | Pastel Mix | Behind Text |
| Eraser Method | Rainbow Splash | Under Borders |
Rainbow Wave Designs
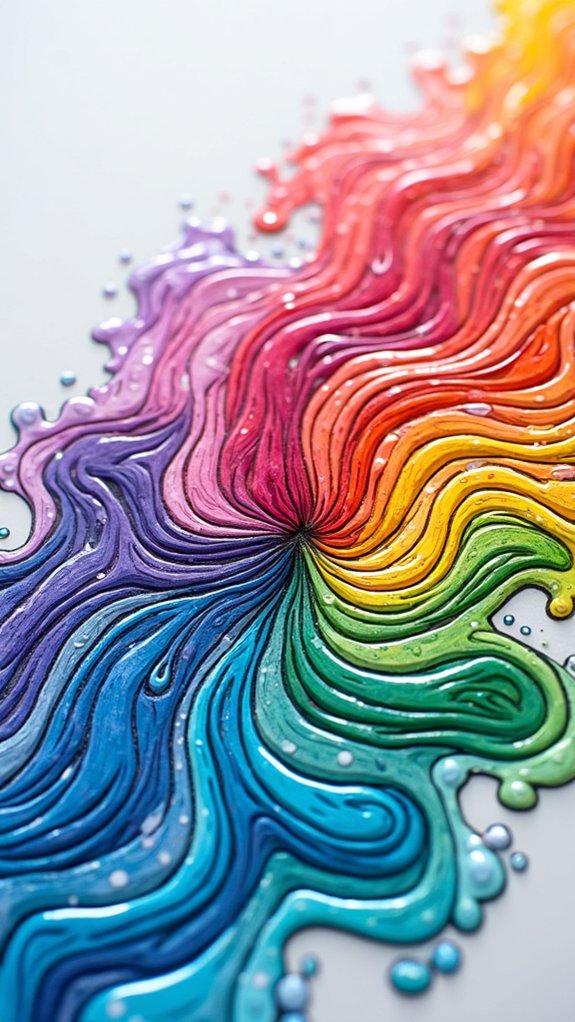
Rainbow wave designs are all about creating wavy lines across your page, filling them in with bright, cheerful rainbows, and letting your imagination run wild with patterns.
To get started, there’s a simple step-by-step process for drawing the waves, making color choices that really make things pop, and experimenting with fun twists like thick waves, extra sparkles, or even upside-down rainbows.
Whether you want to follow some easy tips or totally go your own way, these designs are perfect for anyone who loves doodling and doesn’t mind a little burst of happiness on their paper.
Step-by-Step Drawing Process
Wavy lines zoom across the page like wild roller coasters, twisting and dipping wherever the artist’s hand wants them to go.
To start the step-by-step drawing process, the artist draws a bunch of wavy horizontal lines, letting some overlap and others stop mid-ride—nobody said doodles had to behave!
Spaces between the lines become playgrounds for rainbows, each one using bold or blended color blending techniques. For extra zing, the artist experiments with line thickness variations, making some waves chunky and others skinny.
Bored with blank spots? Why not fill them with creative doodle patterns like mini stars, dots, or even tiny smiley faces popping up out of nowhere?
- Make crazy, twisting wavy lines
- Alternate rainbow arcs: up and down
- Try wild color blends and contrasts
- Doodle fun patterns in empty spots
Color Selection Tips
While picking colors for wild rainbow wave doodles, it’s almost like opening a treasure chest full of markers and pencils—where do you even start?
First, stick with vibrant color palettes that shout for attention—think bold reds, electric blues, sunny yellows, and punchy greens. Using color contrast techniques, like picking tones that are opposite each other on the color wheel, makes your waves bounce off the page.
Stuff is way less blah when you mix warm tones or cool tones for different vibes. For dreamy gradient blending tips, start your waves with a soft yellow and slowly add darker oranges or deep reds, letting the shades melt together.
Grab markers with different tip sizes to layer and add cool, eye-popping depth.
Creative Variations Explored
Jump into the world of rainbow wave designs, and it’s like giving your doodles a ticket to the amusement park—suddenly, everything feels more exciting!
These playful patterns start with simple wavy lines stretched across the page. By tweaking the width and curve, anyone can create unique styles that stand out.
Don’t just use one color—grab all those vibrant colors in your pencil case and go wild! Fill each wave section with classic or upside-down rainbows to make your doodle burst with personality.
Rainbow wave designs don’t just look cool—they’re perfect for backgrounds in journals or planners, making your notes pop.
Here’s how to make the most of rainbow waves:
- Mix up wave heights
- Alternate rainbow directions
- Experiment with bold colors
- Add simple doodle accents
Wagon Wheel Patterns
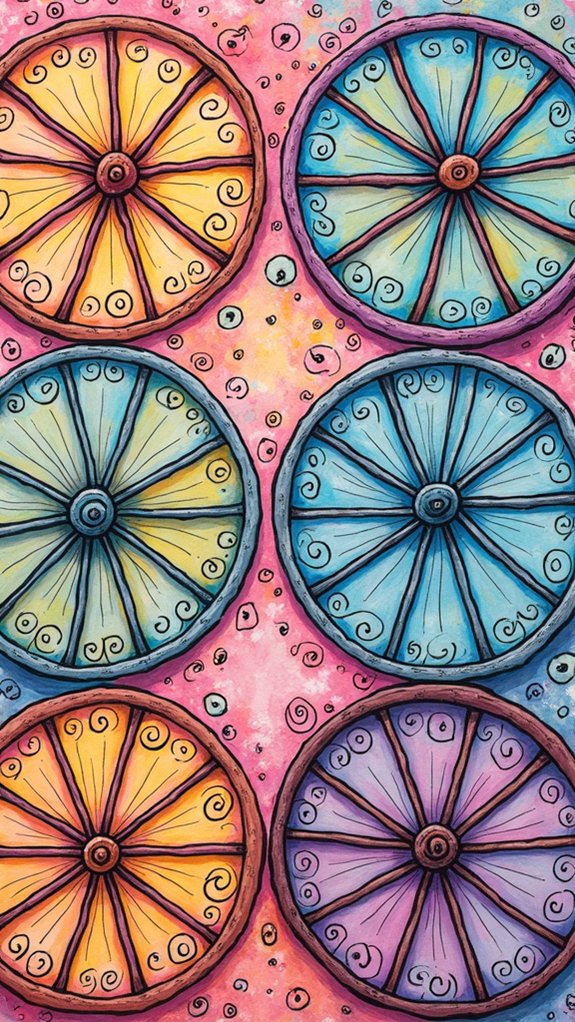
A burst of lines spinning out from a single point—that’s the magic behind wagon wheel patterns!
These classic wagon wheel designs start with a simple circle and a dot right in the center, just like a wheel’s hub. Next, straight lines are drawn from the hub to the edge—these are your decorative spokes, giving the whole pattern wild, circular symmetry.
Want to make it cooler? Add more circles, change up the sizes, and soon you’ll have a full wagon wheel parade marching across your page!
Each wheel can look totally different, especially if you fill the rims with dots, zigzags, or other creative patterns.
Wagon wheel patterns are a blast to doodle and make any sketchbook spin with personality and fun!
Cow Print Blobs
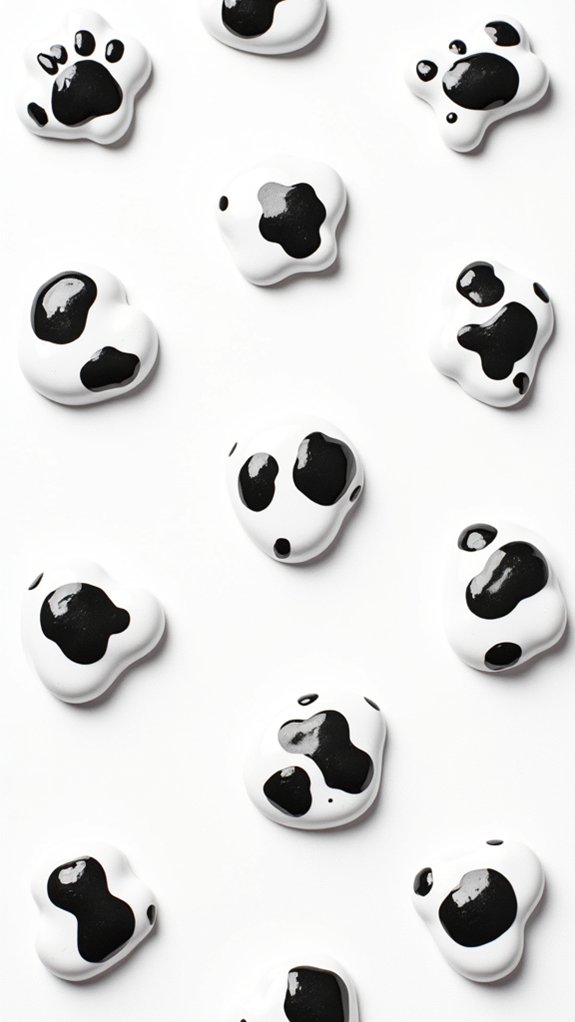
Swapping out all those neat wagon wheels for something a little wilder, cow print blobs let the imagination go completely free-range.
With this doodle style, anyone can toss the ruler aside and just let their pencil travel across the page, creating random, snazzy blobs. Using blob customization techniques is part of the fun—change up the size, overlap a few shapes, and fill each with smaller blobs for cool abstract layering methods.
For those craving extra drama, try adding pops of color around the blobs. The color contrast effects really make the cow-inspired doodle stand out in a crowd of sketchbooks—talk about moo-ving art!
- Draw freeform blobs for natural, random patterns
- Fill blobs with smaller shapes for texture
- Experiment with layering for depth
- Use color backgrounds for bold contrast
Cute Animal Sketches
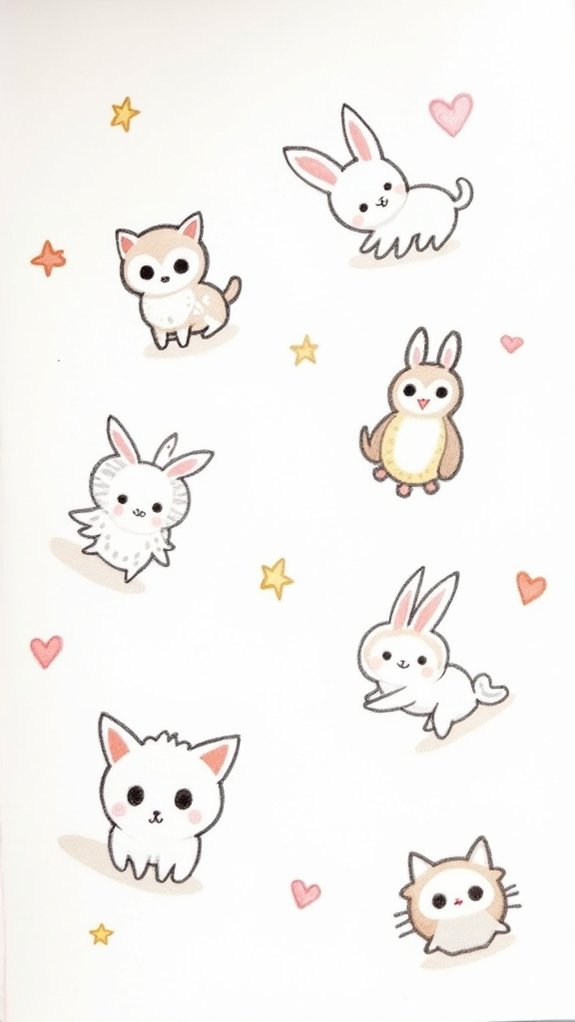
Let’s be real—there’s just something totally irresistible about cute animal sketches. Maybe it’s those big, sparkling eyes or the goofy, unexpected animal expressions that always seem to make people smile.
Drawing adorable animals doesn’t have to be complicated; in fact, most cute doodles start with really simple geometric shapes, like circles for heads or triangles for ears. It’s almost like playing with building blocks, but with a pencil.
Extra charm comes from playful poses—think a cat stretching or a bird puffing its chest out. Add a couple whiskers, some quirky patterns, and maybe a bowtie or a tiny hat, and suddenly, that sketch has tons of personality.
Cute animal sketches really prove that you don’t need fancy skills to create something super fun!
Fruit and Snack Doodles
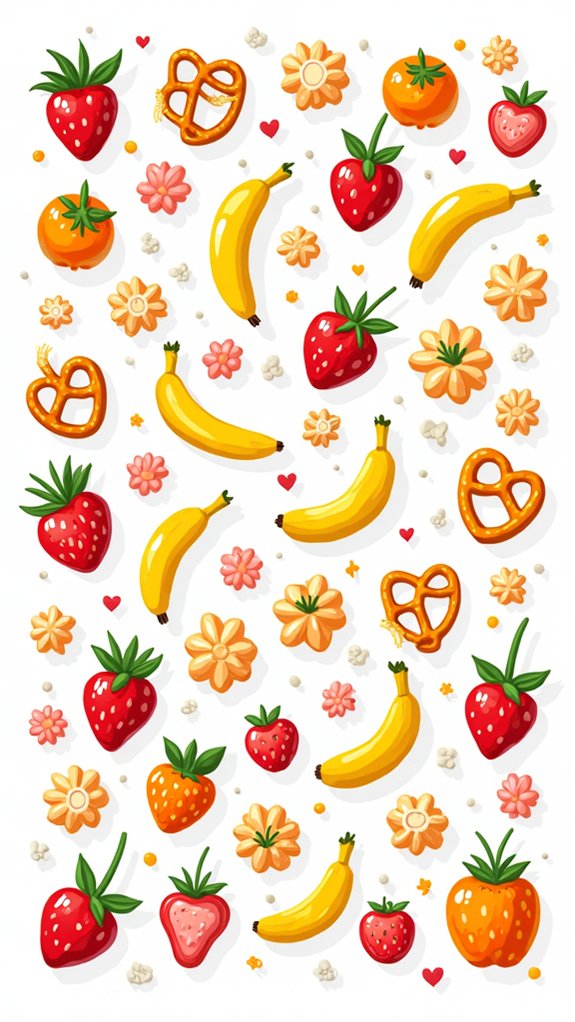
Fruit and snack doodles bring a burst of energy to any sketchbook page, kind of like a mini party for your pencil.
Drawing juicy fruits like apples or bananas using easy fruit doodle techniques is a great way for anyone to get started, no matter their skill. With snack doodle variations, like goofy pizza slices or cupcakes topped with epic swirls, these sketches become seriously fun.
Throw in creative fruit patterns and some wild colors, and suddenly your doodles can light up a journal—or even make you smile on a cloudy day. Who knew a doodled strawberry could look this cool?
- Try bold, wavy lines for apple doodles
- Experiment by giving snacks funny expressions
- Mix creative fruit patterns in the background
- Go wild with color to make your snacks pop
Ocean-Inspired Drawings
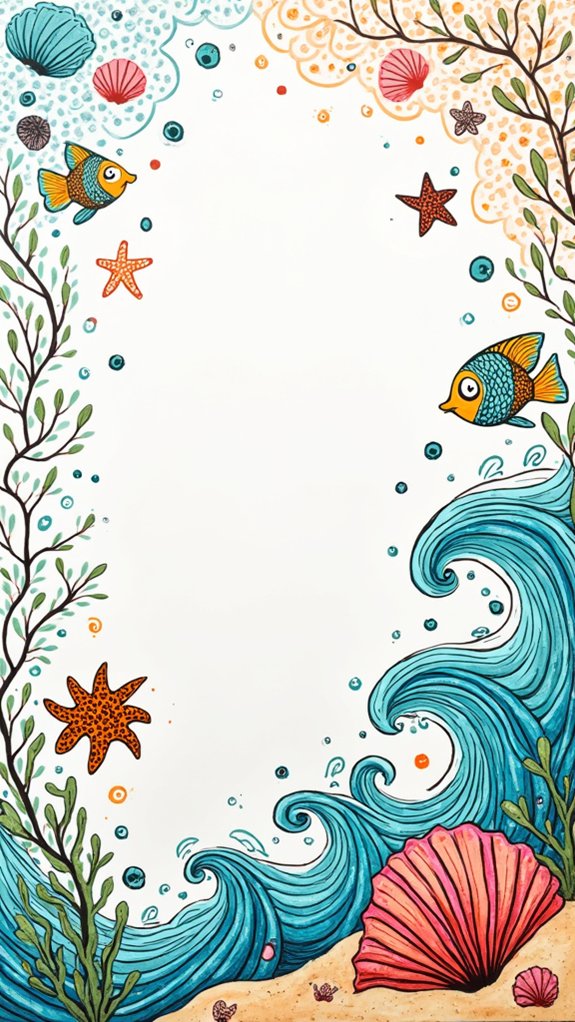
After all those sweet and silly snacks, it’s time to catch a wave and see what doodling beneath the sea looks like.
Ocean-inspired drawings open up a whole underwater world, bursting with ocean color palettes—think cool blues, sandy yellows, and bursts of coral pink. Kids will love sketching sea creature silhouettes like playful fish, gentle turtles, or even a sneaky dolphin, using just a few simple lines and shapes.
By adding underwater textures—maybe some wavy lines for seaweed or bumpy dots for coral reefs—doodles become way more interesting. Layer in patterned waves or entire schools of fish for backgrounds, giving extra movement to the page.
Using vibrant colors not only looks awesome, but can actually make the whole scene feel peaceful and fun.
Space-Themed Doodles
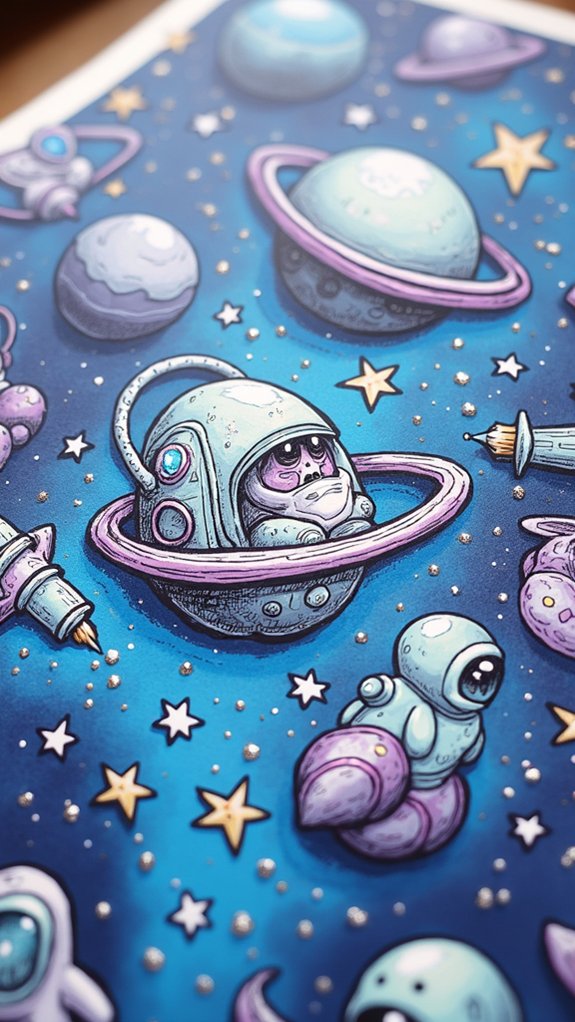
Rocket ships, swirling planets, and glittering stars—space-themed doodles basically let imaginations blast off into the galaxy.
Drawing outer space is all about stretching creativity, with planetary perspectives, astronaut adventures, and the thrill of using cosmic colorways. Even a beginner can doodle a big planet, a speedy comet, or a brave little astronaut floating off to explore.
Try layering planets in all sizes and make those stars sparkle wildly. Exaggerate those helmet visors or let funny aliens wave hello—you set the rules in space!
Don’t forget dreamy backgrounds with cloudy space dust or a trail of shooting stars for extra style. A splash of purple or streak of silver? Suddenly, your page becomes the coolest corner of the universe.
- Doodle tiny rockets zooming past planets
- Draw astronauts meeting quirky aliens
- Layer planets for awesome depth
- Add colorful comet tails and stardust
Fun Random Object Sketches
How awesome is it that just about anything can turn into a doodle? Grab a coffee cup, a book, or even a banana and watch them leap onto your page with just a few lines!
With creative object combinations, why not draw a flying cat juggling apples or a plant with sunglasses? Everyday item interpretations don’t have to be boring—add silly faces or wild patterns to everyday stuff.
Playful drawing techniques like using simple shapes or bold outlines can totally change how these objects look. Switch it up with colored pencils or funky markers to make your sketches pop.
Sketching random things is not just fun—it actually helps warm up your drawing skills and lets your imagination go wild. Try it and see!
Frequently Asked Questions
How to Doodle When Bored?
When someone feels bored, they may try doodling for relaxation by exploring simple doodle techniques. Creative doodle prompts—such as drawing animals, shapes, or patterns—can inspire ideas while providing a calming, skill-building activity during idle moments.
How to Doodle for Beginners?
When learning how to doodle for beginners, one may start with basic doodle techniques, select simple doodle materials like pens or markers, and explore various doodle styles. Gradual practice encourages creativity, experimentation, and increased drawing confidence.
What Are Quick Draw Doodles?
Quick draw doodles are spontaneous sketches created using quick sketch techniques. They often feature playful doodle prompts or creative doodle challenges, encouraging artistic expression and relaxation with simple shapes, patterns, or familiar objects in a brief, accessible format.
Is Doodle Art Easy?
Doodle art is generally regarded as easy, since basic doodle techniques require minimal skill, prioritize creative freedom, and can be enjoyed by anyone. The process often offers stress relief, making doodling approachable for beginners and experienced artists alike.
Conclusion
So, after all these wild and wacky doodle ideas, anyone can see that creativity really has no limits—just like your probably overflowing sketchbook. Whether someone’s scribbling a mountain or drawing a space taco, every doodle is a little adventure. So grab some paper, let your pen go for a joyride, and remember: messy lines just mean more personality! In the end, it’s all about having fun, trying new things, and surprising yourself with cool, unique art.
Leave a Reply