
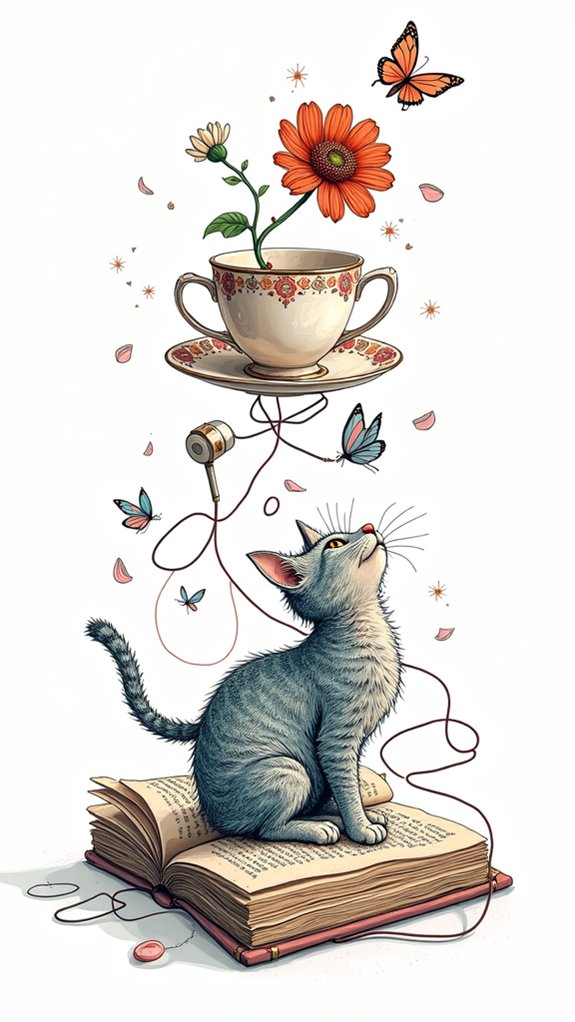
Anyone can plunge into doodle art with easy ideas like spiral op-art, clover fields, or drawing wobbly cow prints and blobby shapes. Beginners enjoy sketching cute monsters with googly eyes, simple flowers, and mountains with zigzag lines. Mixing patterns, playful geometric shapes, or nature-inspired squiggles makes the page burst with energy. Everyday objects—like mugs or sketchy backpacks—can get a fun cartoon twist, too. Swirling lines and bold colors keep it exciting, and there’s plenty more creativity just ahead.
Key Takeaways
- Start with simple flower and leaf doodles using circles, teardrop shapes, and varied petal designs for visual interest.
- Experiment with geometric patterns like spirals, cow print blobs, and clover fields to practice repetitive shapes and textures.
- Draw cute monster characters and playful, hand-lettered greeting cards to add creativity and personality to your doodles.
- Explore abstract styles such as Keith Haring-inspired doodles and whimsical landscapes to unleash imagination and movement.
- Enhance doodle art using depth, bold outlines, color blending, and drip effects for vibrant, three-dimensional results.
Spiral Op-Art Drawing

Dive right in—Spiral Op-Art drawing is like taking your pencil on a wild rollercoaster ride!
Start by putting a dot smack in the middle of your page. Forget the urge to just draw a circle. Instead, let wavy lines shoot out from the center dot, stretching all the way to the paper’s edge. Those lines create random shapes, almost like slices of a funky pizza.
Now, here’s where the doodle art magic happens: inside each of these wavy sections, draw upside-down “u” shapes, nesting them and making them bigger as you move outward. Each “u” adds depth, making it look three-dimensional and super hypnotic.
Before you know it, your wild drawing will grab anyone’s attention—daring them not to stare!
Clover Field Pattern
The Clover Field pattern is all about building up cool, layered teardrop shapes that connect and almost look like fluffy clover clusters spreading across your page.
To make these clusters pop, outlining each petal and stacking more teardrops outside the first row creates serious depth—kind of like a secret clover jungle where leprechauns would love to hang out.
When you change up the shapes and squeeze different sizes together, your doodle ends up looking super lively and way more interesting than a regular old field!
Building Layered Teardrop Shapes
Sometimes, all it takes is a handful of teardrop shapes to kickstart an awesome clover field pattern. To begin, let’s move your pen and draw three or four big teardrop shapes, connecting their tops so they form the clover’s “petals.”
Inside each one, add another, smaller teardrop shape for extra detail—it’s like giving each petal its own personality! Then, grab a thicker marker and start building layers by adding more teardrop shapes around your first petals.
Experiment with direction: some teardrops can point sideways, others up or down, and the overlapping just brings more life to your design. Finally, fill the background with a mix of larger and smaller teardrop shapes until your page looks full and playful—almost like a wild clover patch.
Creating Flowing Clover Clusters
After playing around with layered teardrop shapes, it’s time to go wild and let those clovers burst into full-blown fields. First, draw one clover by connecting three or four teardrop shapes at the tip—boom, instant clover petals! Make sure to add a tiny teardrop inside each petal for a little extra style.
Then, don’t be shy—go back and expand your field by drawing more clovers right next to the first one, keeping those teardrops cuddled together at the edges. For a real clover field vibe, fill in any empty spaces with more teardrop shapes, mixing up their size and direction so everything feels alive and wild. It’s like organized chaos, but in the best way possible!
Adding Depth With Outlines
Bringing some pop to a clover field doodle is all about depth, and nothing makes those petals jump off the page like crisp, bold outlines. Grab a trusty pen or marker and start tracing the teardrop shapes with a darker shade.
Instantly, you’ll notice the clovers getting that three-dimensional vibe, almost as if they’re ready to leap off the paper and join you for a dance! Try switching up the thickness of your lines—maybe a chunky edge here, a thin one there—for petals that look full of life.
Want more drama? Add a bit of shading or use an extra color to outline again, just for fun. Keep lighter shades in the background so your outlined clovers always steal the show.
Abstract Keith Haring Style Doodles

Abstract Keith Haring style doodles pack a punch with their thick, bold lines and funky shapes—think wild dancing figures or those classic Haring “radiant babies.”
These doodles seem to jump off the page with tons of movement, almost like they’re caught mid-dance at an endless party.
Toss in some eye-blasting, neon colors, and suddenly your page feels like it’s got a pulse, even if the only thing actually moving is your pencil.
Signature Shapes and Lines
Shapes and squiggles practically dance across the page when you immerse yourself in doodling in a Keith Haring style. This abstract approach invites beginners to navigate signature shapes exploration, turning circles, triangles, and unexpected blobs into the stars of the show.
With bold, black outlines and energetic line pattern variations, even a basic doodle becomes hard to ignore (just like that one kid in class who never sits still). Playful shape combinations let creativity go wild, focusing more on the fun and less on making perfect sense.
Here are some simple steps to get started:
- Draw random shapes—think circles, triangles, and funny blobs.
- Outline shapes with thick, bold lines for strong contrast.
- Weave squiggly lines between shapes for a lively, maze-like look.
- Mix and repeat signature shapes for endless fun.
Creating Energetic Movement
Kickstarting a doodle with a Keith Haring vibe is like lighting a firecracker—suddenly, energy explodes all over the page.
Abstract doodle fans know that movement exploration techniques are the secret sauce. By mixing playful shape combinations—think wild blobs, sneaky triangles, and laid-back circles—they create a living, breathing background.
Each shape sets the stage for dynamic line variations. Here’s the fun part: a single squiggly line snakes through the shapes, never quite bumping into them, almost like it’s dancing its way around a crowded party.
The result is pure visual chaos, but in the best way possible. This style invites artists to be bold, spontaneous, and maybe a little mischievous—because doodles should never just sit still or play it safe.
Adding Vibrant Colors
Once the wild party of movement is happening on the page, it’s time to crank things up a notch with a burst of color—because no one wants a doodle dressed only in black and white.
For Abstract Keith Haring style doodles, splashing on bold, contrasting color schemes totally amps up the fun and makes your art impossible to ignore.
Here’s how to shine even brighter:
- Experiment with color blending techniques—layer different hues using markers or colored pencils for cool effects.
- Play with color psychology effects—pick colors that change the mood, like sunny yellows for happiness or electric blue for chill vibes.
- Try unexpected color combos—the wilder, the better! Keith Haring would totally approve.
- Add funky patterns inside shapes—stripes, polka dots, or even zigzags keep things interesting.
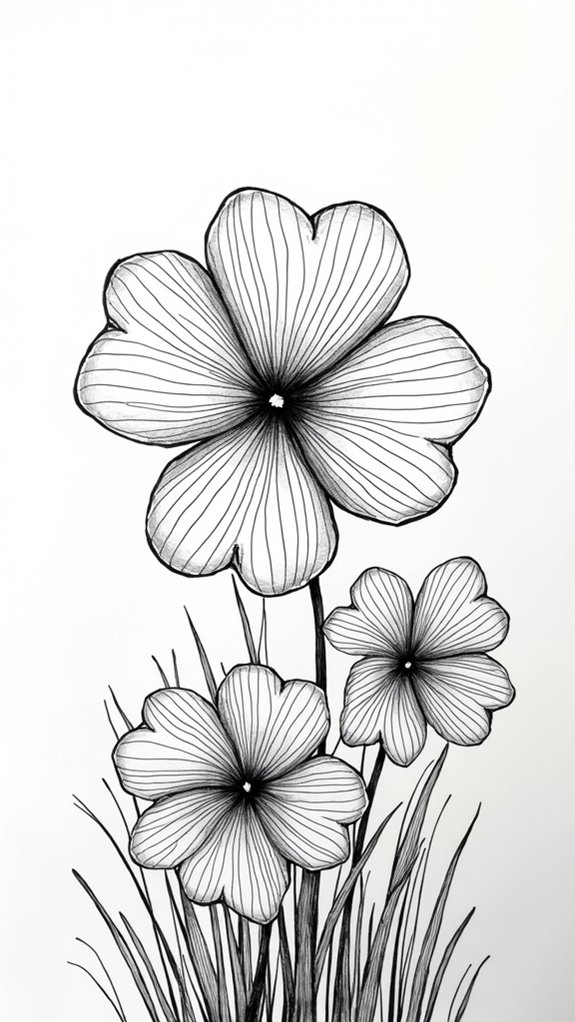
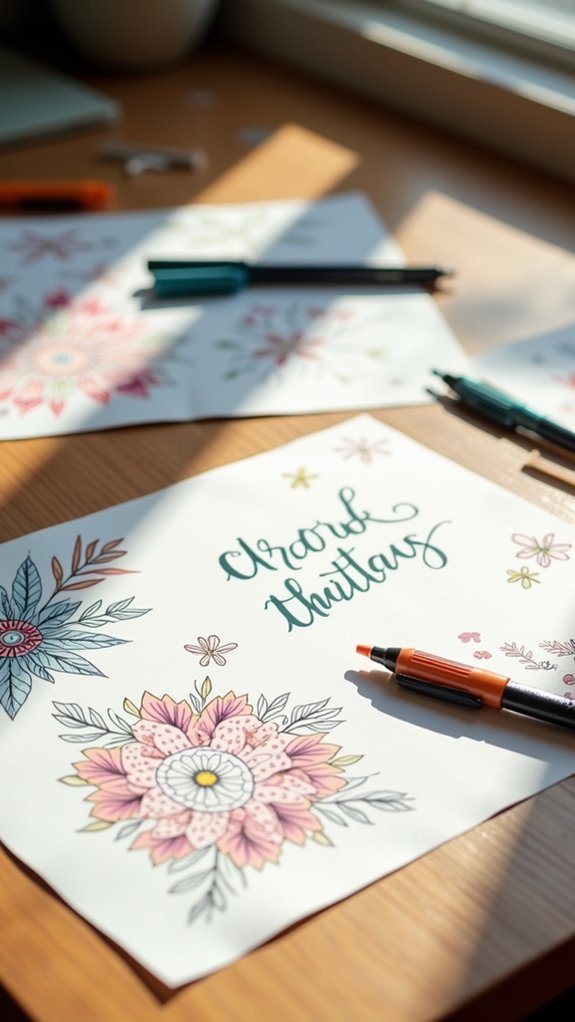
Simple Flower Doodles
A bunch of easy flower doodles can instantly brighten up any notebook page and honestly, they’re way less tricky to draw than most people think. Start simple: just draw a circle for the center, then add five or six petals—boom, you’ve got yourself a classic flower!
If you’re feeling adventurous, jazz it up with a few flower arrangement techniques, like layering extra petals or mixing flowers of different sizes. When thinking about petal color variations, imagine each petal rocking a different shade or stylish pattern—super eye-catching!
For great doodle composition tips, scatter your blooms across the whole page, and don’t skip out on the little details. Dots, swirls, or tiny leaves really pull the whole flowery masterpiece together.
Easy Mountain Illustrations
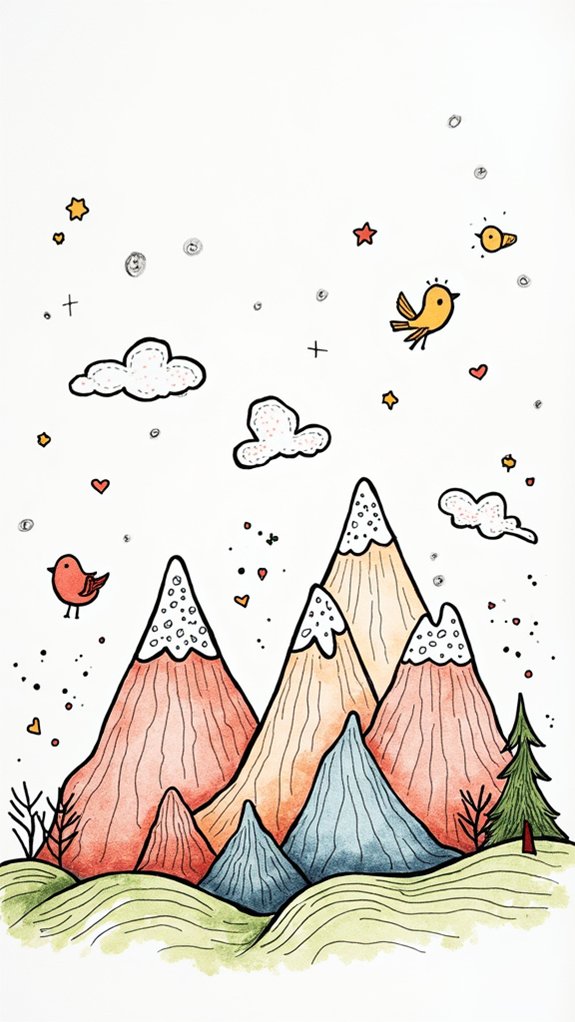
Nature-themed doodles aren’t just about flowers. Mountains can make your sketchbook feel super adventurous!
Drawing easy mountain illustrations starts simple but can look surprisingly awesome with a few tricks. Grab a pen and try these steps to bring your mountain doodles to life:
- Draw wavy triangle shapes—remember, mountains love different heights. The more variety, the cooler it looks!
- Try layering mountain views by sketching smaller peaks in front of big ones. This gives your scene a ton of depth, almost like you’re hiking in!
- Add wavy lines inside each peak for rocky textures and practice mountain shading techniques; use tightly spaced lines for shadows and lighter strokes for sunny sides.
- Spice things up by adding nature elements—think tiny trees, drifting clouds, or even a little hiker!
Drawing a Rose Step-by-Step
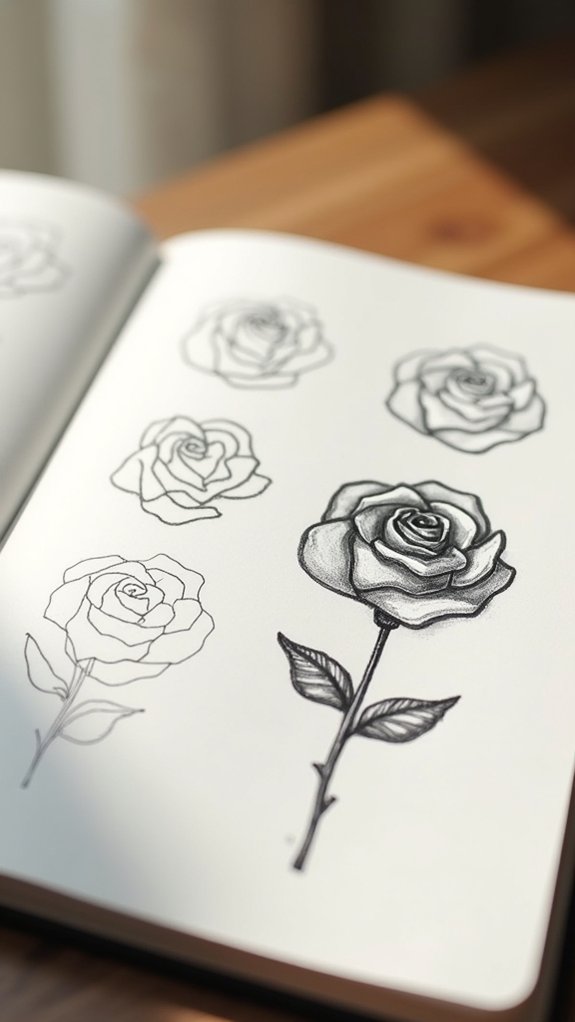
Drawing a rose might sound tricky, but it actually starts with just a simple circle in the center—like the secret base camp of your blooming masterpiece.
From there, the real magic begins as you build layers of petals that overlap, stretch out, and sometimes look like they had too much coffee and can’t sit still.
The final step is all about adding those extra lines and textures, bringing your rose to life—so real you might feel the urge to sniff your doodle (but, fair warning, paper doesn’t smell like roses).
Starting With the Center
Every great rose doodle starts with—you guessed it—the center! Think of this spot as the heart of your flower, and from here, your masterpiece will blossom.
Drawing the middle captures the magic, so don’t skip the basics. Want to ace those rose core techniques and give your doodle serious wow-factor? Check out these steps:
- Draw a small circle. This is your rose’s core; keep it tight and neat.
- Use gentle, curvy lines around the circle to make little, overlapping petals—think soft waves, not sharp mountains!
- For authentic petal layering methods, let each petal edge be a little different; variety equals realism.
- Try adding a few light lines or subtle shading effects tips inside those petals for extra texture—hello, pop of depth!
Suddenly, your doodle already looks stunning!
Building Layered Petals
With the rose center looking great, now comes the super fun part—building out those layered petals!
The magic happens by adding petals around the center, using classic layered petal techniques. These aren’t just ring-after-ring of the same thing; petal shape variations really make your rose pop. Some petals might be tightly wrapped, while others flare out wider—think of a rose unraveled after a long day!
When sketching, use curved lines for soft, gentle edges, giving that lifelike, petal-y feel. A smart rose drawing tip: let some petals overlap for added depth, bringing your flower to life right on the page.
Mix up the size as you move outward, and don’t be afraid to play—roses are never boring, so neither should your doodle be!
Adding Final Details
Time to kick things up a notch—this is where a rose doodle goes from “pretty cool” to “jaw-droppingly awesome.”
Adding final details is all about bringing the drawing to life and making it pop right off the page. Here’s how anyone can finish their rose masterpiece:
- *Try adding shading techniques* by darkening areas where petals overlap. This makes the rose look three-dimensional, almost like you could smell it!
- *Incorporate texture variations* by drawing tiny, curved lines inside each petal, showing off their natural wrinkles.
- *Enhance color depth*—layer colored pencil or marker shades to give petals rich, bold tones.
- Optionally, throw in extra roses or leaves to create an entire bouquet. Why stop at one when you could have a garden on your page?
Creative Drip Effects
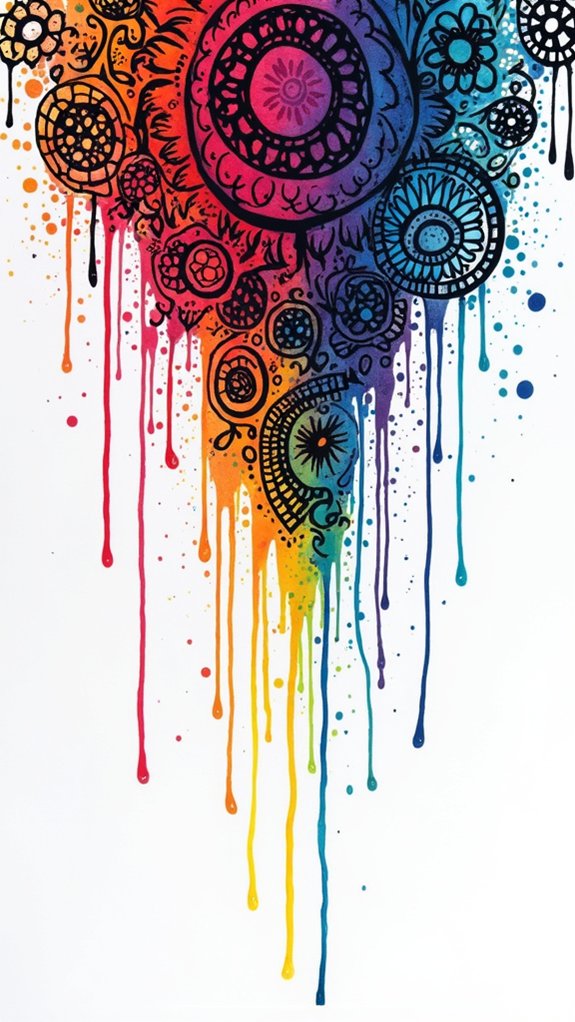
Splash some excitement onto the page by exploring creative drip effects—these are doodles that look like paint, syrup, or maybe even alien goo sliding down a window on a rainy day.
The fun starts with wild, wiggly lines that drip and curve, using different thicknesses for a cool 3D look. If you want to really impress, try layering drip designs by drawing big drips first, then adding tiny inside drips with a skinny marker. Magical, right?
Don’t be afraid to show off with bold drip color techniques—maybe neon pink slime, blue blueberry syrup, or whatever weird color combo your brain invents. For extra realism, space out the drips in uneven ways, capturing those authentic organic drip patterns just like sneaky leaks or rainy day windows.
Rainbow Wave Designs
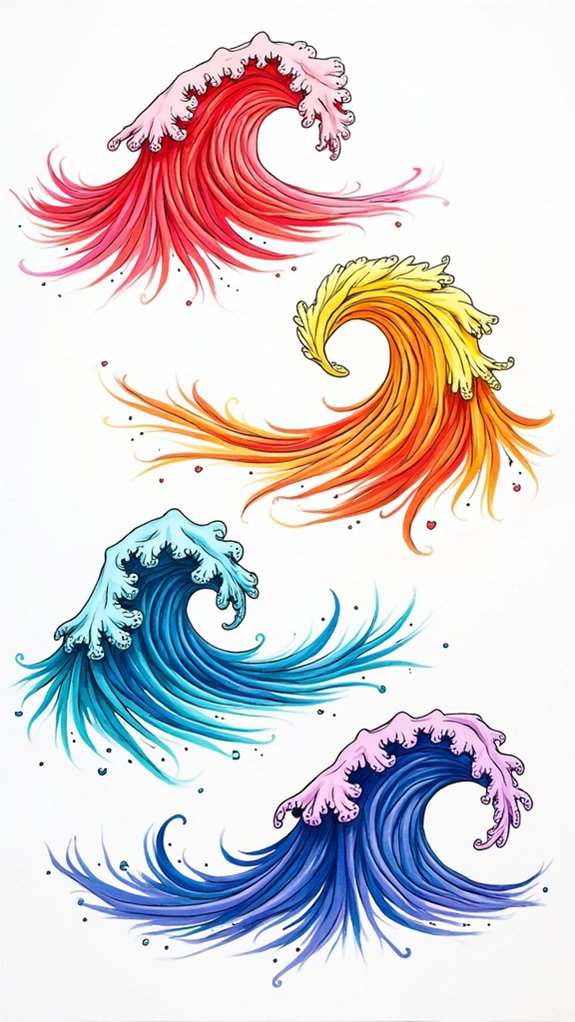
Rainbow wave designs are all about drawing wavy lines across your page, but the real magic happens when you start playing with color shifts and cool pattern twists.
It’s super fun to see how simple swerves and a burst of rainbow shades can make the whole thing look like it’s moving, almost like your doodle is alive and dancing.
Want your waves to pop even more? Try switching up line thickness, sneak in upside-down color arcs, or even layer patterns on top—there are endless ways to mix it up!
Simple Wavy Line Techniques
Every beginner doodler looking for a splash of color and fun can plunge into the world of simple wavy line techniques, where, honestly, things never get boring.
With wavy line variations, you’ve got an instant recipe for playful rainbow wave designs—think dynamic design techniques that look fancy, but are totally doable. A plain notebook turns into a sea of mesmerizing squiggles, and the real magic starts with clever rainbow color blending.
Here’s how to get started:
- Draw wavy lines horizontally, mixing up their height and spacing for a fluid, lively look.
- Try overlapping lines or having them stop suddenly—surprise keeps things interesting!
- Fill spaces with alternating rainbow colors and flip some rainbows upside-down.
- Use a wide variety of colors, making every wave brighter and bolder!
Creating Color Transitions
Now that wavy lines have taken over the page with their bold, squiggly energy, it’s about time to talk color—specifically, how those wild rainbows can flow and blend across every wave.
To make your doodle seriously pop, it’s all about playing with color blending techniques. Start by grabbing a bunch of markers or colored pencils, then choose playful color combinations—think pinks next to greens or blues melting into oranges.
Use gradient application methods inside each wave by gently shading from one color into the next, mixing them just a little where they meet for that smooth shift. Alternating between traditional arcs and upside-down curves gives extra zing.
Outline the waves with a black pen to make those colors look extra bright—bam, instant rainbow magic.
Pattern Variations and Ideas
Take a wild ride with rainbow wave designs—it’s like turning your page into a festival of color and movement.
With this awesome pattern, beginners can explore wavy line techniques while having a blast with rainbow color palettes. Each curve dances across your paper, creating dynamic visual effects that pop.
Want to kick it up a notch? Try switching up the spacing, flipping rainbows upside down, or grabbing wacky pens for texture.
Here are four creative pattern variations to try:
- Double Waves: Draw overlapping wavy lines, then color between them using different rainbow shades.
- Rainbow Stripes: Alternate upward and upside-down rainbows in each wave section for contrast.
- Chunky Waves: Change up the size and thickness of wavy lines to create a bold, unique rhythm.
- Texture Mix: Use fine liners or gel pens for extra visual punch in your doodle.
Wagon Wheel Motifs
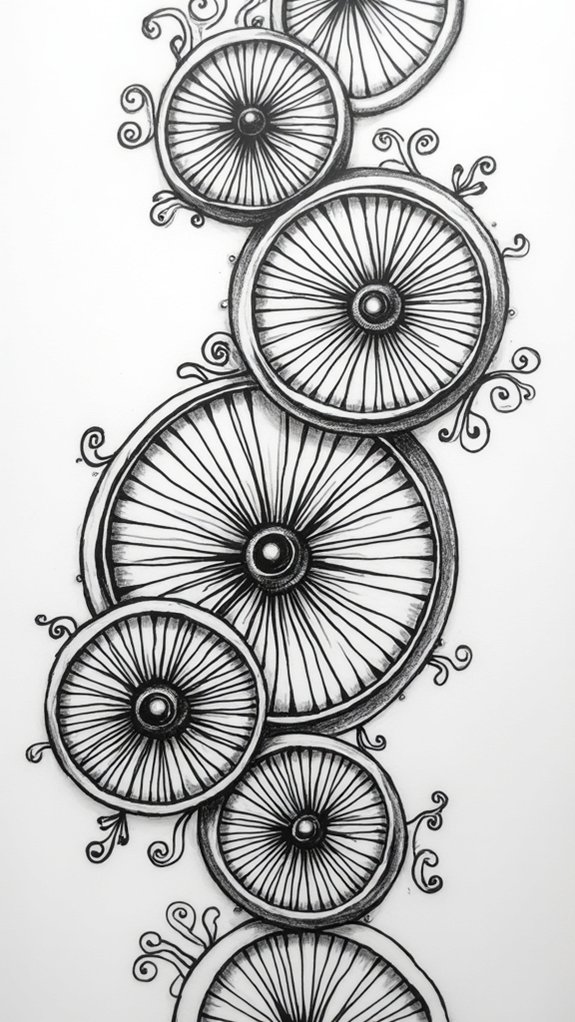
Wagon wheel motifs spin a sense of fun right onto the page, making them a popular pick for anyone just starting out with doodle art.
Mastering wheel design techniques is a breeze—start with a simple circle, then send straight lines zooming from the center out like sunbeams to form those classic spokes.
Feeling adventurous? Fill your paper with wheels in different sizes for a real burst of action.
Now, here’s where things get wild: try mixing in decorative element additions like dots or mini-circles along the spokes. Thicker and thinner lines make some parts pop, keeping things from looking flat.
For a splashy finish, use contrasting color combinations—think blue and orange or yellow and purple. These choices make those wheels whirl with energy!
Cow Print Blobs
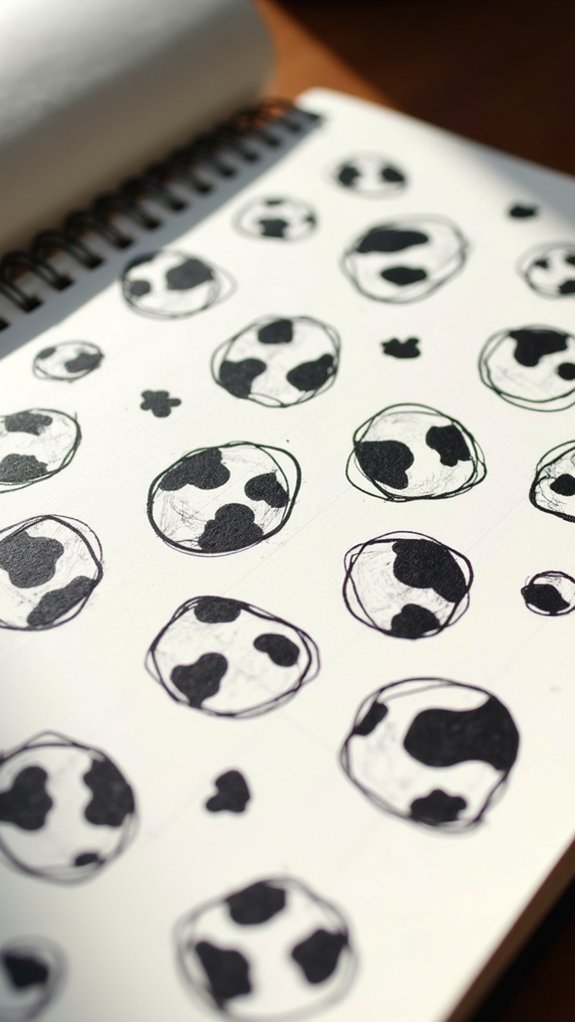
Cow print blobs let artists get wild with patterns, flipping the usual black-on-white look or even inventing their own wobbly shapes for extra flair.
There’s no “perfect” blob—mixing up the blobs’ sizes and turning cow spots upside down can create a whole new look that cows everywhere would envy.
Throw in a bold background color and suddenly those classic spots pop like they’re ready to start their own cartoon stampede!
Creating Unique Blob Patterns
There’s something oddly satisfying about drawing blobby shapes all over a page and watching them come together to create cool, animal-inspired art.
Creating unique blob patterns—especially those inspired by cow prints—can totally boost your doodle game. Start with blob shape variations: make some round, others lumpy, maybe even a goofy potato shape. The more random, the better!
Next, contrasting background colors can make your blobs pop off the page or look like they’re walking right at you (moo-ving art, anyone?). Don’t be afraid to try playful ink experiments—switch up your pen, brush, or even colors for bold effects.
Here are four quick tips:
- Mix small and large shapes.
- Layer blobs for depth.
- Test out wild color combos.
- Add personal patterns inside blobs.
Inverting Traditional Cow Prints
A fresh twist on classic patterns, inverting traditional cow prints—also known as cow print blobs—brings a whole new vibe to doodle art. Instead of the usual black blobs on white, think about using inverted color schemes—maybe bright blobs on a dark surface or pastel shapes against something bold.
Start by sketching out random, blobby, cow-like spots all over your page. Don’t worry about making them perfect—the blob shape variations are kind of the point! Go wild with different sizes and oddball orientations, then fill each main blob with smaller, tangled shapes to add depth.
Using contrasting color backgrounds really makes those crazy blobs pop. This quirky pattern is not just fun to draw but also makes every doodle session feel like a creative adventure.
Adding Colorful Backgrounds
Markers and paint splashes can totally supercharge the look of cow print blobs, turning a regular doodle page into a wild burst of color and energy.
Don’t just settle for white paper! By experimenting with color palette selection, artists can make the black and white blobs jump right out. Picking bold colors seriously pumps up the vibe.
Here are a few cool ways to jazz up the background:
- Pick a lively palette—Go for colors that pop and contrast the blobs (like neon pink or electric blue).
- Try background texture techniques—Dab, splatter, or stipple for extra fun.
- Work with vibrant color blending—Use gradients for smooth shifts between colors.
- Let layers dry—Patience means crisper lines and pictures that really wow.
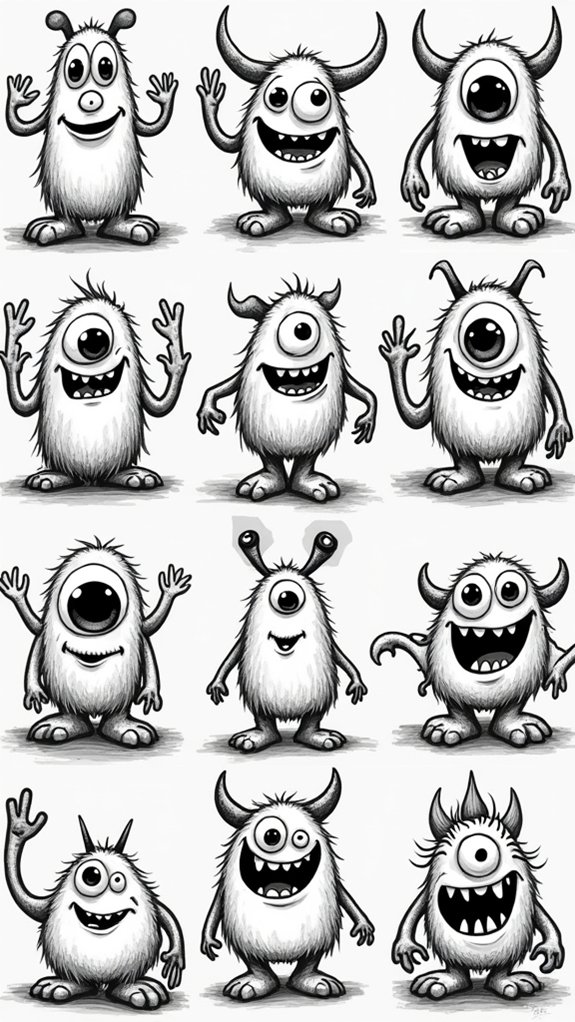
Cute Monster Characters
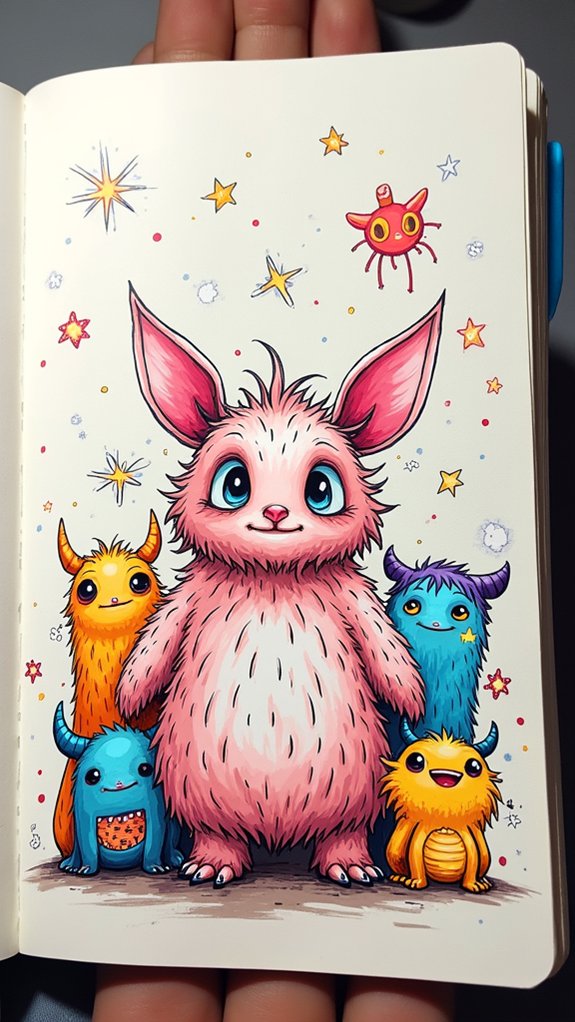
If someone wants to turn up the fun in their doodles, cute monster characters are the perfect way to do it. With their big heads, tiny bodies, and silly expressions, these imaginative creatures can really show off wild monster personalities and make anyone grin.
Whimsical designs pop even more when artists mix in playful colors—think neon greens, pink polka dots, or rainbow stripes! To set each monster apart, why not throw in goofy features like extra eyes, wiggly arms, or floppy ears? The more unusual, the better.
Soft, rounded shapes keep monsters looking friendly, not scary. For an extra giggle, doodle on hats, giant glasses, or funky bows. Each new monster becomes part of a happy, hilarious doodle world.
Hand Lettered Greeting Cards
Nothing says “special delivery” quite like a homemade, hand lettered greeting card!
With a few clever hand lettering techniques, even beginners can create awesome, unique card designs that really make someone’s day. Just imagine handing over a birthday, thank you, or holiday card filled not only with a personalized message, but your own doodled flair!
Getting started isn’t rocket science, but does take a bit of practice. Here are four fun steps to try:
- Practice different styles like cursive and block letters for your main words.
- Use colorful gel pens or brush pens to make your hand lettering pop!
- Draw simple doodles, like little hearts or stars, around your message for extra personality.
- Play with backgrounds and color combos for truly unique card designs!
Fun Geometric Shapes
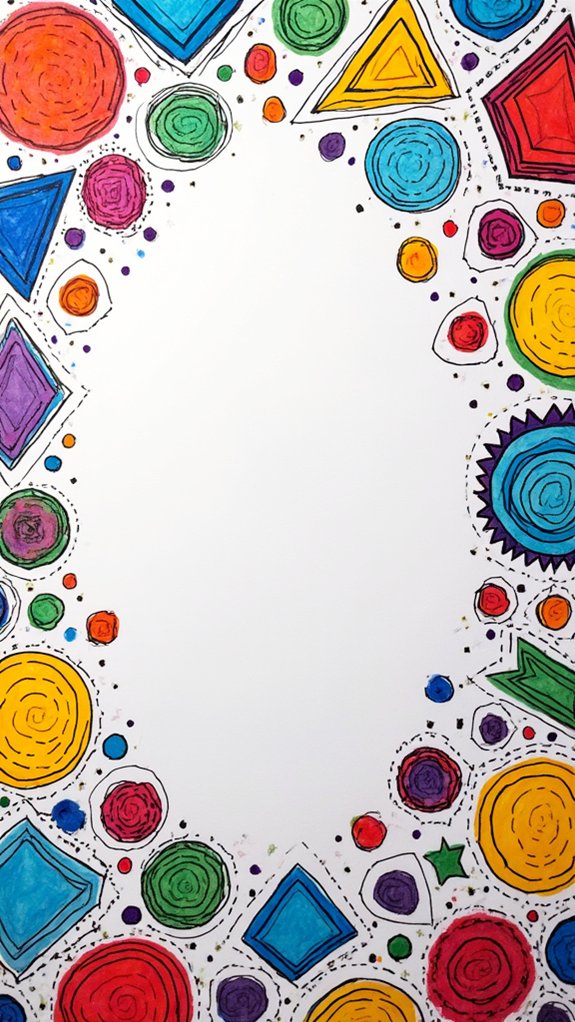
Patterns can turn an ordinary doodle into something totally mind-blowing, and geometric shapes are the secret ingredient behind some of the coolest designs out there. Triangles, circles, squares, even hexagons—think of them as the ultimate shape squad, ready for action.
Using geometric symmetry techniques, like mirroring and repeating shapes, brings serious balance and wow-factor to a doodle (it’s almost like math class, minus the pop quiz).
Shape combination strategies let artists mash up different forms, creating everything from simple diamonds to wild, interconnected webs.
Want to level up? Dynamic doodle experimentation, like shaking up the size, angle, or adding sneaky shading lines, gives depth and some 3D magic.
Trust, with these tricks, a page can go from “meh” to totally mesmerizing.
Happy Birthday Doodle Art
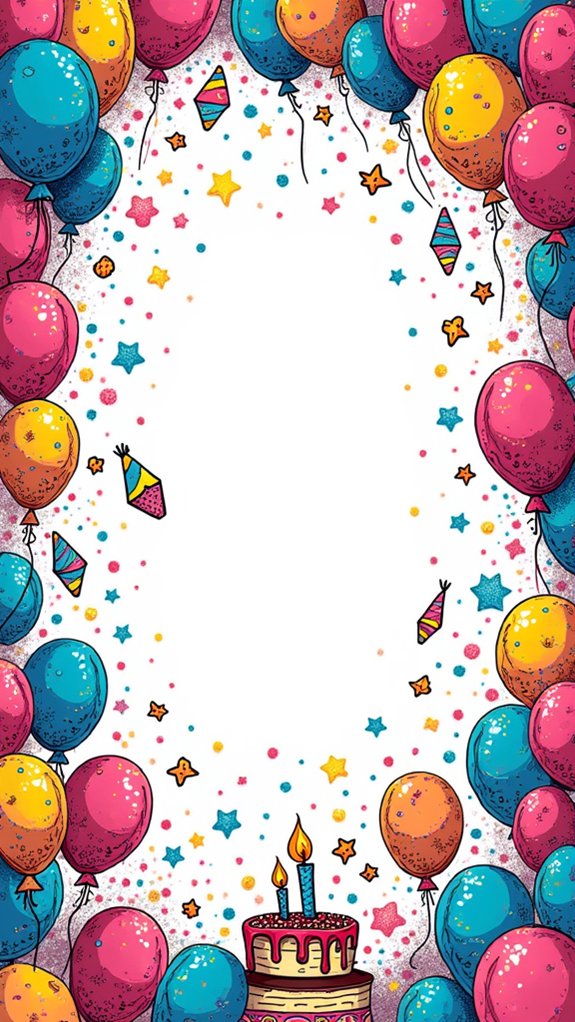
After rocking out with geometric shapes, it’s time to get into party mode with Happy Birthday doodle art. This style is all about adding those cheerful vibes to your birthday card designs—think cakes bursting with candles, colorful balloons, and streamers everywhere.
Using festive color palettes and playful typography styles totally amps up the energy, making even the most basic doodles pop. Anyone can start simple and then spice things up with personal touches, like the birthday girl or boy’s favorite colors.
Here are some ideas to get those creative juices flowing:
- Draw a bundle of balloons with someone’s name written across the strings.
- Doodle a cake with each layer in a different color.
- Use playful typography styles for birthday wishes.
- Add confetti and streamers for extra festivity!
Cartoon Monster Coloring Pages
Monsters might sound scary, but on cartoon monster coloring pages, they’re mostly just hilarious and a little weird—in a totally awesome way. These pages mix crazy shapes, silly faces, and bold lines, making them perfect for anyone looking to plunge into monster design techniques. Whether you want to make your monster fluffy, spotty, or with ten wiggly arms, there’s room to get super creative! Wondering how to pick your colors? Use wild combinations as color palette inspiration—think purple polka dots or neon green fur. Want to show off your character personality exploration skills? Give your monster a goofy grin or a bashful blush!
| Monster Feature | Doodle Tip |
|---|---|
| Wacky eyes | Try mismatched sizes! |
| Wild fangs | Add a silly zig-zag pattern |
| Fluffy bodies | Test out patchy color blends |
| Crazy feet | Stripes! Spots! Go bananas! |
Bullet Journal Divider Doodles
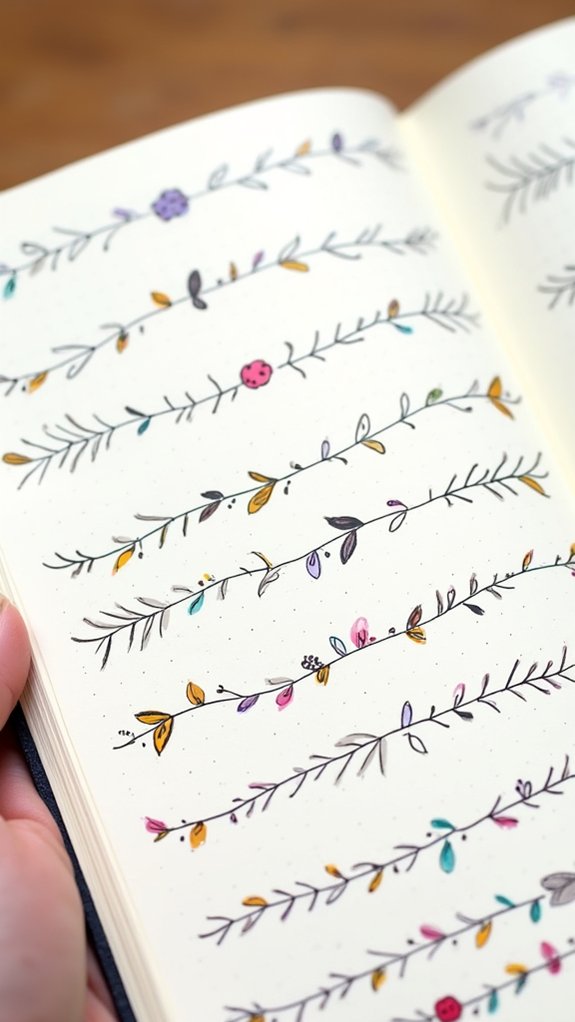
Anybody who just had a blast sketching out zany cartoon monsters might be wondering what else they can doodle to make their art pop off the page.
Enter bullet journal divider doodles! These little doodle design techniques are not just fun—they seriously boost bullet journal aesthetics and make any page look organized and inviting.
Even simple creative divider ideas like wavy lines or arrows break up sections and make your journal easier to use. Try jazzing things up with themed doodles, using bold colors, or playing with line thickness.
Want some quick inspiration?
- Draw rows of tiny flowers for a whimsical feel.
- Add zigzags or loop-de-loops for instant energy.
- Use bold arrows to point at important notes.
- Mix geometric shapes for a cool, modern vibe.
Divider doodles? Chef’s kiss!
Swirls and Repetitive Patterns
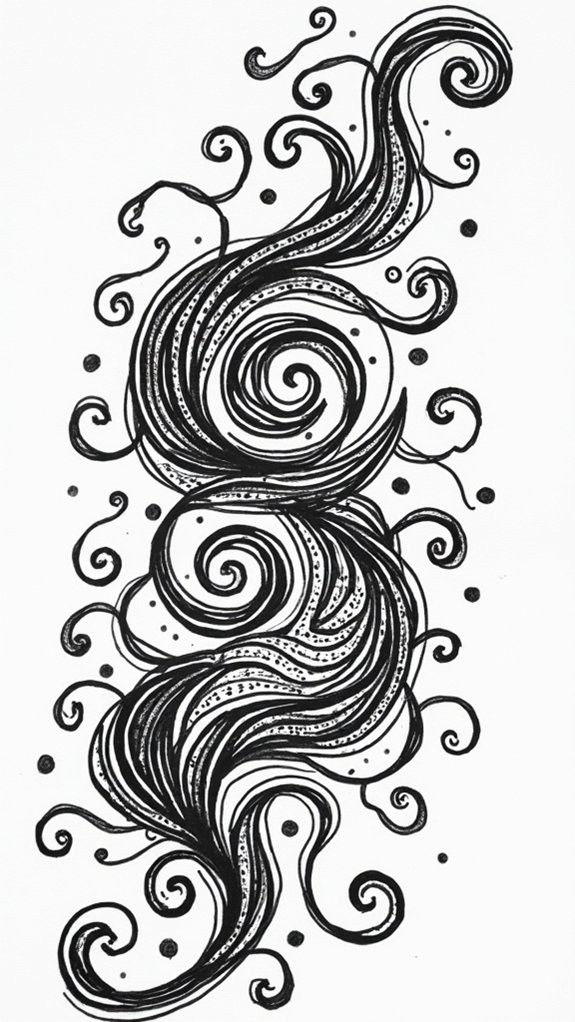
Swirl into the world of patterns, and suddenly the page feels alive—like someone’s cranked up the energy! Swirls and repetitive patterns pack a punch when it comes to adding rhythm and movement to doodles. Simple swirl variations are an awesome start: thick, thin, tight, or loose—they all change the vibe. By playing with line thickness, a doodler can make things pop or fade for dramatic effect. Pattern exploration isn’t just about looking cool; repeating shapes builds steady hands and sharp eyes, which is especially handy for beginners. Mixing up arrangements or layering patterns lets each artist put their personal flair on paper. Check out the table for ideas that might spark your own doodle adventure:
| Swirl Variation | Pattern Exploration Idea |
|---|---|
| Loose spirals | Zigzag repetitions |
| Tighter, bold swirls | Wavy line combinations |
| Thin, delicate loops | Concentric circles |
| Layered swirl stacking | Alternating triangles |
Whimsical Landscapes
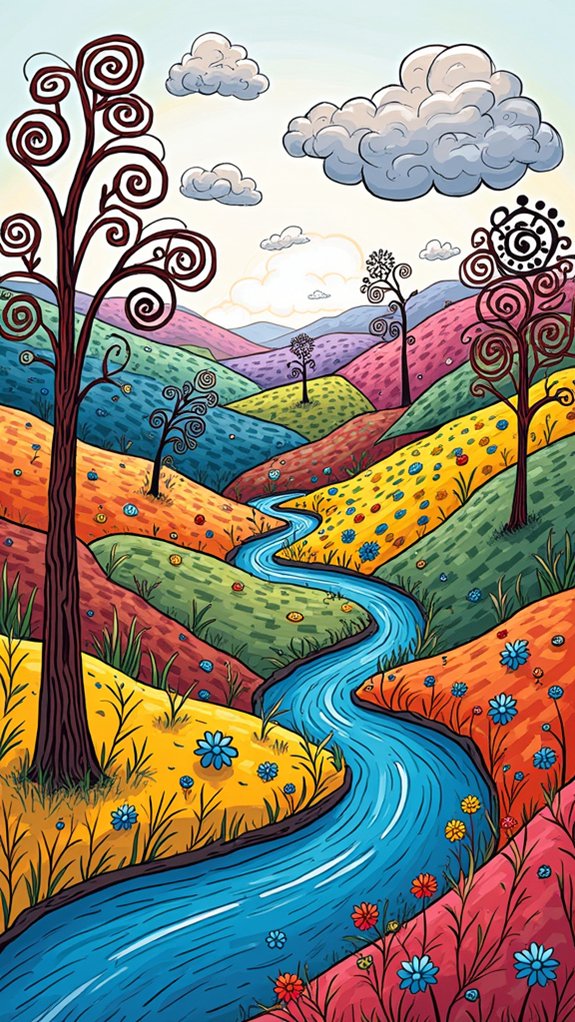
Even when reality feels a little boring, doodling whimsical scenery is like unfastening a secret doorway to a world where anything can happen—imagine hills that curl like giant waves, trees with branches that spiral into the clouds, and suns that actually smile back at you.
Anyone can try sketching whimsical scenery, because perfection is overrated here. Think about drawing whimsical treehouses perched on wild branches, or floating islands drifting above the land, with playful clouds bouncing between them like giant marshmallows.
Don’t be afraid to use bright, mismatched colors or cover a hill in stripes! If it makes you smile, you’re doing it right.
Here are some fun suggestions to get started:
- Draw curled hills and swirling tree trunks.
- Sketch floating islands with tiny bridges.
- Add playful clouds with silly shapes.
- Design whimsical treehouses with twisty ladders.
Everyday Object Sketches
If someone’s ever stared at their desk during class and started doodling the nearest pencil or coffee cup, they already get what everyday object sketches are all about.
These doodles can be super fun—think mug sketches, plant drawings, or even goofy book illustrations, all based on stuff just lying around at home.
The trick is to break things down: a mug is just a cylinder with a handle, right?
Try scribbling in different ways, like making it look really realistic with shading, or turning it into a wild cartoon. There’s no pressure to get every detail perfect; the point is practice and having fun.
Ever challenge yourself to doodle what’s in your backpack in ten minutes? Now, that’s an adventure!
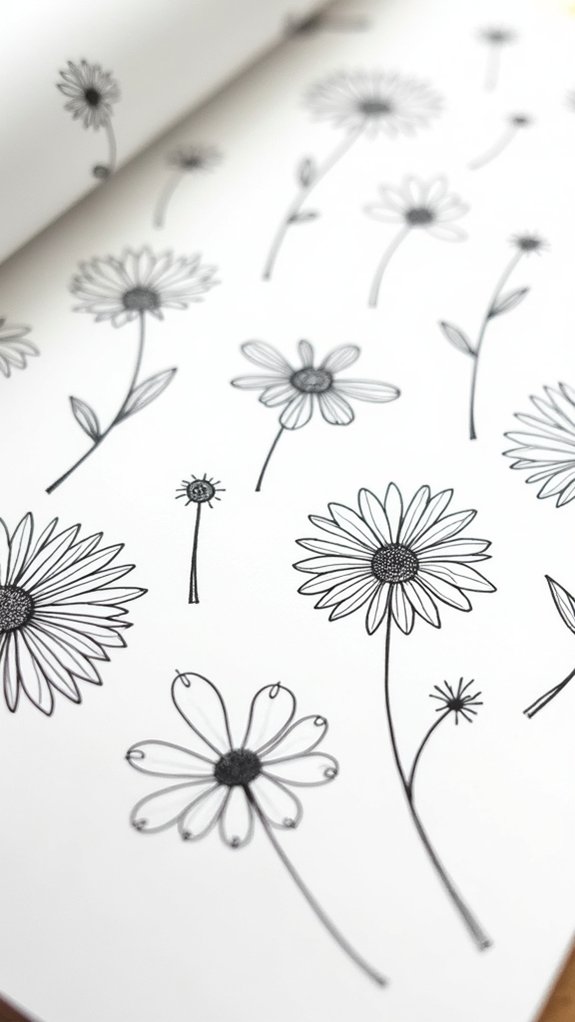
Creating Nature-Inspired Doodles
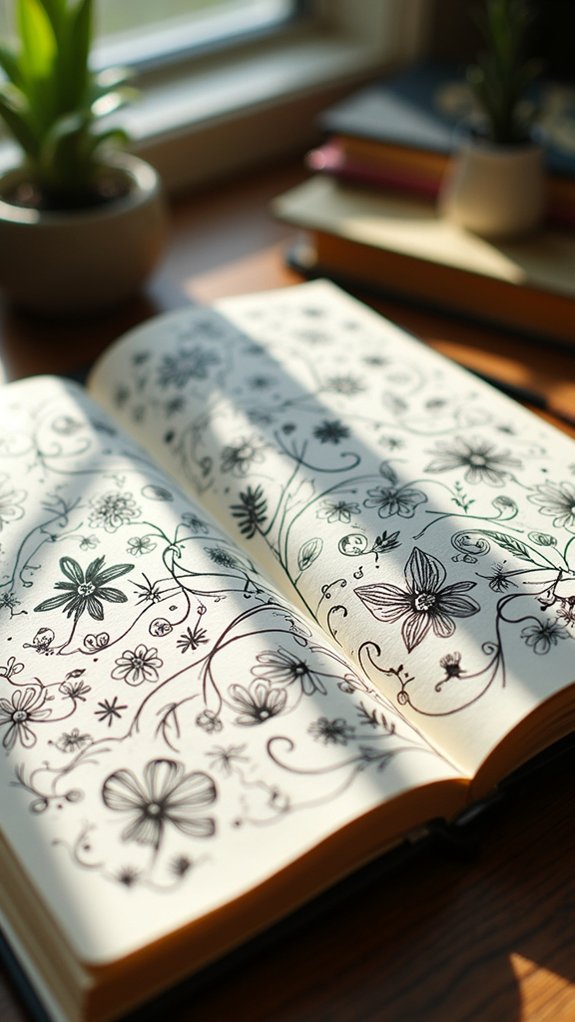
Nature is basically the ultimate doodle inspiration—seriously, it’s packed with interesting shapes, wild patterns, and colors people could only dream up.
People starting out with doodles can totally boost their creativity by trying a fun mix of flower petal techniques, organic shape exploration, and nature doodle composition.
Try drawing teardrop shapes for petals or leaves and layering them together for flower effects. Even simple wavy lines turn into rivers or clouds.
Here are some super easy tips:
- Sketch teardrop shapes in circles to build flowers—repeat for bouquets!
- Stack wavy lines for rippling water or fluffy clouds.
- Use repetitive patterns like spirals to mimic seashells or leaf veins.
- Add shading or dots for texture to make things stand out more.
Frequently Asked Questions
How to Draw a Doodle Art for Beginners?
When exploring how to draw a doodle art for beginners, one should start with basic sketching supplies, apply simple doodle techniques, and use creative prompts to inspire designs, gradually building complexity as skills and confidence develop.
What Are the Five Styles of Doodling?
When exploring the five styles of doodling, one encounters geometric patterns with symmetry, nature themes featuring organic forms, abstract designs for expressive freedom, playful character illustrations, and textured techniques that add dimension through line variation and shading methods.
How Do I Get Ideas to Doodle?
Finding inspiration for doodling can involve observing nature themes, experimenting with abstract shapes, or noticing everyday objects. By engaging with different surroundings and ideas, a person stimulates creative thinking and uncovers unique visual possibilities for their doodles.
Is Doodle Art Easy?
The current question explores whether doodle art is easy. Many find it accessible due to simple doodle techniques, the creative freedom it offers, and minimal art supplies required, making it suitable for individuals at any artistic skill level.
Conclusion
So, whether you’re doodling spirals during math class or sketching funky flowers at home, there are endless ways to make your own cool art. The best part? Mistakes totally add character, and you never know what awesome design you’ll create next. Grab a pen, let your imagination run wild, and remember—doodles don’t have to be perfect, just fun. Try out these ideas, and you’ll be surprised at how creative you really are. Happy doodling!
Leave a Reply