
To create a beautiful mandala rangoli, first pick a clean, flat surface and gather supplies like colored powders, a compass or bowls for tracing circles, and maybe some flower petals for extra flair. Sketch a big circle, split it into equal sections, and start filling from the center out, using bright colors and bold patterns. Don’t forget the finishing touches—add beads or candles for sparkle. Get ready, because the next steps make your design truly eye-catching!
Key Takeaways
- Choose a clean, flat surface and lightly sketch a large circle for the mandala base using a compass or round object.
- Gather colored powders, rice flour, flower petals, and decorative items like beads or diyas for vibrant and textured designs.
- Divide the circle into equal sections and start filling colors from the center outward for symmetry and balance.
- Use tools like tiny spoons or funnels for precise placement of powders and crisp pattern edges.
- Add finishing touches with contrasting colors, sequins, and candles to enhance visual appeal and festive spirit.
Understanding the Significance of Mandala Rangoli

Mandalas are like magical circles that have been a part of Hindu culture for ages, and when it comes to Mandala Rangoli, there’s more going on than just pretty patterns on the floor.
Mandala designs actually carry deep meaning—they’re all about wholeness, unity, and the entire universe, wrapped up in a circle. The word “mandala” itself comes from Sanskrit and literally means “circle.”
These eye-catching designs usually have complex geometric patterns that start from the center and spread outward, kind of like a journey to enlightenment or self-discovery.
People use mandala designs as a spiritual tool, not just for decoration, and making one can be super relaxing—almost like meditation with colored powder.
It’s peaceful, beautiful, and surprisingly powerful!
Gathering Materials for Your Mandala Creation
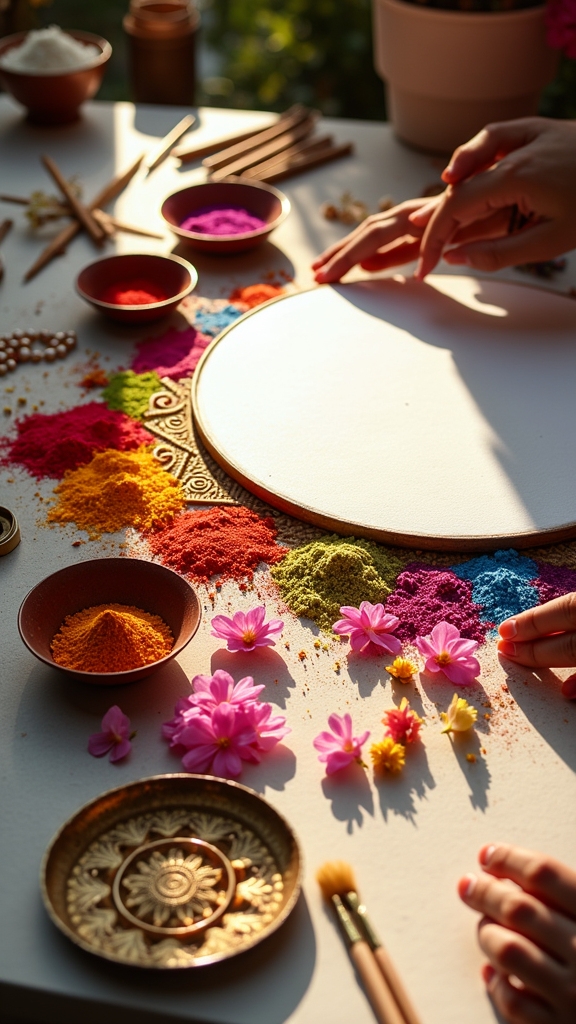
Supplies are the secret sauce behind any awesome mandala rangoli, so it’s worth tracking down the right stuff before diving in. To make those Rangoli designs pop, colored powders or rice flour in bright shades are a must—think rainbow meets art class! For perfect circles in your mandala, grab a compass, or even a kitchen bowl for tracing. Don’t forget natural goodies like flower petals or seeds for extra texture and color. Want to add some sparkle? Toss in diyas or candles for that wow effect once your design’s done. Here’s a quick cheat sheet for your supply hunt:
| Main Ingredient | Extra Tools | Decorative Touches |
|---|---|---|
| Colored powders | Compass/bowls | Diyas/candles |
| Rice flour/chalk | Stencils | Flower petals |
| Flower petals/seeds | Spoons/sifters | Fresh leaves |
Preparing the Surface for Rangoli Art

Before starting on the Mandala Rangoli, it’s super important to pick a spot that’s flat and clean—imagine trying to make art on bumpy carpet, yikes!
Sweeping or mopping the area helps your colors stick better and keeps your lines nice and sharp, plus nobody wants random crumbs in their masterpiece.
A well-chosen, tidy surface is the first secret to a Rangoli that really pops!
Choosing the Right Location
Finding just the right spot for a mandala rangoli can feel like a mini adventure—almost like searching for buried treasure, but with less digging and more sweeping!
When picking a location, the surface really matters. Flat, even areas like cement or tiled floors make Rangoli patterns pop, while bumpy or carpeted spots just don’t cut it. High-traffic zones or spaces near your front door are perfect for showing off your masterpiece to everyone who walks by.
If you’re thinking about making your design outside, try to stay away from windy or rainy places—unless you want your beautiful colors to blow away!
Before the colors come out, lightly sketch the center and outline with chalk or pencil. That way, your patterns stay sharp and symmetrical.
Surface Cleaning and Preparation
Even the most dazzling Rangoli design can flop if the surface isn’t ready for action! Before jumping into the magic of Rangoli Art, surface cleaning and preparation should be top priority.
Start by picking a flat, clean spot—cement or tile works best. Sweep away every bit of dust, dirt, or cookie crumb (yes, even that one!). Next, grab a damp cloth and wipe down the area, because even invisible grit can mess things up.
Let the floor dry completely; patience now means no smudges later! If you’re working outside, make sure the space is safe from wind and rain—nobody wants their Rangoli to blow away mid-creation.
For extra help, sketch a light outline using chalk, so your Mandala Rangoli stays on track.
Sketching the Circular Mandala Outline

A blank floor or tabletop can feel like a giant invitation, just waiting for a burst of color and creativity.
To begin sketching a mandala rangoli, the artist first chooses a clean, smooth surface—nobody wants their masterpiece interrupted by dust! Using a compass or even a dinner plate (yes, kitchen tools can be art tools), they trace a big circle. This becomes the stage for all the magic.
Next, they lightly divide the circle into equal sections, a bit like slicing a pizza—perfect for symmetry. In the center, simple shapes appear, maybe even a tiny lotus flower, hinting at all the beauty to come.
Lines are kept gentle and erasable, so mistakes disappear like magic. Precision now makes future patterns shine!
Filling in Colors and Patterns
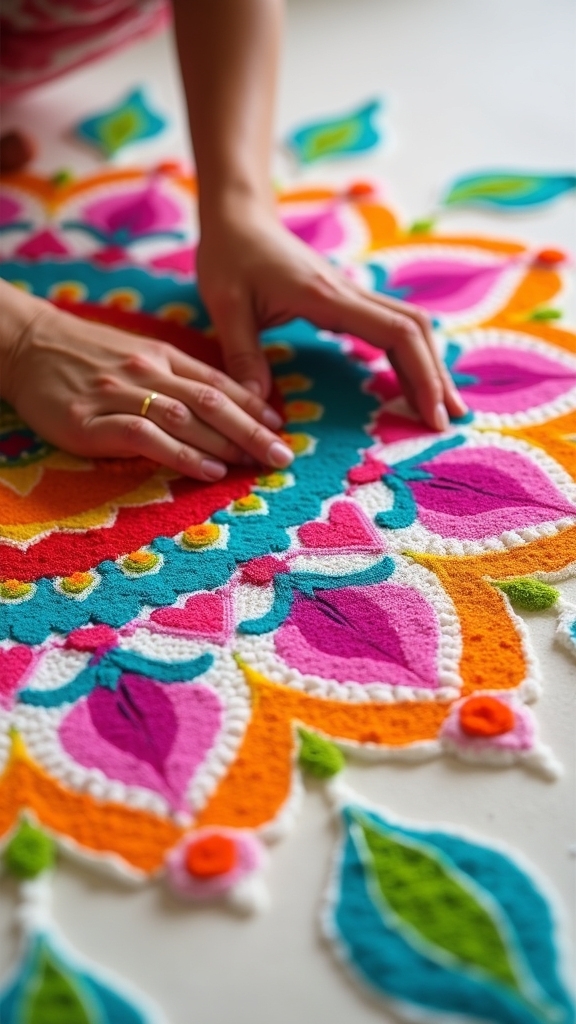
Splashing color onto the mandala rangoli feels like waking up a sleepy drawing—suddenly, everything comes alive!
When it comes to filling in colors, starting at the center is key. It’s kind of like eating a pizza from the middle out—except way less messy. Each section gets its own color, and you want to finish one section before moving to the next, so the design stays sharp and organized.
Traditional mandalas love bold shades like blue, green, yellow, and red; these colors just pop! Inside each section, adding intricate patterns—tiny dots, squiggly lines, or swirling curves—makes the design really stand out.
For a smooth look, use a tiny spoon or funnel to pour colored powder, keeping colors crisp and unmixed.
Adding Decorative Elements and Details
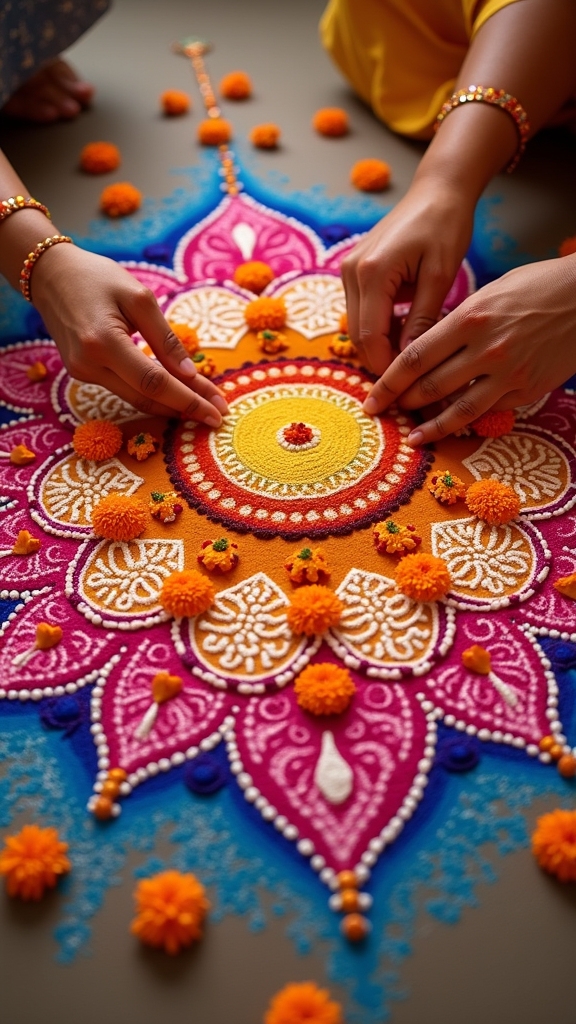
When it comes to making a mandala rangoli truly pop, adding decorative elements and details is where the magic happens. This is an important part of the process because it’s your chance to show off creativity and make the design shine.
Use vibrant colors—natural pigments or colored powders work great—to highlight the tiny details and give the mandala that “wow” factor. Next, toss in some beads, sequins, or even a bit of glitter at the center for a sparkly focal point.
Contrasting colors on the outer layers build depth and really make the whole thing stand out. Fun motifs like lotus petals or geometric patterns around the edges add a touch of culture. A crisp white or gold outline finishes everything off perfectly!
Displaying Your Mandala Rangoli Design
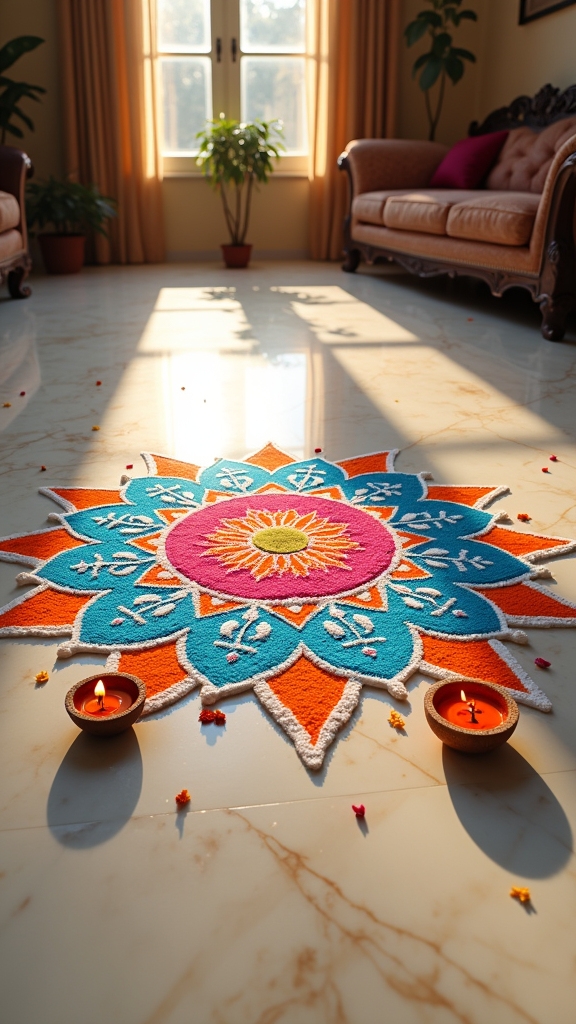
Even though creating a mandala rangoli is a blast, showing it off is where all that hard work really pays off!
When it comes to displaying your mandala rangoli design, the main entrance is a classic choice. It’s like rolling out a colorful welcome mat for your guests—and maybe even for some good vibes, too.
Make sure the surface is clean and flat; avoid carpets or tricky tiles that can make designs on the floor look messy. Patios and porches work great, giving plenty of space for those fancy details.
For extra sparkle, place diyas or candles around your rangoli, especially during Diwali. If you want flexibility, try making your design on cardboard, so you can move it around or save it for later!
Creative Variations and Personalization Tips

Although mandala rangolis already look amazing, there are tons of ways to make them even more unique and personal.
Try mixing up the geometric shapes—add flowers, leaves, or even zigzags in the outer layers for a fresh twist in your new Rangoli.
Picking colors is a big deal, too! Go wild with bright shades if you want lots of energy, or choose soft pastels for a super chill vibe.
Want to make it special? Plop your initials or a tiny symbol right in the center. That’s like putting your signature on a masterpiece!
Fancy materials like flower petals or a sprinkle of glitter can really make things pop.
And don’t forget a cool central motif—maybe something lucky or meaningful to you!
Frequently Asked Questions
How to Create a Mandala Design?
Creating a mandala design involves sketching a central circle, dividing it symmetrically, and filling sections with geometric patterns. Careful color selection enhances visual impact, while outlining and decorative elements add depth, resulting in a harmonious, intricate artwork.
What Is the Difference Between a Mandala and a Rangoli?
The difference between a mandala and a rangoli lies in their purpose and cultural significance: mandalas symbolize spiritual unity and meditation, while rangoli serves as festive decoration, welcoming guests and honoring deities during Hindu celebrations and rituals.
How to Improve Mandala Art?
To improve mandala art, one should focus on achieving symmetry, refining intricate details, and exploring diverse styles. Emphasizing color harmony by selecting complementary palettes can enhance visual appeal, while mindfulness during creation fosters greater creativity and meaning.
How Can I Make Rangoli Designs?
Creating rangoli designs involves selecting a clean surface, sketching geometric patterns, and using thoughtful color choices to fill the design. Incorporating intricate details and additional decorative elements enhances both symmetry and visual appeal, resulting in enthralling traditional artwork.
Conclusion
Creating a mandala rangoli is like bringing a burst of color and good vibes right to your doorstep. With a few simple tools, some patience, and a sprinkle of creativity, anyone can do it—even if your first circle looks more like an egg! It’s all about having fun, getting a little messy, and letting your imagination run wild. So grab those colors and start designing; your masterpiece could be the next neighborhood showstopper!
Leave a Reply