
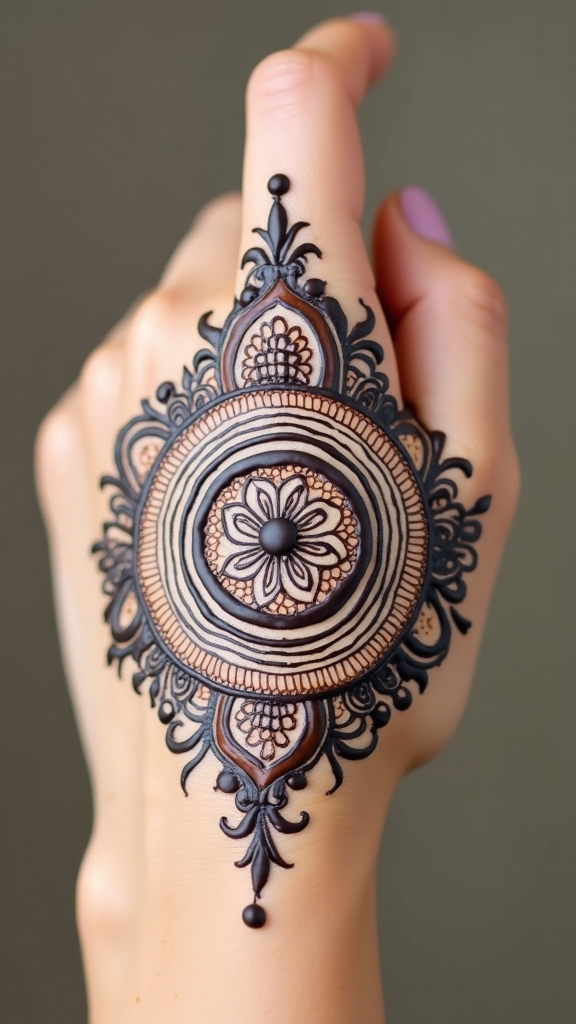
To draw a mandala mehndi design that really pops, start with a bold central flower or circle, then work outwards with sharp circles and layered patterns—think petals, dots, and bold lines for extra wow. Use a fine-tipped cone for crisp outlines, and don’t be afraid to add paisley or extra shapes for flair. Changing up the line thickness makes it super dynamic. Toss in a little glitter, and suddenly, you’ve got a design that stops people in their tracks. Stick around for more tricks!
Key Takeaways
- Start with a bold central motif like a flower or circle to anchor your Mandala and ensure symmetry from the center outward.
- Alternate thick and thin lines using a fine-tipped henna cone to create dynamic contrast and visual interest.
- Layer geometric shapes, petals, and dots to build depth and complexity, filling gaps with intricate details for a fuller look.
- Use light highlights, glitter, or rhinestones to accentuate key areas and make the design stand out.
- Sketch your design first and regularly step back to check symmetry, refining patterns for a polished, professional finish.
Essential Tools and Materials for Mandala Mehndi Art
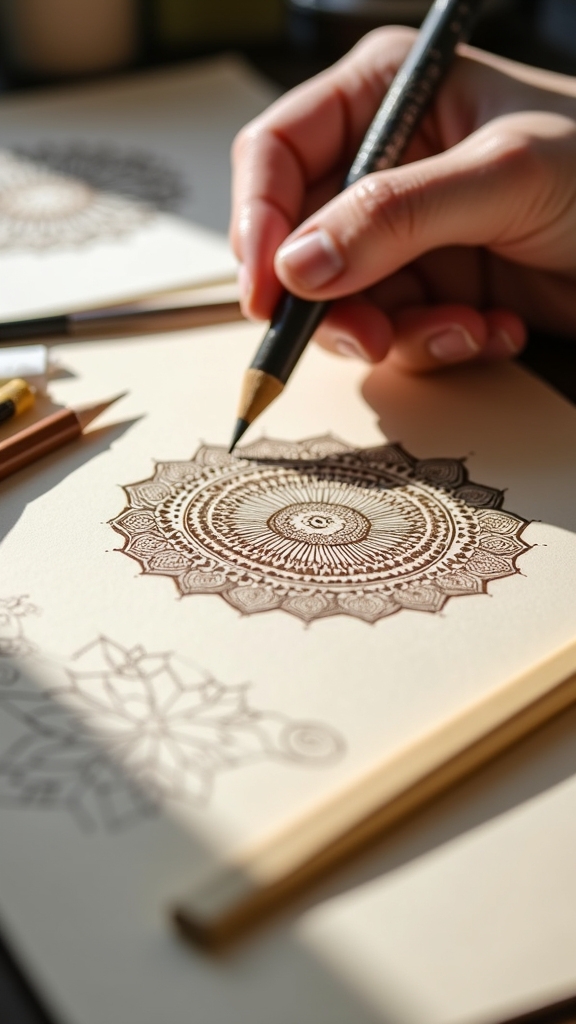
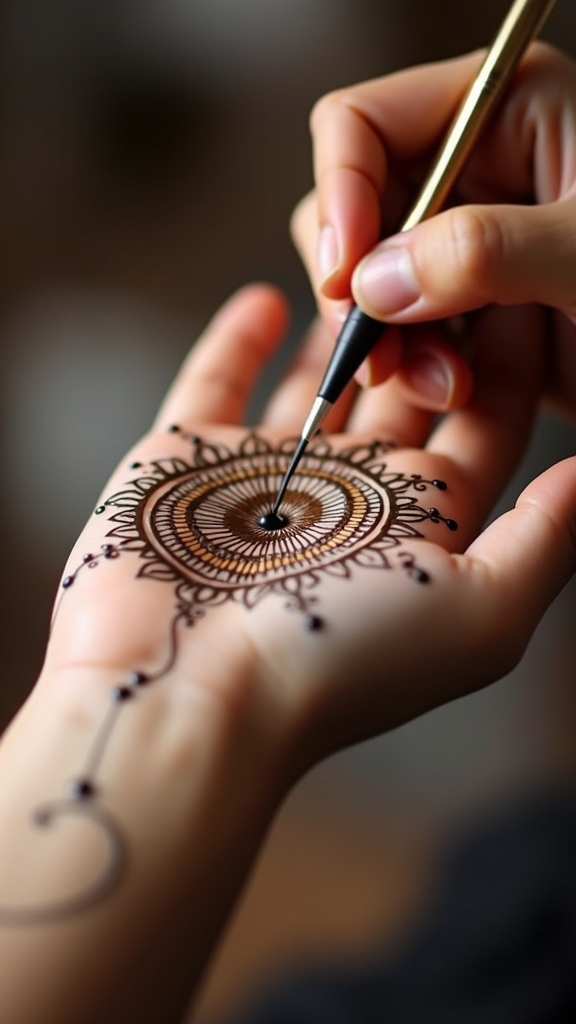
Jumping into the world of Mandala Mehndi art is a bit like gearing up for an epic quest—except instead of swords and shields, the heroes here need henna cones and some seriously steady hands.
The essential tools for creating Mandala Mehndi art start with a fine-tipped henna cone, perfect for those mind-blowing details in every mandala design. Practicing on paper, skin, or even fabric gives each Henna Mandala its own vibe.
Beginners might grab a stencil to keep their circles looking sharp, but the super-skilled go full freehand, flexing their creativity. Using high-quality henna powder mixed with lemon juice and essential oils means the stains are bold and beautiful.
And for a little extra wow, artists can add glitter or rhinestones to really make designs pop.
Setting Up Your Workspace for Creativity
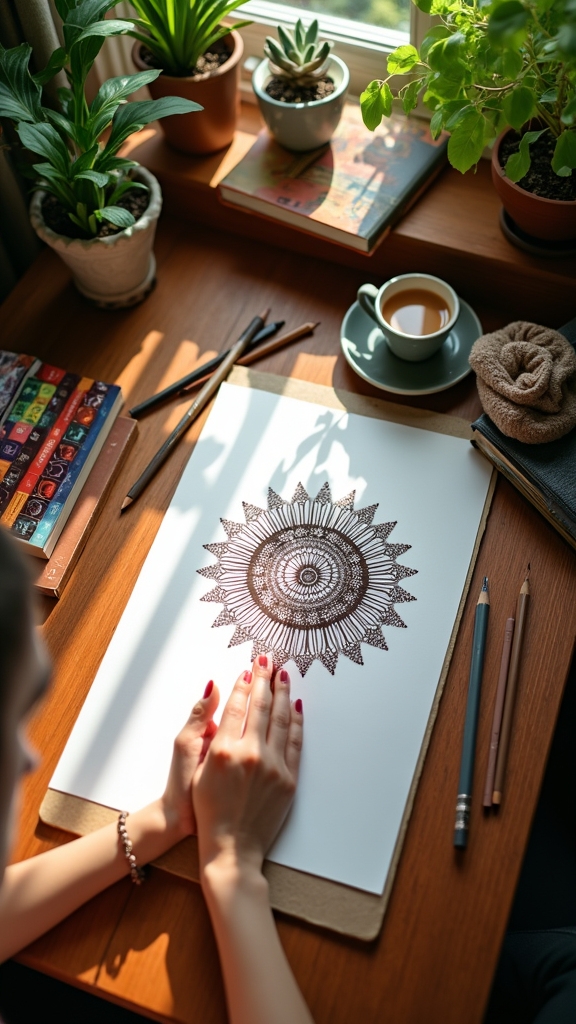
Getting started with your Mandala Mehndi masterpiece means setting up a space that actually makes you want to create—nobody gets inspired next to laundry piles!
Gathering your art supplies and putting them where you can reach them easily is a real game-changer, saving you from frantic hunts for missing henna cones mid-design.
Plus, choosing a spot that feels bright and comfortable (bonus points for cool music or a calming candle) can turn your workspace into a creativity zone that’s hard to leave.
Organizing Essential Art Supplies
Every artist knows that the magic starts with the right tools, and creating a mandala mehndi design is no exception. To get those easy mandala patterns just right, it’s smart to round up all your art supplies before you start—think henna cones, fine-tipped markers, or pens for super-precise lines.
It’s not just about having the supplies, though. Keeping them organized in trays or containers makes everything smoother, seriously cutting down on frantic searches for that one missing pen! A smooth surface like a sturdy drawing pad or desk is a must, so lines don’t get bumpy.
Having a sketchbook nearby is a game-changer, too; it’s where wild ideas and inspiration can run free before you commit anything permanent.
Choosing an Inspiring Environment
Once all the art supplies are lined up and ready for action, there’s something else that can totally boost the creative vibe—a workspace that sparks inspiration.
Seriously, please let your imagination run wild by picking a spot with tons of natural light. It’s amazing how much easier it is to Draw a Mandala when you can actually see those tiny details!
Grab a comfy chair, a sturdy table, and set up your tools—henna cones, sketch paper, and even some cool reference pics.
Want bonus points? Add a plant or a funky art piece that makes you smile.
Oh, and don’t forget to pick a quiet place—no barking dogs or noisy siblings. Set a time just for you, and let the creativity flow!
Choosing Your Central Motif: Flowers, Circles, or Geometric Shapes

Picking the right central motif is where things get exciting—do you go for flowers that burst with charm, classic circles that feel endless, or maybe some sharp geometric shapes for a cool, modern look?
Each choice has its own vibe, and finding the sweet spot between simple and super detailed can make your mandala pop without turning into a tangled mess.
It’s a bit like picking your favorite ice cream flavor—sometimes you want just one, but mixing two or three can be even better.
Exploring Popular Motif Options
Motifs are like the heart of any Mandala Mehndi design—they set the vibe and grab all the attention. When picking a central motif, flowers bring a burst of natural beauty and elegance to the table, perfect for anyone who loves a classic touch. Circles, on the other hand, represent unity and wholeness; they’re a favorite for their Mandala symbolism and deep cultural significance. If you want something modern, geometric shapes such as triangles or squares can totally shake things up. Combining these elements creates amazing design inspiration and adds serious wow-factor.
| Motif Type | Symbolism/Effect |
|---|---|
| Flowers | Beauty, elegance, tradition |
| Circles | Unity, wholeness, Mandala symbolism |
| Geometric | Modern, bold, creative edge |
Mix and match to make your design pop!
Balancing Simplicity and Detail
Dive right into the fun part: choosing the perfect central motif for your mandala mehndi design! This is where the magic starts.
The motif selection importance can’t be stressed enough—your choice sets the whole vibe. Want something dreamy? Go with flowers for a soft, romantic touch (perfect if you’re feeling fancy or channeling your inner bride).
More into order and cool lines? Geometric shapes shout modern and minimalist, showing off the simplicity vs complexity battle. Circles are the peacekeepers here, creating unity and pulling your whole design together.
When thinking about visual harmony techniques, remember: your central motif should stand out but not hog all the attention. Let it shine just enough, so the rest of your patterns can play along beautifully!
Achieving Perfect Symmetry in Your Mandala
Getting a mandala to look perfectly even can feel a bit like magic, but there’s actually a secret recipe behind that stunning symmetry. The journey starts with a central point—think of it as the “seed” of your design—where all those symmetrical patterns will bloom.
Grab a compass or a round object, and sketch your first circles to set the stage for awesome radial balance. Next, lightly divide your paper like slicing a giant pizza, making sure every section can host identical shapes.
Mirroring patterns on opposite sides keeps everything in harmony, almost like the design is having a conversation with itself. And don’t forget, stepping back and squinting at your work helps spot anything off.
Adjust as needed, and boom—design harmony revealed!
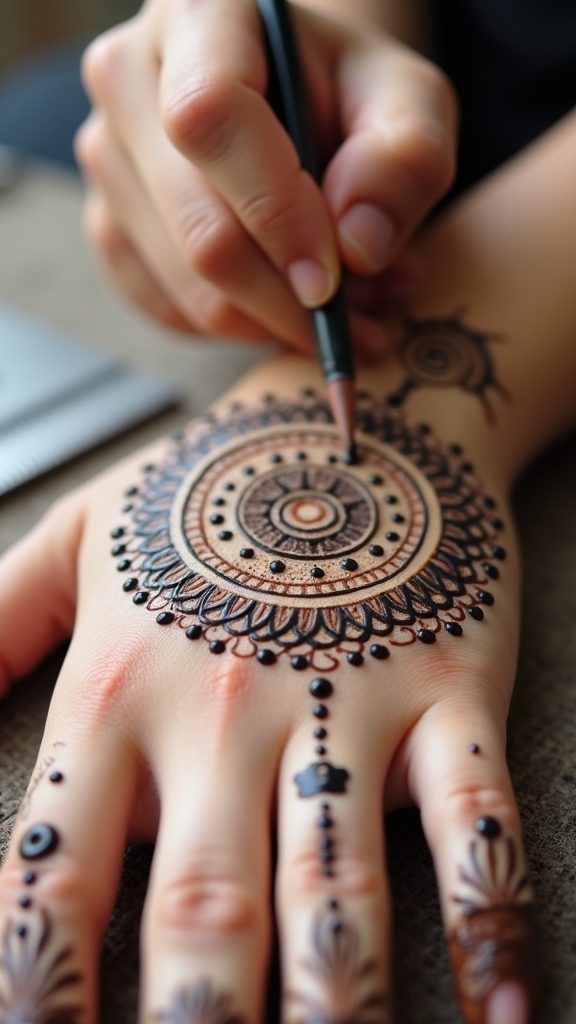
Building Layers: Creating Intricate Patterns and Textures
Imagine building a mandala like stacking epic layers on your favorite cake—each one adds something special and makes the whole thing pop. Start at the center and work outwards, using layering techniques to add depth. Circles, triangles, and petals are your go-to shapes for cool pattern variations. Don’t forget to toss in dots and lines to fill empty spots and boost texture. Mix up your line thickness—let some lines shout, while others just whisper in the background. This keeps the design lively! Step back every so often to check the visual harmony. Are the layers working together? If not, tweak away. Here’s a quick guide:
| Shape | Texture Trick | Layering Tip |
|---|---|---|
| Circles | Dots inside | Thicker outlines |
| Triangles | Parallel lines | Overlap with petals |
| Petals | Shaded edges | Alternate directions |
Enhancing Your Design With Paisley and Floral Elements
Sprinkle some extra magic onto your mandala by weaving in paisley and floral elements—these classic mehndi shapes are total game-changers.
Paisley patterns bring a dynamic flow that instantly makes your design look more lively and intricate, almost like it’s dancing across the page. When you tuck in floral arrangements, it’s like adding a secret garden right in the middle of your mandala—suddenly, everything feels more balanced and full of harmony.
Mixing up the sizes of your paisley and floral elements? Genius move. It helps different parts pop and keeps your design from looking flat or boring.
Don’t be afraid to experiment with textures or style, either. Combining these elements is a nod to traditional henna art, and your mandala will totally shine!
Playing With Line Thickness for Depth and Dimension
Dial up the wow factor in a mandala mehndi design by playing around with line thickness—it’s like magic for adding instant depth and personality.
By mixing up line weight, artists make their designs look way more interesting. Thick lines outline the main shapes, making them bold and impossible to miss, while thin lines sneak in, adding delicate little details that draw the eye.
This combo creates strong visual contrast, making certain parts pop while others softly blend in. It’s not just about looks, though—line thickness can totally change the emotional expression. Bold lines scream confidence, while thin ones whisper elegance.
Plus, practicing different line weights is a secret weapon for leveling up henna skills, making designs look polished and super professional.
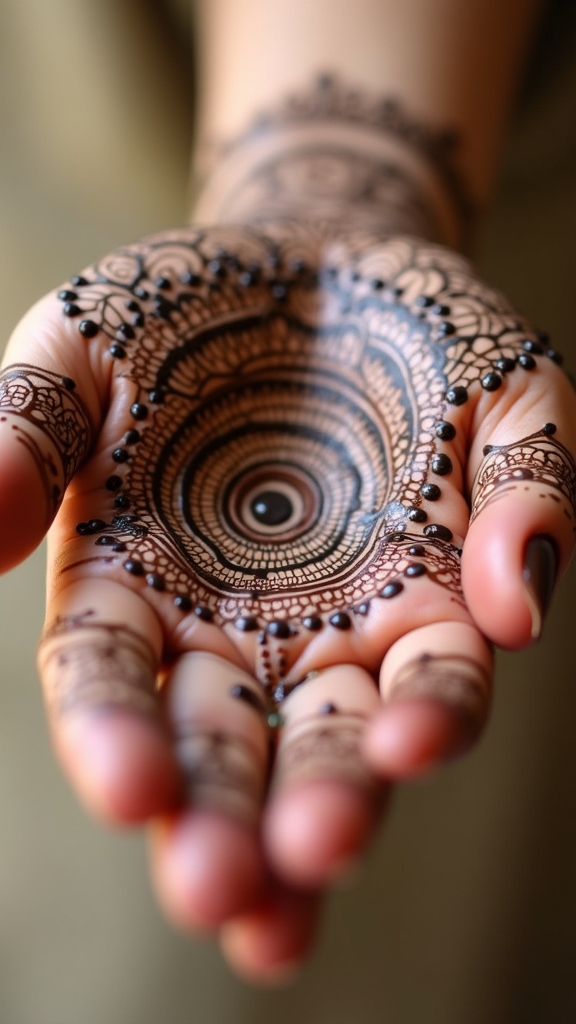
Finishing Touches: Outlining and Highlighting for Maximum Impact
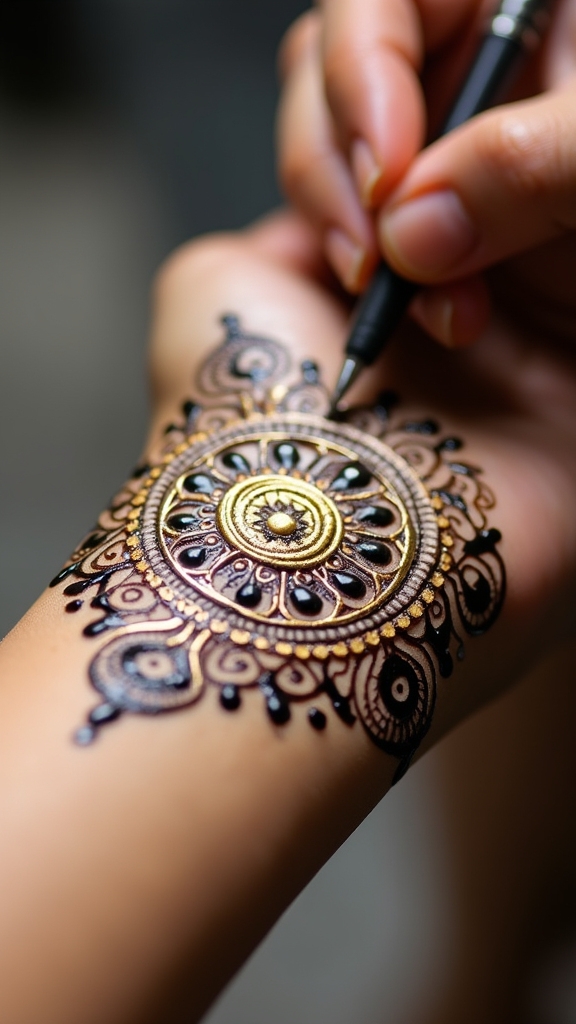
Time to give that mandala mehndi design some serious star power—outlining and highlighting are where the magic happens.
For bold outline styles, using a fine-tipped henna cone or gel pen keeps those lines super sharp. Try mixing up line thickness—thicker lines can shout “look at me!” while thinner lines whisper cool details.
For depth enhancement, toss in some subtle highlight techniques. Dab on lighter henna or even a bit of glitter gel to make patterns jump off the skin (just let the henna dry first, unless you like smudgy surprises).
Don’t forget little dots or fun decorations around the mandala; they fill gaps and make the whole thing pop.
Outlining and highlighting? That’s how you make your design go from “meh” to “wow!”
Practice Tips for Developing Your Signature Mandala Style
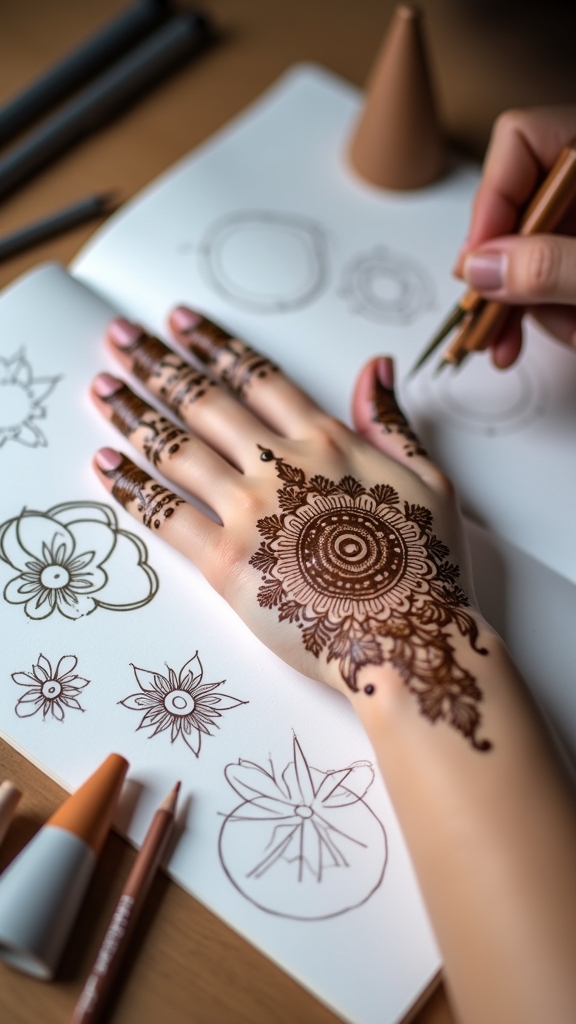
Creativity is the secret sauce when it comes to developing a signature mandala mehndi style. It’s all about mixing style evolution techniques, like experimenting with different shapes, floral motifs, or even traditional patterns, until something just clicks. Practicing mindfulness artistry helps too—take a deep breath, find your focus, and let those lines flow. Symmetry and balance really matter, so keep an eye on those while you work. Use tools like fine-tipped applicators to play with line thickness. Sketch ideas on paper first, since mistakes there don’t stain! Watching artists like Rupal on YouTube can spark personal inspiration sources, giving your designs a unique twist.
| Practice Tip | Why It Works |
|---|---|
| Try new patterns | Sparks creativity |
| Use varied tools | Adds cool textures |
| Sketch before henna | Easy to fix mistakes |
| Watch tutorials | Learn new tricks |
| Focus on symmetry | Makes designs pop |
Frequently Asked Questions
What Are the Rules for Drawing Mandalas?
When drawing mandalas, artists typically follow rules emphasizing symmetry techniques for balanced composition, pattern repetition to create rhythm, and careful selection of design elements. These principles guarantee visual harmony, allowing the mandala’s structure and intricate details to appear cohesive and engaging.
What Is the Difference Between Mandala and Mehndi?
The difference between mandala and mehndi lies in purpose and tradition. Mandala symbolism centers on spiritual geometry and meditation, while mehndi history emphasizes celebratory body art. Their design techniques differ, with mandalas focusing on symmetry and mehndi on decorative motifs.
How to Draw a Mandala Step by Step?
The current question involves drawing a mandala step by step, starting with circular shapes at the center. Artists build symmetrical patterns outward, incorporating intricate designs. Gradual layering and detail work help achieve the characteristic balance and complexity of mandalas.
How to Practice Mehndi Design?
When practicing mehndi design, one should focus on mastering design techniques, achieving pattern symmetry, and experimenting with color application. Regular practice with guided tutorials allows artists to refine their skills and develop visually balanced and vibrant creations.
Conclusion
Drawing a mandala mehndi design that pops isn’t magic—it’s practice, patience, and a little bit of daring! With the right tools, a cool workspace, and your wild imagination, you can create patterns that totally wow your friends. Don’t stress about making it perfect—sometimes the little wobbles give your design character. So grab that cone, trust your hands, and let your creativity spiral out. Your signature mandala style is just a few doodles away. Go make some art!
Leave a Reply