
Drawing eyes with pencil can feel like magic—grab an HB for outlines, sketch that almond shape, and don’t forget to keep things light to dodge crazy cartoon eyes! Add the iris and pupil next, marking highlights like tiny moons. Shading brings it all to life, so use a blendy stump and stronger pencils for pop. Detail the lid, flick in eyelashes, maybe toss in a sparkle. It’s all about patience and these slick tricks, and the secrets just get juicier.
Key Takeaways
- Begin by outlining an almond-shaped eye lightly with an HB pencil, ensuring proper proportions and symmetry using a straight edge if needed.
- Lightly sketch the iris and position the pupil, adding highlights by leaving unshaded areas aligned with the light source.
- Gradually shade the sclera, iris, and pupil using a range of pencils (HB, 4B, 6B), blending for smooth transitions and realistic texture.
- Add eyelid creases, subtle wrinkles, and draw eyelashes in grouped, curved strokes of varying thickness for natural appearance.
- Refine shadows and highlights with a kneaded eraser and blending stump, finishing with crisp edges and white gel pen touches for lifelike detail.
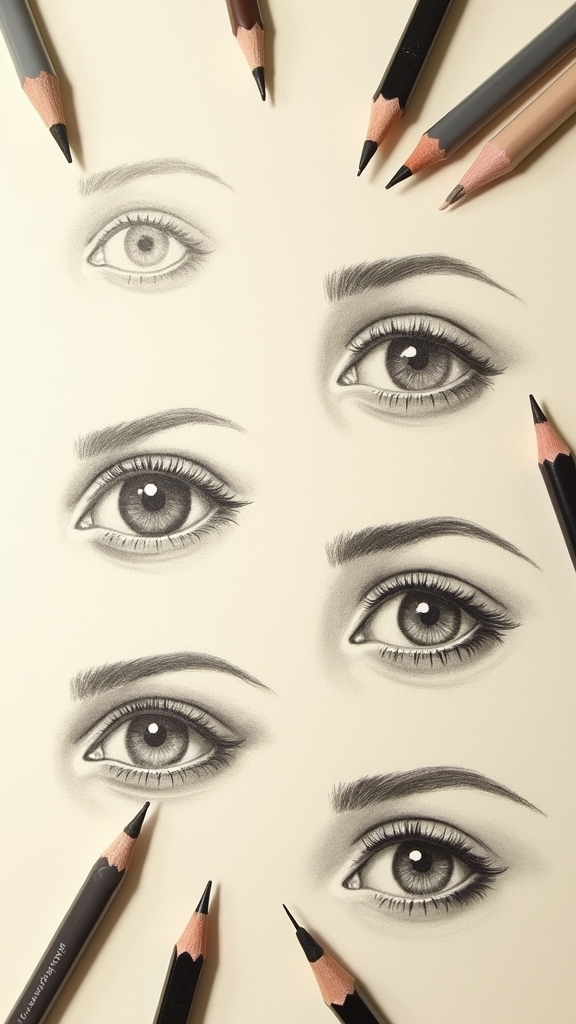
Materials and Tools for Drawing Eyes
No artist ever conquered the tricky business of drawing eyes without the right gear—think of it like assembling your superhero toolkit!
First up: the mechanical pencil with an HB lead. It’s perfect for mapping out tiny details and those delicate eyelashes.
Start with a trusty mechanical pencil and HB lead—your secret weapon for drawing every tiny eyelash and delicate detail.
When it’s time to get dramatic, a regular pencil with a darker shade, like a 4B, adds depth to the eye’s shadowy areas.
To blend all that shading together? Grab a trusty blending stump—it’s like a magic wand for smooth shifts.
Oops, made a mistake? No worries! A solid eraser zaps away goofs, while a kneaded eraser can gently pull up graphite for subtle highlights.
Excellent highlights and crisp lines around the iris? That’s where a clean eraser really shines!
Outlining the Eye Shape and Proportions
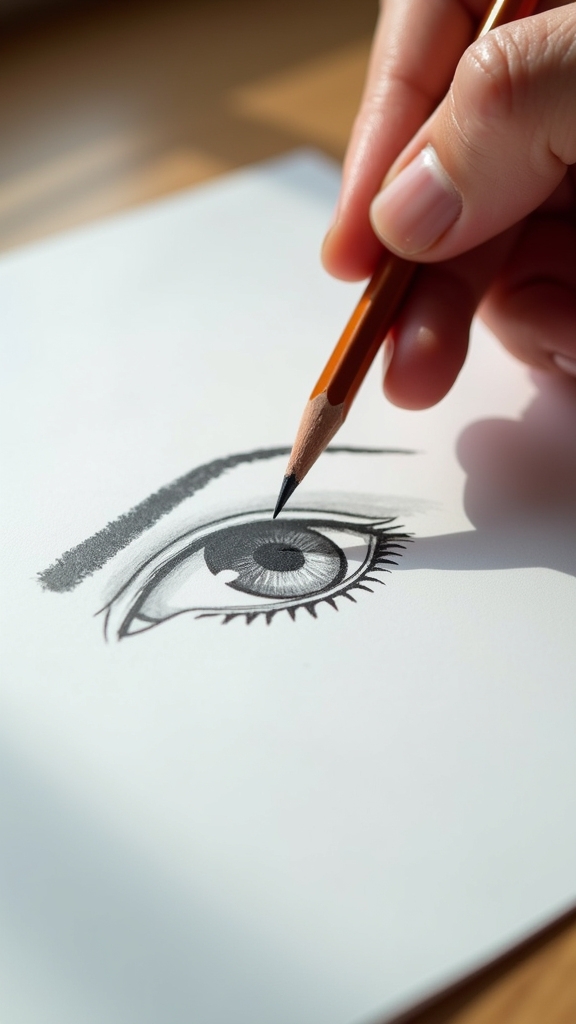
The outline is where the magic starts—kind of like laying out a treasure map before finding the hidden gold.
Creating the right eye shape means everything, and artists kick things off by grabbing an HB pencil. Light pressure is key for a soft outline—no dark lines haunting your final drawing! Start with an almond shape, remembering that the inner corner is lower than the outer. This step by step method makes sure the eye’s proportions look natural.
For symmetry, using a straight edge can save the day, especially when drawing both eyes. Reference images come in clutch, helping artists check accuracy.
Here’s what makes outlining really unforgettable:
- Light, sketchy outlines spark excitement!
- Symmetrical shapes boost confidence.
- Reference images turn nerves into smiles!
Sketching the Iris, Pupil, and Highlights

Once the basic eye outline is down, the real fun begins—sketching the iris, pupil, and those sparkling highlights that make eyes look alive.
Start by lightly sketching the iris in a circular shape that fits perfectly with the other facial features. Mark the center of the pupil with a faint cross, making sure it lines up with the light source and feels realistic. Fill in the pupil with a dark 6B or 8B pencil, but be careful not to cover the highlights—they’re tiny but mighty for bringing the drawing to life!
For the iris, grab your blending stump and smooth graphite from the edges toward the pupil. Add radiating spokes with a 4B pencil, blending them just enough to keep things interesting but not too uniform.
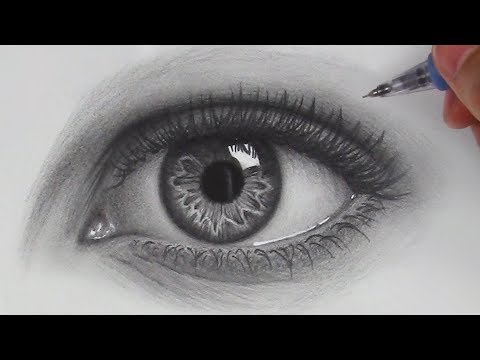
Shading Techniques for Depth and Realism
Jump right in—shading is where a boring eye sketch suddenly starts to look real and totally cool.
With smart shading techniques, it’s possible to make the eye appear deep, shiny, and bursting with life. A light hand helps you control graphite, keeping those sparkly highlights in the iris and pupil bright. To create darker shadows, switch to softer pencils like 4B and 6B.
Want that soft, dreamy look? Use a blending stump to blur pencil strokes, but don’t blend away all the detailed lines in the eye. If things get too dark, a kneadable eraser makes it easy to wipe away graphite—almost like magic!
Here’s why it gets exciting:
- Shadows add drama—so moody!
- Highlights pop, making lash reflections shine.
- Erasing mistakes? Instant relief!
Enhancing Eyelids, Eyelashes, and Final Details

Sharp shadows and smooth blends have turned a flat eye into something shockingly lifelike—nice!
Now it’s time to tackle enhancing eyelids, eyelashes, and those stunning final details that make a great difference. Tiny, gentle lines show subtle eyelid wrinkles; slowly darkening the crease adds drama, but careful, you want it natural.
Eyelashes can look wild if you rush—they’re best drawn in threes at first, each moving like the letter ‘j’ with different twists and thicknesses. Sure, it might look odd at first, but drawing tutorials always say: stay patient.
Grab a white gel pen and tap in highlights on the tear duct and lower lid, making them pop.
Last, tweak shading consistency, checking smooth shifts to keep the eye round and realistic.
Frequently Asked Questions
How to Draw an Eye Step by Step for Kids?
When learning how to draw an eye step by step for kids, focusing on simple eye shapes, basic shading techniques, playful color choices, cartoon eyes, realistic features, and varied eye expressions helps build both creativity and observational skills.
What Is the Rule for Drawing Eyes?
When drawing eyes, artists follow rules involving accurate eye proportions, careful eyelid structure, and balanced symmetry. Effective shading techniques, attention to iris details, and precisely placed reflection highlights are essential for creating realistic and expressive eye renderings.
How to Make the Easy Eyes?
To make easy eyes, one uses basic eye shapes with simple shading and cartoon eye styles. Easy eye techniques involve eye proportion tips and beginner drawing methods, helping artists quickly sketch expressive eyes without focusing on complex realism.
How to Draw Two Eyes Step by Step?
The current question involves drawing two eyes step by step, focusing on accurate eye proportions, shading techniques, and iris details. Attention to various eyelash styles, expression variations, and appropriate pencil types enhances overall realism and expressive quality.
Conclusion
Drawing eyes with just a pencil might seem tough at first, but now anyone can give it a shot. With a few tricks and a little patience, sketched eyes can leap off the page, full of character and life. Remember, nobody’s first eye looks perfect—eyelashes have a plan to go wild! Just relax, keep practicing, and don’t be afraid to mess up. Every smudge or wobbly line gets artists one step closer to truly awesome, realistic eyes.
Leave a Reply