
Designing your own sketchbook cover is a blast! First, pick a sketchbook that suits what you want to make, from doodles to paintings. Next, grab paints, brushes, and maybe some washi tape—protect your desk, too! Sketch wild design ideas on scrap paper, then outline your favorite on the cover. Paint it, add bright patterns, and let it dry before sealing with a spray for extra durability. There’s more to know, like cool texture tricks and keeping your masterpiece safe—stick around!
Key Takeaways
- Choose a sketchbook with suitable paper, size, and binding for your intended creative projects.
- Gather essential materials such as paints, brushes, protective desk coverings, and optional decorative papers or fabrics.
- Brainstorm multiple design ideas and sketch your favorites on scratch paper before selecting one to refine.
- Apply colors, patterns, and textures in layers, allowing each to dry fully before proceeding to the next step.
- Protect your finished cover with a compatible sealant and, if desired, use a protective sleeve for extra durability.
Selecting the Perfect Sketchbook for Your Project

How does someone even begin to choose the right sketchbook when there are so many options out there?
Picking a sketchbook isn’t just about grabbing the first thing you see. Think about what you actually want to do. If you dream of painting wild dragons, watercolor paper is a must—trust me, your soggy pages will thank you later.
Maybe you want to make a sketchbook for doodles or comics, so look for lighter paper that won’t bleed ink.
Size matters too! A tiny one fits in your backpack for fire-breathing inspiration on the go, but a big sketchbook cover gives you tons of space to sprawl out your ideas.
Don’t forget, spiral bindings flip easy, hardcovers survive epic tumbles—choose wisely!
Gathering Essential Materials and Tools
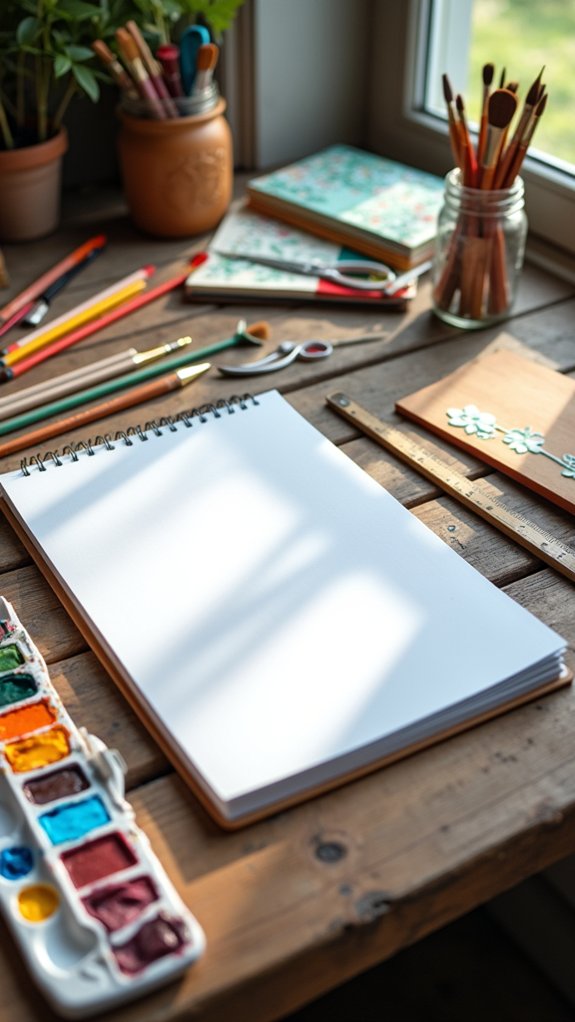
Before splashing any paint, the first step is picking out the right sketchbook cover, whether it’s a smooth new one or that old spiral-bound warrior from last year.
A solid project calls for the basics—paints, brushes, a white pencil for a sketch, and definitely some protection for your desk unless you want to turn it into a Jackson Pollock original.
With supplies and workspace ready, it’s game on for decorating, so no worries about surprise messes or missing tools halfway through the fun.
Choosing Cover Materials
A good cover can make a sketchbook feel like a treasure chest, holding all those wild ideas and doodles safe inside.
The first big decision is what materials to use. The stars of the cover world are sturdy stuff like binder board or thick cardboard; these keep everything safe from squishing and bending—no more floppy sketchbook blues!
But don’t forget decorative touches, like patterned paper or fabric, to give the cover some personality. Just make sure whatever decorative material you pick is cut a bit bigger than your sketchbook for smooth wrapping.
To make your material choices easier, here are three cover tips:
- Stick to strong materials for durability.
- Choose decorative papers or fabrics that make you happy.
- Always pick materials slightly larger than the sketchbook.
Assembling Necessary Tools
Gathering all the right materials and tools is basically like putting together a superhero squad for your sketchbook cover project—the more prepared you are, the smoother the whole adventure goes.
For a DIY Sketchbook, having the perfect heroes matters. Grab fabric pieces in three sizes, a trusty sewing machine (think BERNINA 380 style), and loads of matching thread. Pins? Amazingly helpful.
And don’t forget a needle and thread for details and those Coptic binding techniques everyone raves about. Want your cover super sturdy? Iron and fusible interfacing are your sidekicks.
Add handy sidekicks like an awl, bone folder, and razor cutter. Plus, PVA glue (mixed with water) brings it all together.
Optional, but awesome: brad fasteners and waxed linen cord—the dynamic duo for fancy binding fun.
Brainstorming and Sketching Out Design Ideas

Dive headfirst into the fun part—let your imagination run wild as design ideas start swirling around your head!
Before anything else, pick out the sketch book you want to decorate. Make sure it has a cover that works with your favorite design techniques.
Now, grab some scratch paper and start sketching out tons of different ideas. Try different colors, themes, and styles—nothing is too silly or too wild at this stage!
Don’t forget to keep your workspace clean, so your creativity won’t get buried under a mountain of art supplies.
- Play with color palettes: Mix and match colors that jump out at you or feel harmonious.
- Sketch several design concepts: Let your pencil dance across the page with bold, quirky, or intricate ideas.
- Lightly outline with a white pencil: This trick helps the design pop later!
Prepping the Cover Surface for Decoration
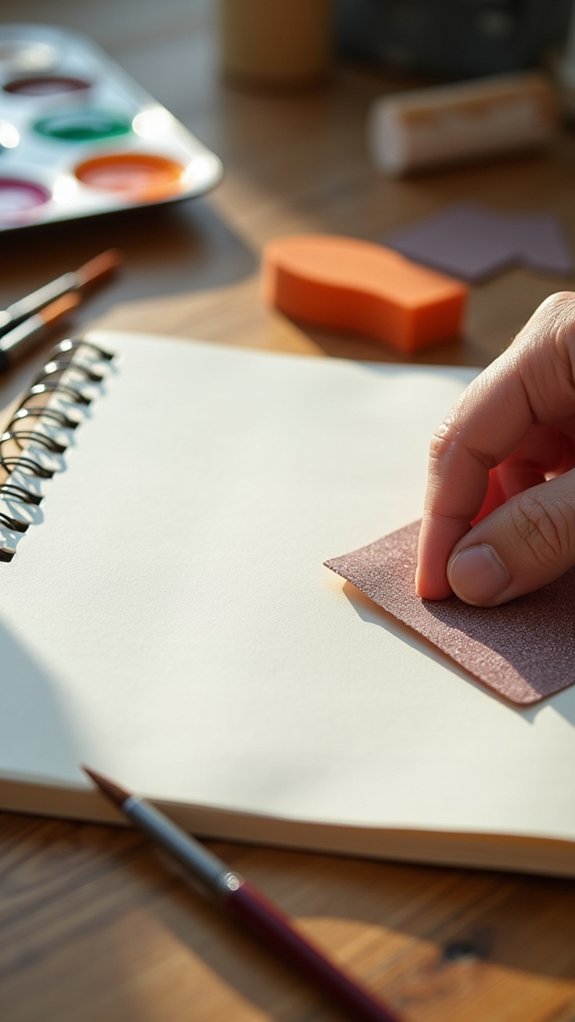
Before the real decorating fun can start, it’s super important to get your sketchbook cover ready for action. Choosing the right cover—one that’s clean, smooth, and easy to work with—makes all the difference, and don’t forget to wipe away any dust or smudges (nobody wants surprise crumbs in their paint).
A quick scuff with sandpaper or a coat of primer can make designs stick better, kind of like sticking a superhero cape on your sketchbook so it’s ready for anything!
Selecting Proper Cover Materials
A solid sketchbook cover is like armor for your art—it needs to be tough enough to take a few bumps, but still look awesome.
Picking the right cover materials is where it all starts. Sturdy types—like binder board or thick cardboard—are super important because nobody wants their cover flopping around like a soggy sandwich.
When choosing decorative paper or fabric, make sure it’s compatible with your adhesive (think a good PVA glue), or things might get weird and warped.
Here’s how to get it right:
- Measure for Protection: Go about half an inch bigger than your pages, front and back, for extra shield power.
- Choose Durable Materials: Grab those thick boards so your sketchbook survives backpack chaos.
- Adhesive Compatibility: Test your glue and paper together—no surprise ripples or messes!
Cleaning and Priming Surface
Getting that sketchbook cover ready for decorating is like prepping a canvas for a masterpiece—skipping steps can spell disaster.
To start, cleaning is key. Wipe the surface with a damp cloth, banishing dust and sneaky oils that might mess with your paint. If your cover is glossy, grab some fine-grit sandpaper and lightly scratch it up. This isn’t about destruction—it’s about giving your primer and paint something to grip!
Now, reach for a primer that matches your cover’s material. Spray primer for plastic; acrylic primer for cardboard—trust those labels. Apply thin, even coats, taking superhero patience to let each layer dry as directed. Rush this, and you risk smudges or streaks.
A well-primed surface means your cover decorations will last and look professional!
Transferring and Refining Your Chosen Design
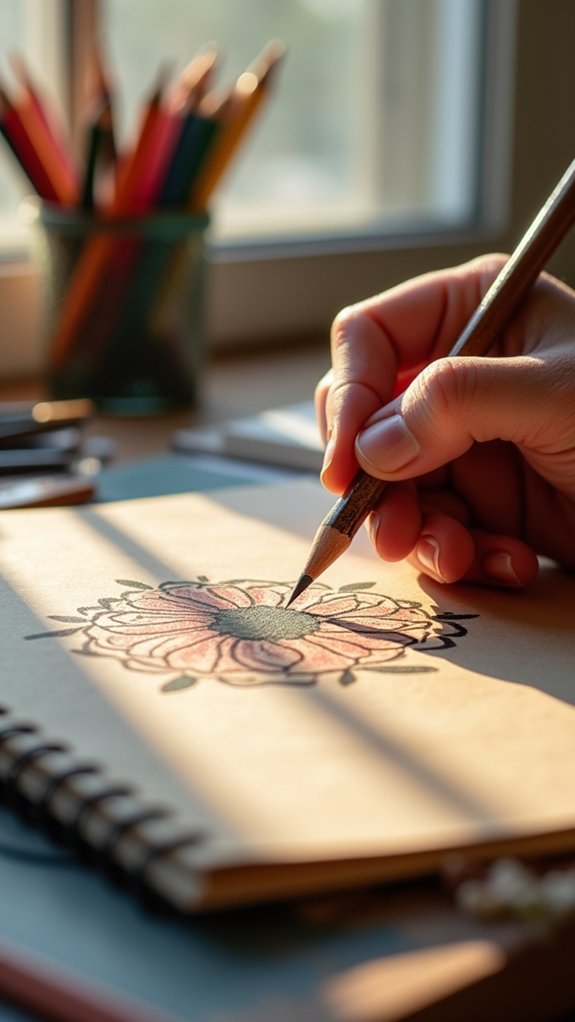
Take a deep breath—this is where the magic really happens. Laying out your design on your sketchbook cover is like seeing your idea come alive outside your head for the first time.
Start by sketching your design on regular paper, making sure it fits your cover—no squishing favorite doodles at the edge! For a sharp transfer, use tracing paper to carefully bring the outline to the cover.
If you want the design to really pop, grab a white colored pencil or some light chalk to trace out each part over your painted base.
- Sketch on paper first and make sure your design matches the cover size.
- Use tracing paper for neat outlines, especially with tricky details.
- Carefully transfer the outline using a white pencil or chalk.
Adding Color, Patterns, and Texture
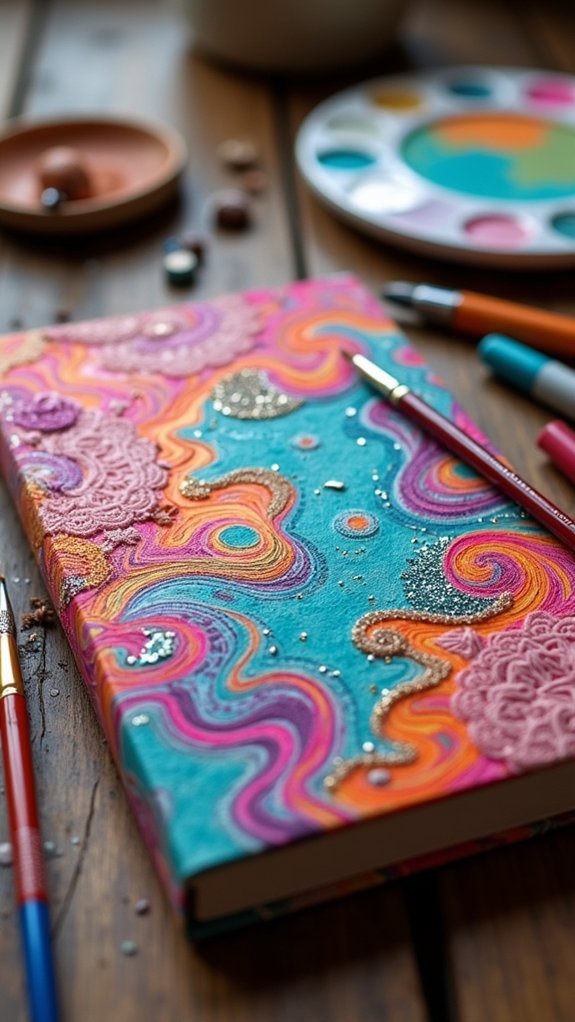
Splash bold color onto the cover and suddenly, that plain sketchbook transforms into something totally unique.
First, pick a base color—grab some spray paint or acrylic paint and lay down a solid coat.
Now, here’s where the fun starts: use stencils or strips of washi tape to add crazy patterns on top. You can make stripes, polka dots, or even zig-zags.
Want to take it up a notch? Go wild with texture. Try dabbing with a sponge, flicking paint for splatters, or smoothing on some textured gel.
Each layer adds serious personality, but patience counts—let every color, pattern, or texture dry before layering on more, unless you’re into accidental abstract art!
That’s how a sketchbook cover goes from basic to completely eye-catching.
Sealing and Protecting Your Finished Artwork

Once all those wild colors, patterns, and textures have finally dried, it’s time to make sure that awesome cover actually lasts. No one wants their masterpiece smudged or faded after just a few backpack rides!
To really protect your sketchbook cover, a sealant is essential. For most artwork, a clear acrylic spray or varnish gets the job done, locking in color and even making everything pop! If you’ve used watercolor, grab a fixative made just for that—it’ll keep the colors looking fresh and stop them from running if they get wet.
Always remember to test your sealant on a scrap first so you don’t get any nasty surprises.
- Choose the right sealant for your medium.
- Apply in a well-ventilated area.
- Use protective sleeves for extra durability.
Frequently Asked Questions
What Materials Are Used for Sketchbook Covers?
Materials for sketchbook covers vary, often featuring sturdy paper types such as thick cardboard or binder board. Binding techniques influence material choice, while cover designs may include patterned paper, fabric, or acrylic paint for added durability and aesthetic appeal.
How to Make a Sketch Pad?
To make a sketch pad, one selects sketch pad types and sizes, gathers paper, creates signatures, marks binding holes, and sews signatures together. The sketch pad binding process concludes with attaching decorated covers and endpapers, ensuring durability and style.
How to Decorate the Front Cover of a Sketchbook?
When exploring how to decorate the front cover of a sketchbook, individuals often utilize cover design techniques, select artistic themes, and prioritize personal expression, resulting in a unique, visually appealing surface that reflects their individual artistic identity and inspiration.
How to Plan a Sketchbook Page?
Planning a sketchbook page involves selecting sketchbook themes, arranging page layout thoughtfully, and drawing on artistic inspiration. Thumbnail sketches and color palettes are chosen to guarantee visual harmony and cohesion, enhancing the expressive potential of each composition.
Conclusion
All in all, designing a sketchbook cover is like giving your creativity a stage to perform on. Every brushstroke or doodle lets personality shine, and there’s no wrong way to make it yours. The best part? Every time someone asks, “Where’d you get that awesome cover?” you get to say, “I made it!” So grab your supplies, trust your ideas, and turn that plain cover into something epic—because who wants boring when you can have brilliant?
Leave a Reply