
Creating beautiful Posca canvas art is super fun and easier than it looks! Start with a smooth blue background on your canvas, then use Posca pens to add bold leaves and wild, colorful flowers—seriously, go crazy with shapes! Play with thick and thin lines for extra detail, and don’t forget to let everything dry between steps (no one likes a smudgy sky). Ready for tricks on framing and more cool ideas? Stick around—there’s even more color magic up next.
Key Takeaways
- Prepare your canvas with a smooth, light blue Posca background and let it dry completely before adding details.
- Organize all Posca pen colors and rotate your canvas while working for even coverage and clean lines.
- Vary leaf shapes, sizes, and colors, adding fine-lined details to create dynamic, textured foliage.
- Use vibrant, contrasting colors for flowers and position them among leaves for a balanced, lively composition.
- Enhance all elements with fine-lined outlines, hatching, and playful details to add depth and visual interest.
Preparing Your Canvas for Posca Art

Every masterpiece starts with a good foundation, and when it comes to Posca canvas art, getting the canvas ready is half the fun.
A masterpiece begins with a solid foundation—prepping your canvas is where the magic of Posca art truly starts.
For any canvas painting, the first step is picking a small canvas and giving it a light blue background—think of it as setting the stage for your artistic adventure.
Grab those Posca pens, because their bright colors and awesome coverage make them perfect for this job. Rotate your canvas as you work to keep the background smooth and avoid weird streaks or bumps. It’s almost like spinning a pizza, but less messy!
Let the base layer dry completely so you don’t end up with a smudgy disaster.
Before you start, get your workspace ready with all your Posca pen colors—no frantic searching required!
Applying a Vibrant Sky Background

A splash of light blue can totally transform a plain canvas into a sky full of possibilities. To kick things off, grab a light blue posca pen and start painting the edges of your canvas first—this trick makes sure the sky wraps all the way around, no bald spots allowed!
Use smooth, horizontal strokes for the background, and if you see any weird lines or bumps, just rotate the canvas to even things out. Want extra drama? Press harder for deeper blue patches or lighten up for a breezy look.
Let the blue layer dry completely—seriously, don’t rush it, or you’ll get smudges. Once dry, a fine-tipped posca pen is perfect for outlining clouds or adding little sky details that make your art pop.
Designing Leaves for Visual Interest
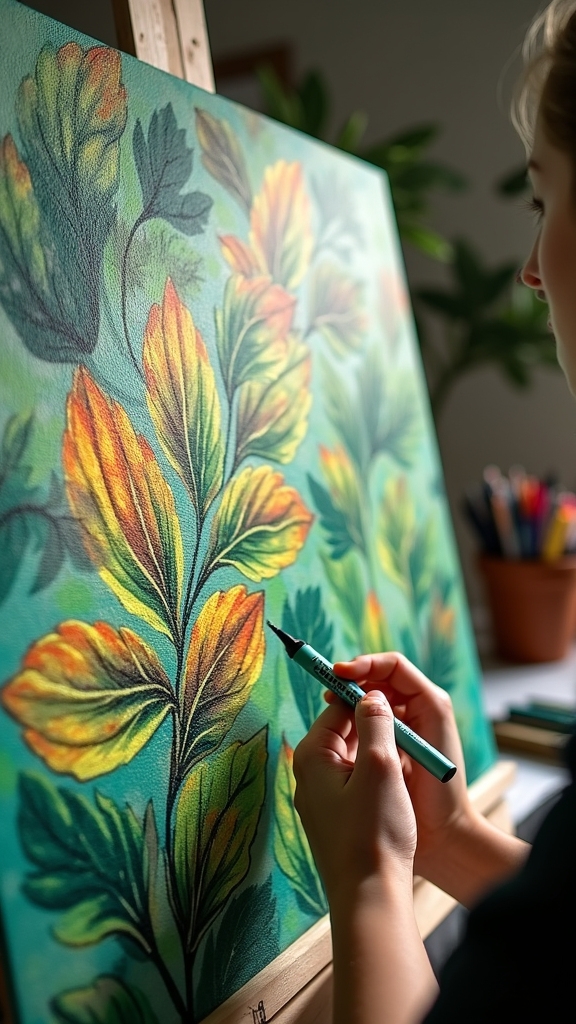
With the sky bursting in blues, it’s time for the leaves to steal the show. Designing leaves is where line art and creativity come together to make the canvas look really lively.
Switching up the shapes and sizes of leaves keeps things from getting boring—they can be long and spiky or round and plump. Using fine-lined paint pens adds those tiny veins and hatching, making the leaves pop with texture.
Playing with different greens and even a dash of yellow or teal gives each leaf its own personality. When leaves are tucked around other elements, like little surprises, the whole artwork feels balanced and full of energy.
- Vary leaf shapes for a dynamic look
- Add detailed line art for texture
- Experiment with bold and subtle greens
Adding Playful and Colorful Flowers
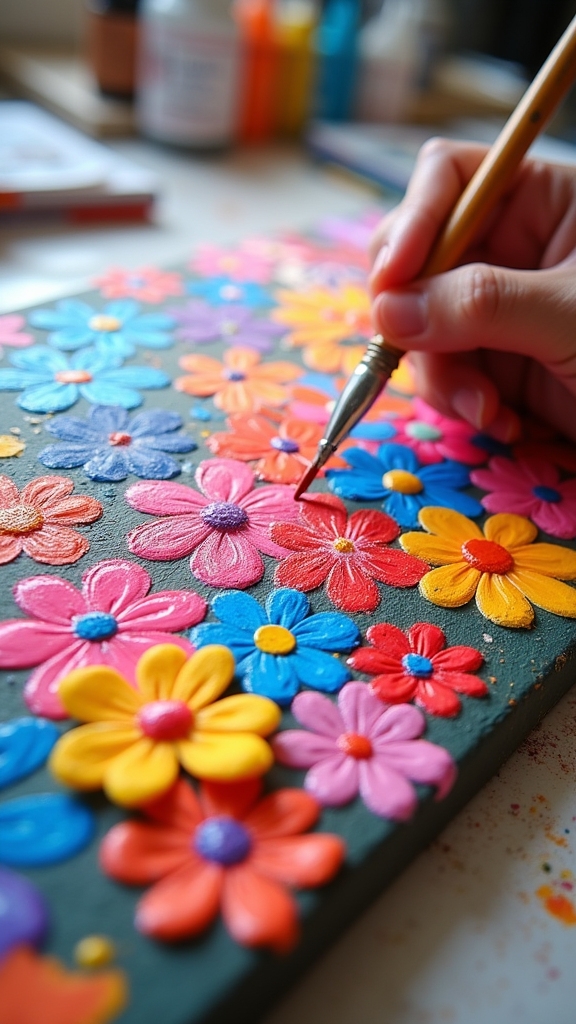
Bursting into the scene, flowers bring instant cheer to any Posca canvas art, almost like confetti tossed across a party.
To get started, artists pick a super vibrant base color—think hot pink or zesty orange—because cheerful flowers are probably going to make anyone smile. Mixing up flower shapes and sizes is key; it keeps the canvas lively and fun.
Start with a bold, happy color and mix flower shapes and sizes for a lively, smile-inducing Posca canvas.
Placing them among the leaves balances everything out, so nothing looks too crowded or too empty. Outlining the stems with a fine-lined paint pen adds a really cute, crisp touch. Toss in some fluorescent colors and suddenly, those flowers pop off the background!
Little details, like a four-petaled bloom or a buzzing bee, make the whole scene even more playful and charming.
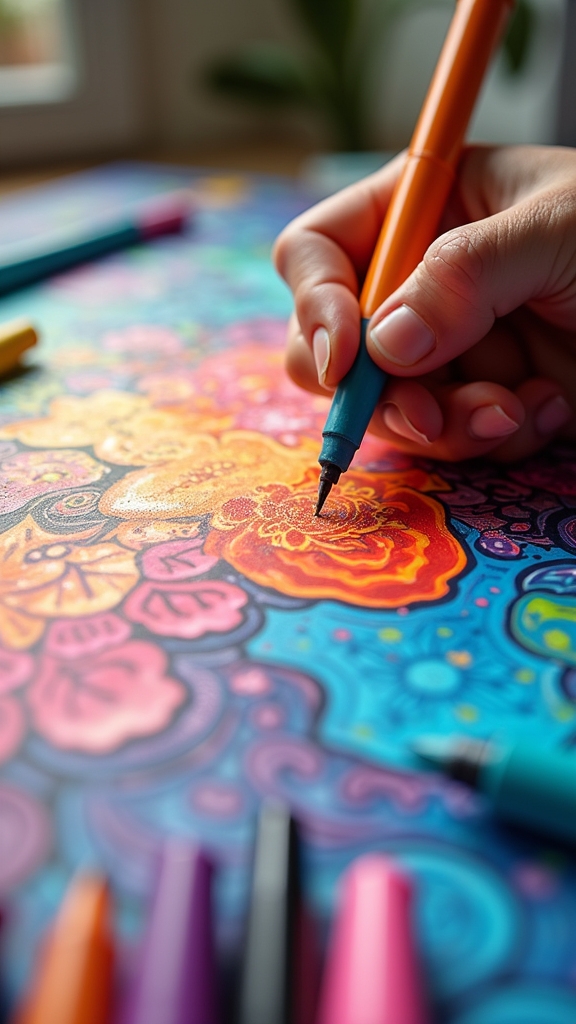
Enhancing Details With Fine Lines and Texture

Once the playful flowers are scattered across the canvas, it’s time to really make things pop by sharpening up those tiny details.
Grab a fine-lined paint marker and start outlining petals, tracing leaf veins, or even adding stripes to a buzzing bee. These little marks bring a look kind of magic and energy, making the art almost jump out at you.
Try hatching on round leaves for texture, or outline shapes with bold colors like white or dark blue for extra drama. Don’t forget to throw in bright, fluorescent highlights for some wow-factor. Suddenly, a simple flower becomes a masterpiece with attitude!
- Try mixing thick and thin lines to create depth and movement.
- Use contrasting colors to make each detail stand out.
- Add small creatures or shapes for playful surprises.
Creating and Decorating a Painted Frame
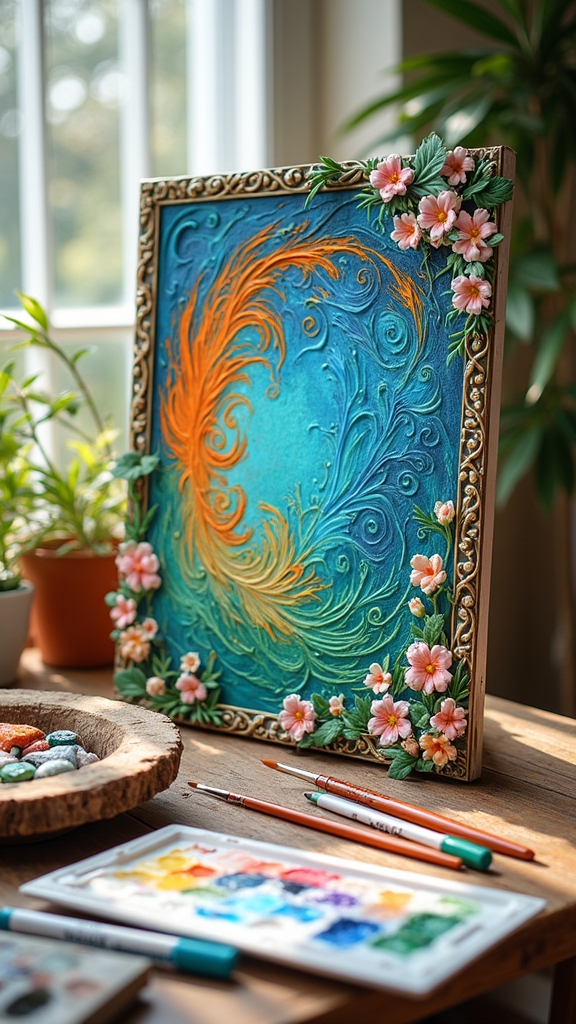
A painted frame isn’t just a border—it’s like the final touch that makes the whole canvas feel complete, almost like adding sprinkles to a cupcake. When decorating a frame with Posca pens, artists often start by using a fine-tipped pen to draw a rustic wooden texture. Adding lighter brown highlights helps the grain pop, giving the frame depth and making you think it looks almost real. To keep things balanced, it’s smart to match the frame’s style to the artwork, while sneaking in some fun details like fluffy textures or tiny line art near bees. Check out the table below to help imagine the process:
| Step | Tool Used | Artistic Effect |
|---|---|---|
| Draw wood grain | Fine-tip Posca | Rustic, natural look |
| Add highlights | Light brown pen | Depth and dimension |
| Fluffy details | White Posca | Playful, whimsical |
| Step back & review | Your eyes! | Balanced composition |
Hope you enjoyed this part!
Tips for Using Posca Pens and Engaging With Your Art
Dive right in, and the world of Posca pens practically begs to be explored!
These markers are one of my favorite tools for canvas art because their bright colors and awesome opacity make every stroke pop.
Try using different nib sizes—thick ones for bold lines, thin ones for crazy details.
Layering is super easy, too, since Posca pens dry fast.
Want your art to really stand out? Add some fluorescent colors and watch your piece glow!
Outlining with a fine-tipped Posca can totally upgrade your design.
Don’t be afraid to experiment and make mistakes—that’s where the magic happens.
Thanks so much for watching your art evolve with every mark!
- Experiment with nib sizes for unique textures.
- Layer colors for added depth.
- Use outlines to sharpen your details.
Frequently Asked Questions
Are Posca Pens Good on Canvas?
Posca pens are considered highly effective on canvas due to their vibrant Posca colors, excellent opacity, and smooth application. Artists utilize various Posca techniques, benefiting from clean lines, quick drying, and versatility, making them suitable for detailed or bold designs.
What Not to Do With Poscas?
When using Posca pens, one should avoid applying excessive pressure, improper layering techniques, or using them on unprimed surfaces. These missteps hinder creating texture, cause color muddiness, and may result in poor adhesion or damaged pen nibs.
Why Are Poscas so Expensive?
Posca pen pricing reflects their high-quality, versatile ink, refillable design, and strict manufacturing standards. While this impacts art supply affordability, their durability, performance on multiple surfaces, and strong reputation among artists contribute to their higher cost.
How Do You Seal Posca Pens on Canvas?
When considering sealing techniques for Posca pen artwork on canvas, one allows complete drying, then applies a clear acrylic sealer spray in light coats. This process guarantees canvas preservation, with a final curing period recommended for maximum protection.
Conclusion
With just some Posca pens and a little creativity, anyone can turn a simple canvas into a masterpiece. The swirling skies, wild leaves, and zany flowers all come together to make art that really pops. Don’t worry if your lines get wobbly or your colors go a little wild—that’s the fun part! Every piece is unique, and mistakes can become your best details. So grab those pens, let loose, and make something awesome!
Leave a Reply