
With POSCA pens, anyone can jump into relaxing art sessions, from doodling wild animal sketches and decorating rocks to layering neon shapes or designing custom journal covers. Try vibrant cityscapes with bold outlines, abstract mandalas, playful wave patterns, or even funny faces with wacky hair—no fancy skills needed! Mix and match colors, add highlights, and let imagination lead the way. If you’re curious about how to make each project truly pop, there’s plenty more to spark your creativity.
Key Takeaways
- Create abstract mandalas or patterns using vibrant Posca colors for a calming and meditative art experience.
- Doodle whimsical animal characters with playful outlines and bright accents for a fun, low-stress project.
- Sketch simple still life scenes of everyday objects and fill them with creative color combinations for relaxing practice.
- Paint dreamy night skies with starbursts, blending blue hues and adding highlights for a soothing creative session.
- Design unique bookmarks by layering bold Posca colors, adding doodles, and mixing in textures like washi tape.
Colorful Urban Sketches With Bold Outlines

Every city has its own kind of magic, and with POSCA pens, artists can bring that magic to life in bright, bold style.
When creating colorful urban sketches, it all starts with a sharp black liner. Outlines jump off the page, instantly making buildings and streets stand out. The opaque acrylic paint inside POSCA pens is perfect for layering vibrant shades—no need to worry about light colors getting lost under dark ones.
Whimsical Animal Doodles on Paper
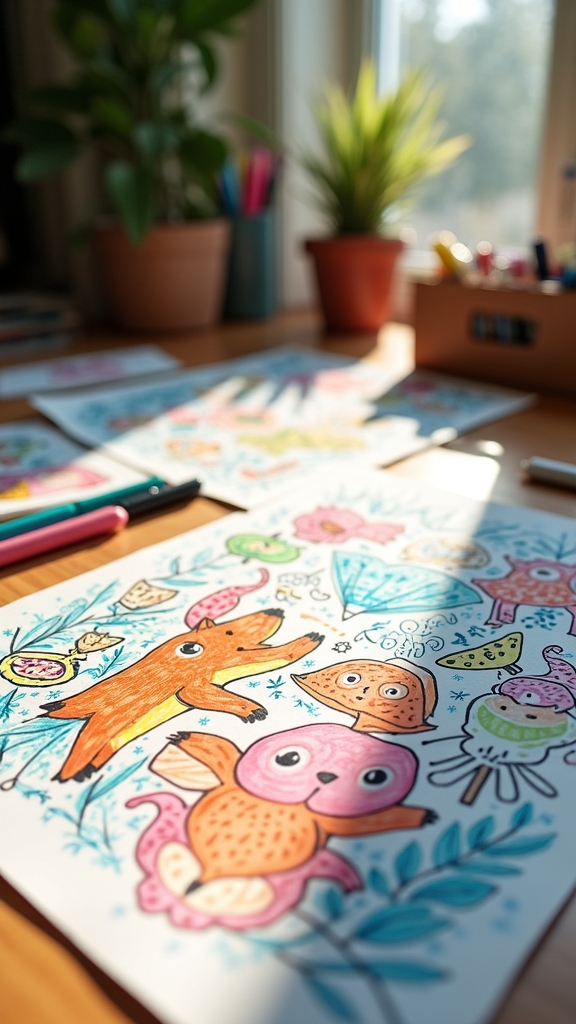
Cityscapes bursting with color are awesome, but sometimes the wildest adventures happen in a sketchbook full of quirky animal doodles. With POSCA pens, anyone can try something totally fun and unexpected—like doodling a llama with polka dot fur or a frog wearing sunglasses.
Artists usually start by outlining their whimsical animal doodles with a black liner, making the shapes pop right off the page. The opaque ink in POSCA pens is perfect for layering, so you can lay down bright colors first, then shade in details with darker tones for extra depth.
Swapping between thick and thin POSCA pens adds a dynamic vibe. Add playful patterns, silly expressions, and don’t forget those shiny white highlights—they make every doodle feel alive and ready for mischief!
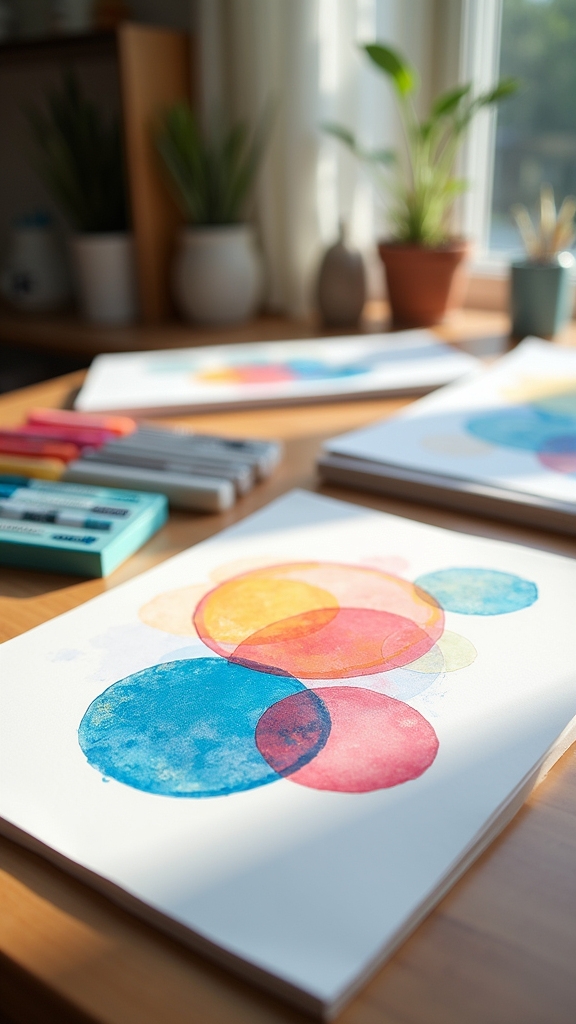
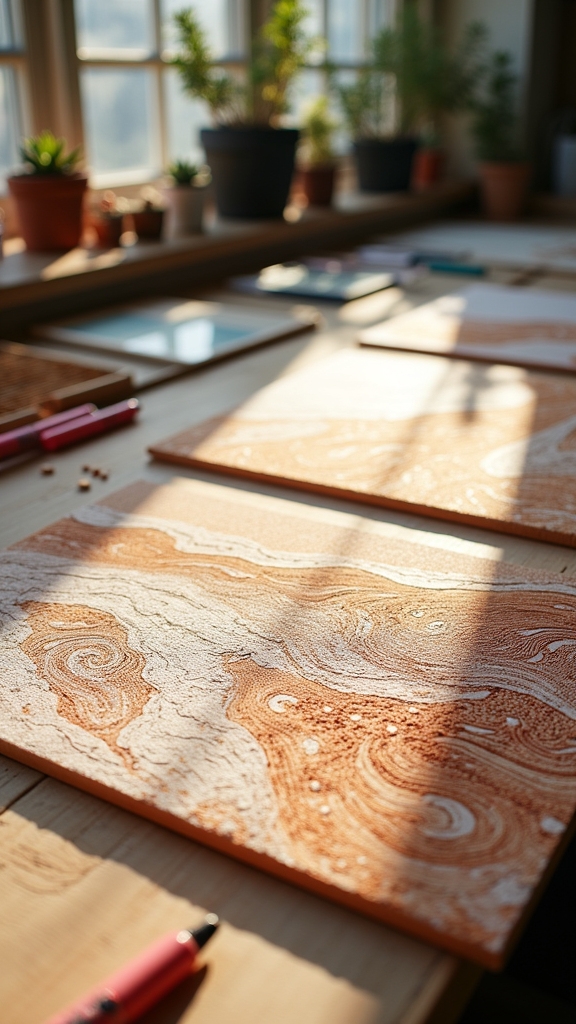
Abstract Patterns and Mandalas

Patterns can turn a regular piece of paper into something totally mesmerizing, and with POSCA pens, creating abstract designs and mandalas feels kind of like magic. Abstract patterns pop with the vibrant, opaque colors of posca markers, and their quick-drying paint means you don’t have to worry about smudges—just pure creativity. Mandalas become super detailed, thanks to the ability to switch line widths by pressing harder or softer. Want to make your mandalas extra bold? Try layering white posca markers over a dark background for some eye-popping contrast. Check out how these two elements can transform your art session:
| Technique | Visual Impact |
|---|---|
| Layering white on dark | High contrast, depth |
| Varying line thickness | Dynamic, engaging look |
It’s fun, relaxing, and totally mesmerizing!
Layered Geometric Shapes With Overlapping Colors
Bold shapes and eye-catching colors can totally transform a blank page into a geometric masterpiece, especially when POSCA pens are involved.
With a vibrant palette of markers in different sizes, anyone can engage in creating layered geometric shapes that really pop. Thanks to the opaque paint, it’s a breeze to stack darker shapes over lighter ones—no muddy colors here!
Create layered geometric shapes that pop—POSCA’s opaque colors let you stack and overlap without any muddy mixes.
Overlapping colors make things even more exciting, as the quick-drying acrylic lets you blend or layer without waiting forever. For extra flair, adding linear hatching or cool textures inside each shape gives your artwork serious depth.
To finish, outlining some shapes with a bold black POSCA pen cranks up the contrast, making those colors look like they’re shouting, “Look at me!”
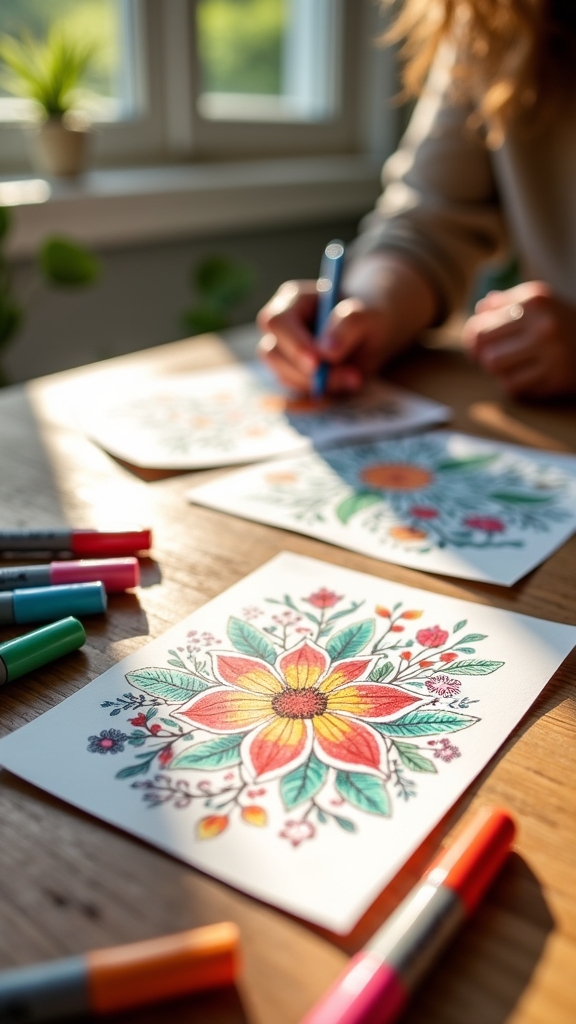
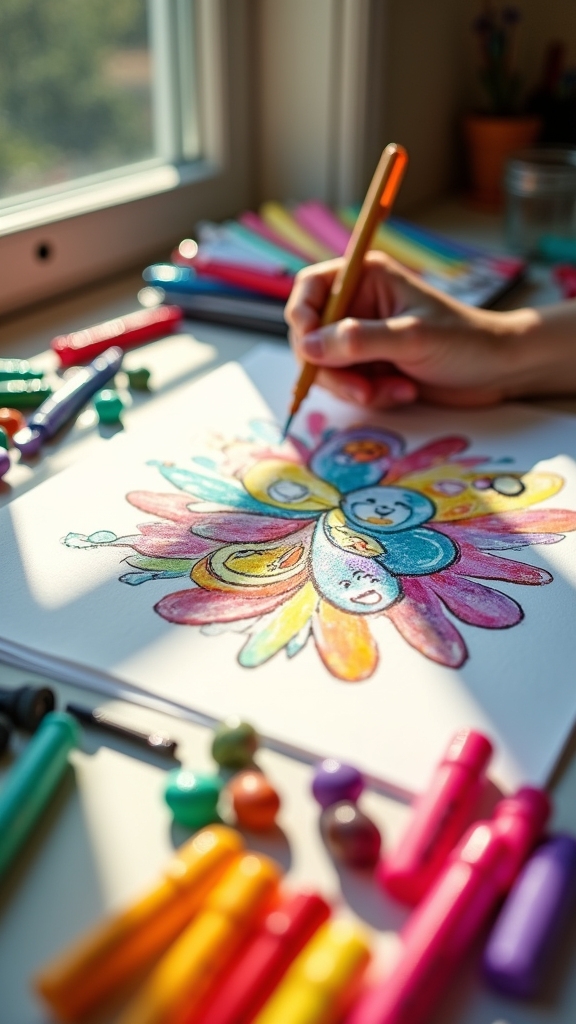
Vibrant Floral Illustrations
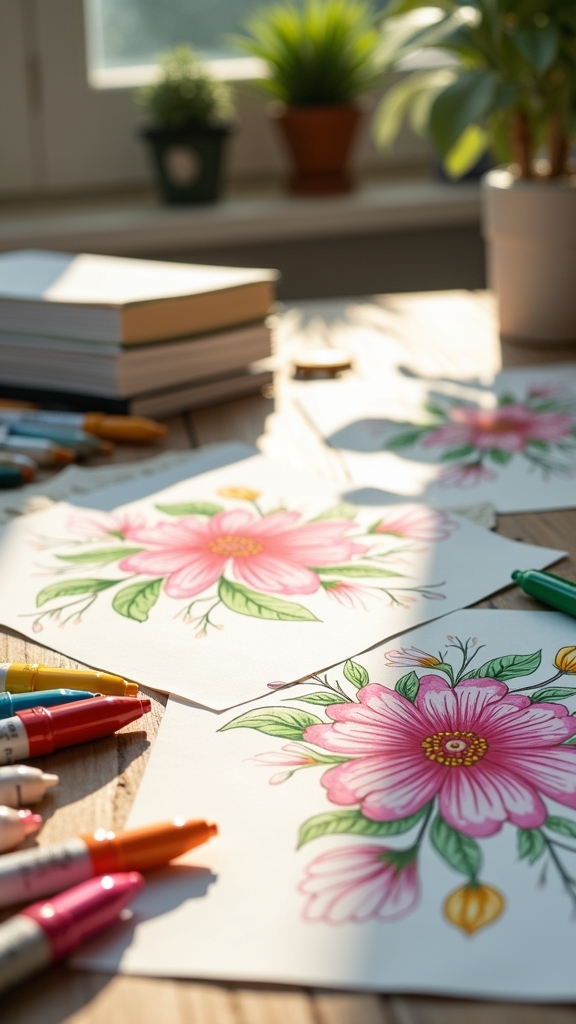
Flowers practically explode with color when POSCA pens get involved—seriously, it’s like handing a garden a set of neon highlighters. Creating vibrant floral illustrations with these pens is pure magic.
Their bright, bold colors turn simple petals into show-stoppers, perfect for anyone who loves eye-popping art. Because the POSCA paint is opaque, artists can easily layer colors. Start with lighter shades, then add darker ones for instant depth.
Want petals that pop? Grab a broad tip. Dreaming of delicate leaf veins or tiny pollen dots? Fine tips have your back.
To boost the fun, try adding textural effects—think hatching, line work, or playful squiggles. Don’t be afraid to experiment with bold, abstract backgrounds, making those vibrant flowers truly steal the show!
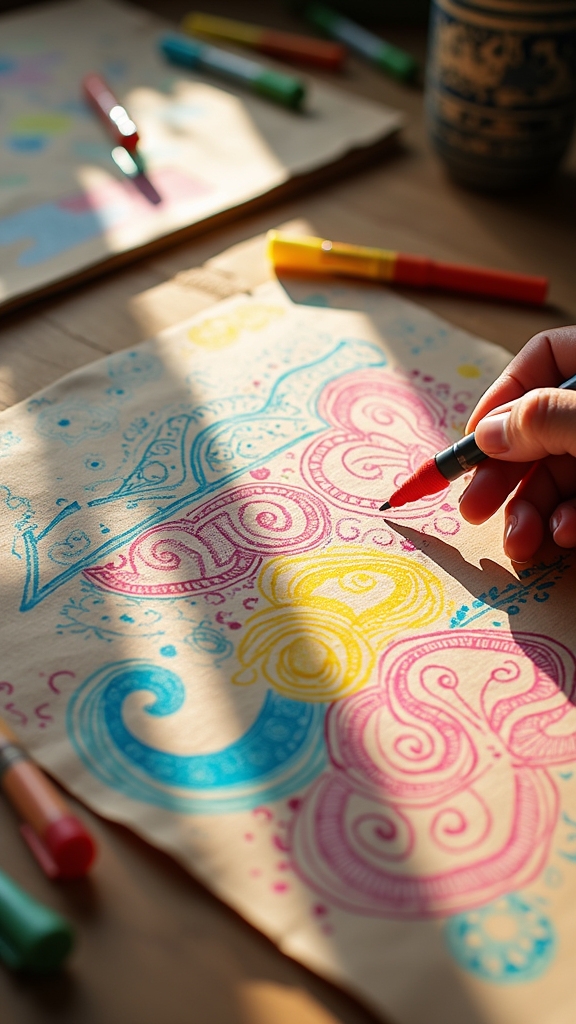
Fun Mixed Media Bookmarks
Making bookmarks with POSCA pens opens up a world of creative design ideas—think bold patterns, cool characters, or even silly doodles that peek out from your latest read.
By mixing the pens with sturdy paper and adding pops of texture with things like washi tape or fabric scraps, each bookmark becomes a mini art project with its own personality.
With so many ways to mix materials and try different drawing tricks, it’s nearly impossible to make two bookmarks that look the same—unless, of course, you have a secret twin.
Creative Bookmark Design Ideas
There’s something extra cool about designing bookmarks that pop with color and personality, especially when POSCA pens are involved.
If you’re itching to try something new, jump in—because I’m going to show you just how awesome bookmark art can be.
Let’s be honest, we’ve got more than enough boring bookmarks out there!
POSCA pens are perfect for layering bold colors and adding intricate details, but why stop there? Mix in other materials for a truly unique look.
- Layer & Outline: Use the quick-drying, opaque POSCA pens to outline shapes in black, then fill them with vibrant colors for a dramatic contrast.
- Mix Media: Add washi tape, stickers, or stamps for extra texture—and a dose of fun!
- Add Personality: Write funny quotes or doodle quirky illustrations that show off your style.
Combining Pens With Paper
Dive straight into bookmark-making mayhem by mixing POSCA pens with all sorts of paper and crafty extras! Imagine you’ve got a stack of sturdy paper—maybe even a little bit of cardboard from an old cereal box. That’s your canvas.
POSCA pens come in all sizes, so you can go wild with bold, colorful backgrounds using the big ones, then squeeze in tiny doodles with the skinny tips. Want to ramp it up? Add washi tape or splash on a watercolor background before you start drawing. Suddenly, you’ve got texture, layers, and a whole lot of “look at what I’ve got going, you know?”
Once your masterpiece is finished, laminate it to keep those wild colors and epic designs safe from snack crumbs and backpack chaos!
Textured Landscapes With Hatching Techniques
Hatching turns a plain vista into something that practically jumps off the page, giving cliffs, trees, and skies a wild new personality.
Using POSCA pens, artists can start by outlining key shapes like jagged cliffs or rolling hills with a black pen—think of it as drawing the bones of the scenery.
Next comes the fun part: layering those bright, opaque colors. Because POSCA pens dry fast, you can keep adding new layers without making a mess.
To really make things pop, experiment with hatching styles. Try cross-hatching for deep forests, or stippling for rocky cliffs.
Here’s a quick checklist:
- Outline major shapes with black POSCA.
- Layer colors, letting each dry before the last thing.
- Add hatching for texture—mix pen sizes for variety.
Festive Lettering and Calligraphy
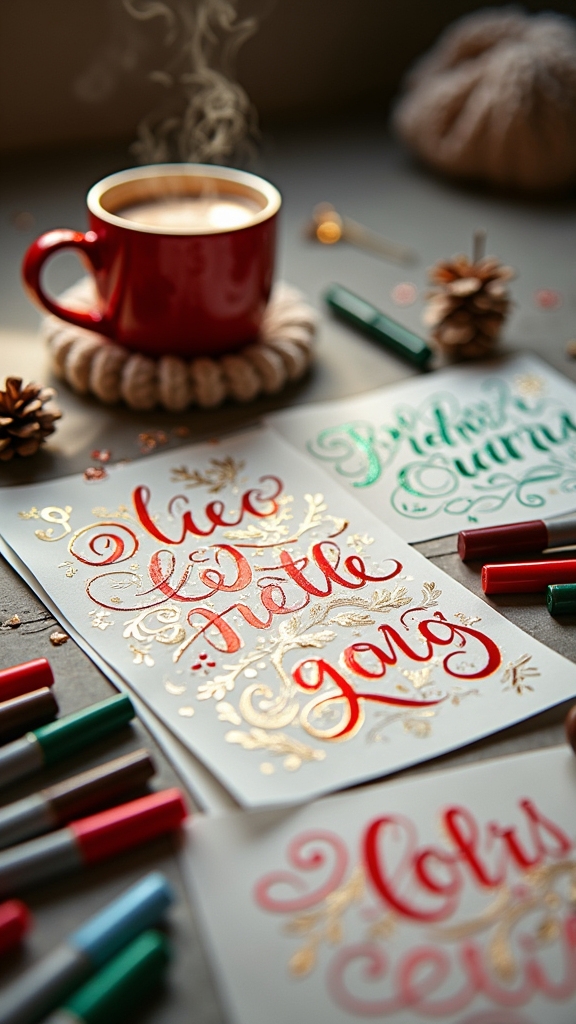
When it comes to making words stand out and sparkle, POSCA pens are basically the superheroes of festive lettering and calligraphy. With their vibrant acrylic paint and bold, opaque coverage, these pens turn even simple holiday card designs into mini masterpieces.
Artists can grab different tip sizes—like the tiny 0.7 mm for snazzy details or the thicker 2.5 mm for dramatic flair—and really play with line thickness. Layering is a snap thanks to the quick-drying paint, so building up festive color combinations or adding shadows is fun, not frustrating.
Experimenting with playful typography styles, funky borders, and quirky doodles brings extra cheer to every project. Basically, with POSCA pens, holiday lettering goes from “ho-hum” to “ho-ho-holy moly!”
Playful Lighthouse Scene Creations
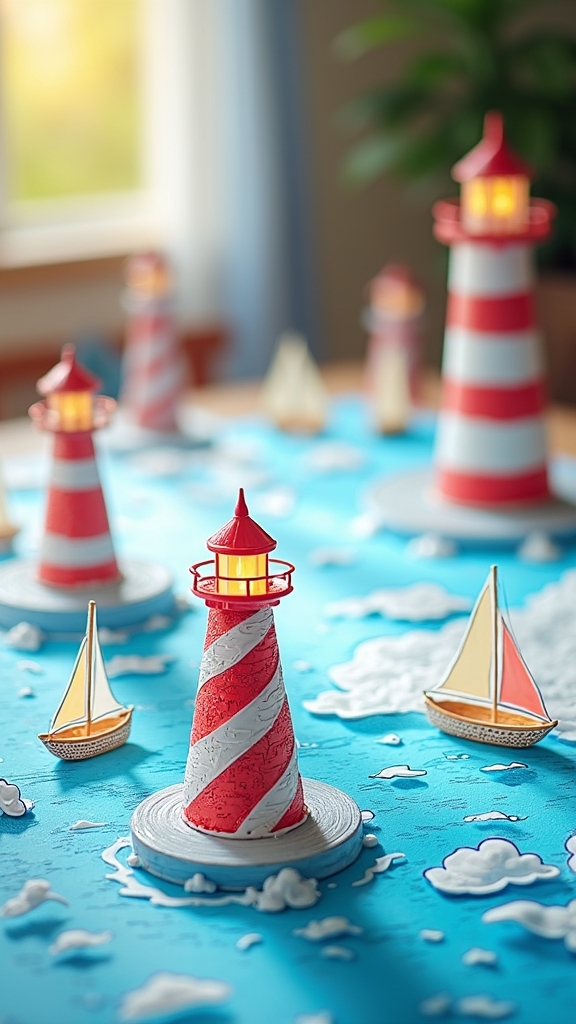
Creating a playful lighthouse scene with POSCA pens starts with sketching out some quirky coastal elements—think rocky cliffs, swirling waves, and maybe a few seagulls who look like they’re up to no good.
Once the stage is set, it’s time to make the lighthouse pop by layering on bold, vibrant colors that can light up even the gloomiest imaginary storm.
Add in some funny sun faces or birds with big personalities, and suddenly, your lighthouse isn’t just standing guard—it’s throwing a seaside party!
Sketching Whimsical Coastal Elements
A lighthouse perched on a wobbly cliff is just begging for some artistic mischief, and that’s exactly what a POSCA pen can deliver. Whimsical sketches come alive with bold outlines—think lopsided roofs, twisty towers, and cliffs that seem to wiggle beneath the lighthouse’s feet.
Coastal colors like bright blues, punchy reds, and sunny yellows make the whole scene pop, layering playful textures that invite a closer look. For extra fun, details like swooping birds, a massive sun with wild rays, or swirling, abstract waves bring even more personality.
Here’s how to ramp up the whimsy:
- Outline the lighthouse and cliffs with a black POSCA, making everything just a little silly.
- Layer coastal colors for bold, playful textures.
- Add quirky details using contrasting colors and hatching.
Adding Vibrant Lighthouse Details
Bold details are what really make a lighthouse scene jump off the page, and POSCA pens are totally up for the job. First, outline the lighthouse with a black pen—don’t forget to add funky stripes and quirky windows for extra character! When filling in, use bold, opaque colors and try layering for that rich, coastal color palette. Surround your lighthouse with cliffs and whimsical wave designs, playing with colors and textures to make the scene pop. Want to make your lighthouse reflections shine? Grab the white POSCA pen and add highlights where the sun would hit. Finally, swirl up the sky with abstract patterns—go wild! Here’s a table of ideas to fire up your creativity:
| Lighthouse Details | Coastal Colors | Whimsical Waves |
|---|---|---|
| Striped windows | Turquoise, coral | Swirly foam patterns |
| Bold black outlines | Deep navy, yellow | Cartoon splashes |
| Shiny light beams | Teal, sunset pink | Dotted highlights |
| Reflected sunlight | Sea green, white | Spiraling curls |
| Fun flag on top | Sandy beige, blue | Zigzag water edges |
Simple Still Life With Everyday Objects

Even the most ordinary objects can look amazing when turned into art, especially with the help of some colorful POSCA pens. For this simple still life project, anyone can grab everyday objects—maybe a banana, a mug, or even a houseplant—and arrange them in a way that feels fun and interesting.
Using a black POSCA pen, artists outline the shapes, making those lines bold and confident. Next, they fill in each object with creative color combinations, layering lighter shades under darker ones for a cool 3D effect. To spice things up, artists play with artistic techniques like hatching for shadows or adding playful backgrounds.
Here are three tips for a standout still life:
- Choose eye-catching everyday objects.
- Experiment with bold color combinations.
- Try new artistic techniques for texture.
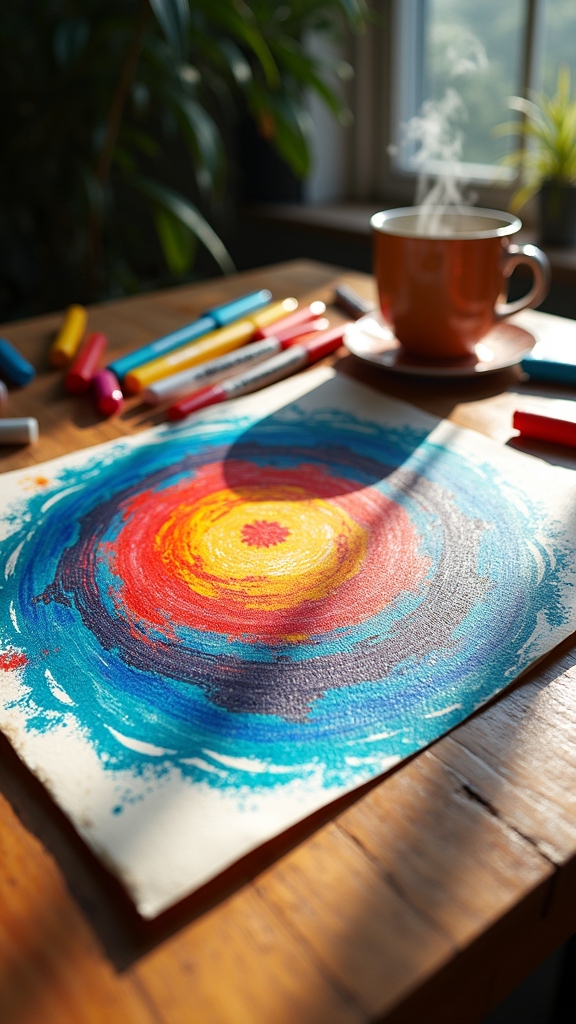
Dreamy Night Skies and Starbursts
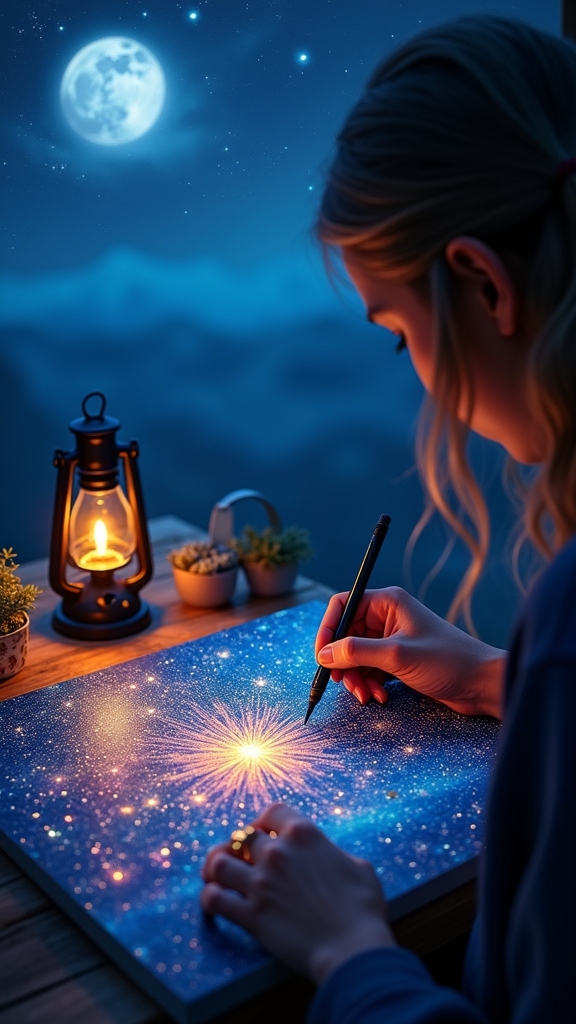
Dreamy night skies and starbursts with POSCA pens are pure magic—start by layering deep blue tones until your page feels like midnight.
Then, flick in some whimsical starbursts and playful highlights, letting those bright pops totally steal the show.
For extra wow, mix in abstract galaxy effects like swirling clouds or bold gradients, and suddenly your artwork looks like a portal to another world!
Layering Deep Blue Tones
When artists start layering deep blue tones with POSCA pens, something magical happens—suddenly, a blank page transforms into a wild, glowing night sky right before their eyes.
Using night sky techniques, they lay down a base of deep blue, then slowly blend lighter blues and purples, creating smooth color gradients that make the sky look endless. The opaque paint helps each layer pop, making every stroke count.
Sometimes, a quick swipe of white or a lighter color adds a burst of light—almost like a shooting star sneaking across the page.
For those looking to level up their dreamy skies, here are a few tricks:
- Layer different shades for realistic depth.
- Use various pen sizes for texture.
- Experiment with blending for glowing, magical effects.
Adding Whimsical Starbursts
Although painting a night sky with deep blue tones is already magical, adding whimsical starbursts takes the artwork to a whole new level—like sprinkling fairy dust across the page.
Starburst techniques are easy and super fun with POSCA pens. Start by picking bright, whimsical colors and draw pointed shapes that shoot out from a single spot. Layering different colors on top of each other creates serious wow-factor and gives the bursts depth and vibrancy.
Against a dark night sky, these colors really pop—no flashlight needed! Use a fine POSCA pen to add white dots or highlights, making your starbursts twinkle like real stars.
Try different pen sizes for an explosion of starbursts, from tiny sparkles to big, bold bursts. Pure art magic!
Creating Abstract Galaxy Effects
If someone wants to turn a plain sheet of paper into a magical window to the universe, creating abstract galaxy effects with POSCA pens is the way to go.
First, lay down a base of deep blues and blacks for that dreamy night sky vibe. Next, layer on purples, pinks, and whites, softly blending them together—this is where galaxy color blending really shines.
Get creative with cosmic swirl techniques, using swirling motions to make the colors dance like real galaxies. And don’t forget starburst detailing! A white POSCA pen is perfect for dotting on stars and adding bursts of light.
To make your galaxy even cooler, try these steps:
- Block in dark backgrounds.
- Blend and swirl vibrant colors.
- Add starbursts for sparkle.
Creative Waves and Water Effects
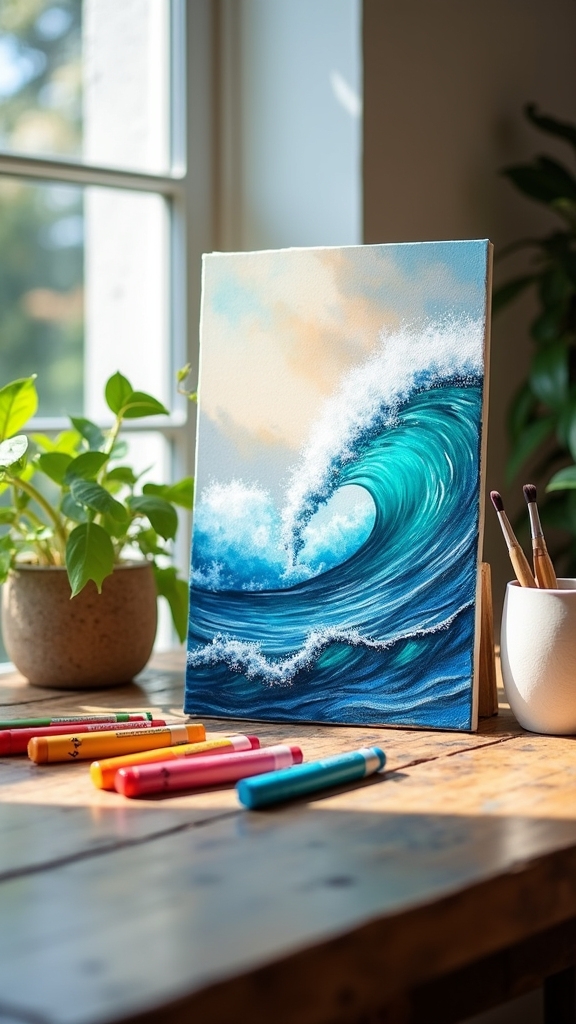
Waves are like the ocean’s own rollercoasters, twisting and crashing with energy that’s hard to capture on paper—unless you’ve got some POSCA pens and a bit of creativity up your sleeve.
To master wave texture techniques, begin by outlining your wave shapes with a black liner; this gives your water its dynamic structure. Grab different pen sizes—thicker ones for bold curves, thinner for those tiny, swirling details.
Outline waves with a black liner, then switch pen sizes for bold curves and intricate, swirling details that bring water to life.
Now, for water color combinations, layer blues and greens, letting the opaque POSCA ink make your waves look alive. Want a splash of drama? Add white highlights for that foamy, sunlit effect.
Feeling wild? Play with abstract wave patterns and experiment above the water with bold skies. The result? Waves that practically dance off the paper!
Expressive Faces With Bright Features
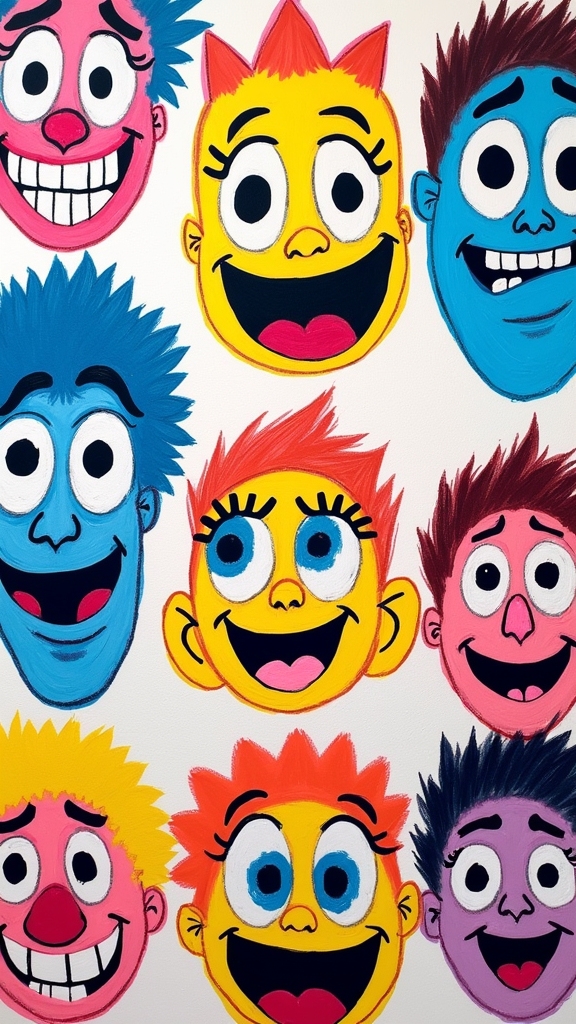
When making faces pop with POSCA pens, choosing bold, eye-catching colors is half the fun—think neon pink hair or electric blue lips!
Artists can crank up the drama by layering bright highlights right on top of lighter shades, making each facial expression look even more intense or silly.
With just a few strokes, a smile can turn from shy to wild, and those cartoon eyes might just be the brightest thing on the page.
Choosing Vibrant Color Palettes
Ever wondered why some art just jumps off the page and grabs your attention? It’s all about choosing vibrant color palettes that spark real excitement.
When making expressive faces with POSCA pens, bold colors aren’t just for show—they’re tools that use color psychology to set a mood, color harmony to keep things pleasing, and color contrast to make features pop.
Here are three quick tips for picking your palette:
- Mix it up: Use both primary colors and their opposite buddies (complementary colors) for instant eye candy.
- Layer for depth: POSCA’s opaque paint lets you stack bright highlights over deep shadows, giving faces real dimension.
- Play with pen sizes: Use fine tips for details and thick ones for wild hair or big, bright cheeks—contrast in size adds extra zing!
Emphasizing Facial Expressions
Although drawing faces can seem tricky at first, POSCA pens turn the whole thing into a fun experiment in bold expression.
With a black liner, anyone can sketch playful outlines that give each face its own personality—think wild eyebrows or super-curly smiles!
Next comes the magic: adding expressive features with vibrant colors. Bright blue eyes, rosy cheeks, and neon lips can really show off color emotions, making the faces look happy, surprised, or even a little mischievous.
Different pen sizes help layer in cool textures and tiny details, like freckles or flashy earrings.
For extra wow, artists sprinkle in whimsical backgrounds or abstract shapes, boosting the expressive vibe.
Every face ends up packed with energy and totally unique, just like a burst of laughter on paper.
Layering Opaque Highlights
After loading up faces with bold outlines and wild expressions, it’s time to really make them pop—cue the magic of layering bright, opaque highlights!
With POSCA pens, artists can totally transform their expressive faces just by adding a few well-placed zaps of color. The secret sauce is all about layering techniques, smart color blending, and creative highlight placement.
Want cheeks that glow or lips that look ready to chat? Go for it! White accents around the eyes can make faces look alive and bursting with energy.
Here’s a quick guide to make those features shine:
- Outline first, then layer brighter colors on top for bold, opaque highlights.
- Use quick drying to blend colors smoothly without muddying details.
- Finish with crisp white highlights for extra pop and personality!
Decorative Rock Painting
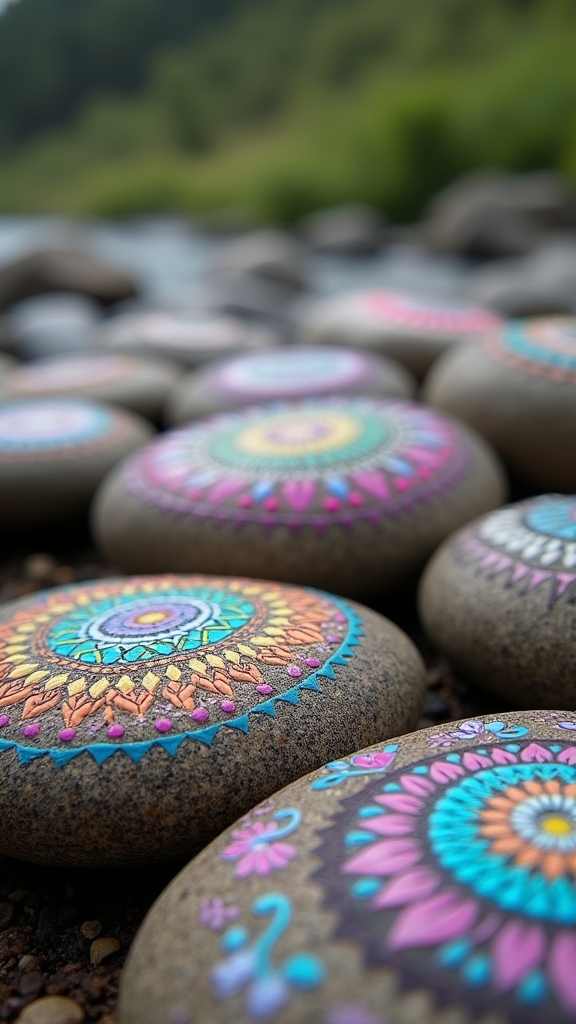
Sometimes, a plain old rock just begs for a splash of color and a dash of personality. With POSCA pens, artists can use rock design techniques to turn even the dullest stones into vibrant masterpieces!
Thanks to POSCA’s opaque acrylic paint, it only takes a few strokes to cover natural rock colors, and the quick-drying magic lets you layer bold outlines or fine details without waiting around.
Imagine painting cheerful faces, funky garden markers, or even motivational quotes—perfect outdoor decoration ideas that make any yard or porch pop.
Don’t forget: after you’ve finished your masterpiece, sealant application tips are key. A clear sealant will protect your hard work from rain or sun, keeping those colors bright for outdoor display, season after season.
Joyful Greeting Cards With Hand-Drawn Elements
A handful of blank greeting cards can turn into mini works of art with just a few swipes of a POSCA pen.
Imagine drawing bright balloons, cheerful flowers, or silly characters—each card becomes a burst of joy! Hand drawn elements let anyone personalize messages, making every card extra special.
With card making techniques like layering colors and adding bold black outlines, designs pop off the page, almost like they’re ready to throw a party themselves.
Trying out vibrant color combinations adds even more fun, making each card completely unique.
- Layer and blend different POSCA pen colors for depth and excitement.
- Add bold outlines with a black pen so your hand drawn elements stand out.
- Finish with highlights using a white pen for glossy, eye-catching detail.
Miniature Cityscapes on Postcards
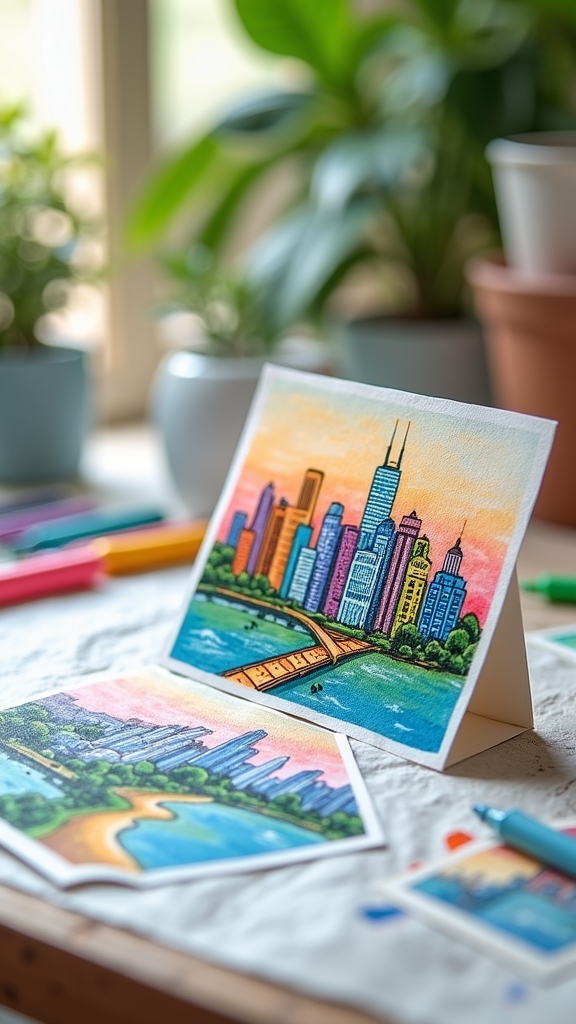
With POSCA pens, artists can bring city skylines to life by layering bursts of color and sketching out tiny details like rooftop gardens or glowing windows.
Each stroke adds more excitement, especially when you throw in playful night lights—think neon signs or twinkling stars that make the scene feel like it’s buzzing after dark.
It’s almost like building your own pocket-sized city, where anything goes and every window can tell a story!
Layering Colorful Urban Details
Even though a plain postcard might look boring at first, turning it into a bustling miniature cityscape with POSCA pens is like giving it a secret life.
With urban color layering, anyone can make a tiny city pop off the page! It all starts with a black liner to sketch out buildings and winding streets—instant city vibes.
Then, using postcard composition techniques, bright colors are layered over lighter areas, creating bold contrasts and lots of personality.
Want skyscrapers to look shiny or bricks to feel rough? Try these steps for more detail:
- Use different pen sizes—fine tips for tiny windows, broad tips for rooftops.
- Add linear hatching and textural marks for unique surfaces.
- Finish by sprinkling in playful cityscape details, like quirky clouds or abstract skies.
Adding Whimsical Night Lights
How does a plain postcard turn into a magical nighttime city? With POSCA pens and a sprinkle of imagination, it’s easier than you think.
Start by sketching tiny buildings, then use the opaque pens to lay down bold, dark skies. Now comes the fun part—add window lights and glowing streetlamps with bright yellow and white. Suddenly, you get that whimsical glow that makes you wish you could shrink and live there!
Use different pen sizes for vibrant details: thick lines for rooftops, thin ones for balconies. Don’t forget dreamy textures. Try hatching or swirling clouds and stars above your cityscape.
Finally, highlight everything with a white pen, making the city sparkle like it’s about to have a dance party under the moon!
Reimagined Album Covers
A bunch of music fans have stared at their favorite album covers and thought, “What if I could make this my own?”
Reimagining album covers with POSCA pens is like hitting the remix button for art—it’s a chance to splash bold colors and wild patterns onto something already cool, making it even cooler. The opaque acrylic paint lets artists completely transform old covers, layering new patterns and textures for maximum impact.
Remix your favorite album covers with POSCA pens—bold colors and wild patterns turn classics into one-of-a-kind masterpieces.
With album interpretation techniques, each piece becomes a unique story inspired by music visuals. Creative color choices bring out the album’s mood, while experimenting with pen sizes adds detail or drama.
Here are three ways to approach your own reimagined album cover:
- Choose inspired music visuals for your theme.
- Experiment with creative color choices.
- Use layering and hatching for depth.
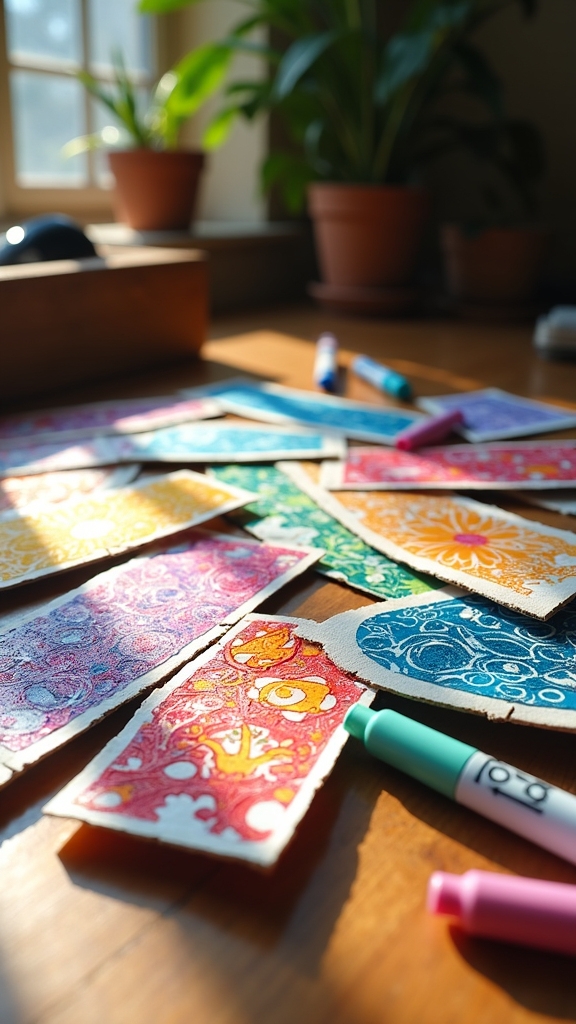
Doodled Patterns on Recycled Materials
After remixing album covers, the possibilities with POSCA pens only get wilder.
Imagine grabbing that empty cereal box or a plastic lid and turning it into a canvas for your wildest doodle techniques. POSCA pens make it a breeze, since their bold, opaque colors stand out on all kinds of recycled materials—cardboard, wood, even plastic that might end up in the trash.
The pens dry super fast, so layering squiggly lines, abstract shapes, or whimsical patterns is easy and mess-free. Try the chunky 2.5 mm tip for thick outlines or the skinny 0.7 mm pen for tiny details that pop.
Not only does this project spark creativity, but it also supports sustainable art, turning would-be garbage into something totally unique.
Personalized Journals With Illustrated Covers
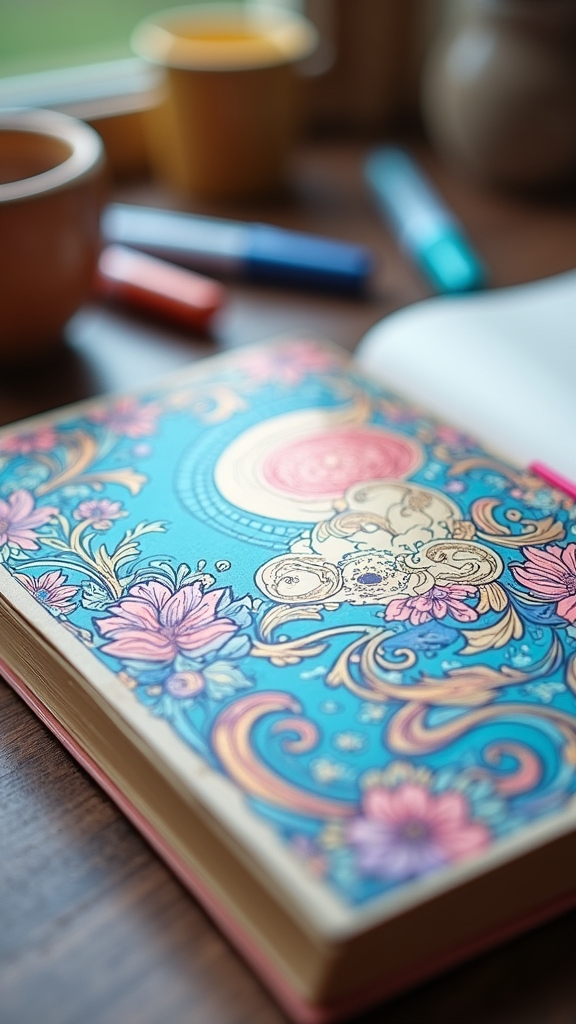
Grab a blank journal and let the cover become a playground for creativity with POSCA pens. It’s super fun to turn something plain into a masterpiece that totally screams “you.”
With just a few journal design ideas, some creative inspiration sources, and a couple of artistic customization techniques, anyone can make a journal cover that wows. Start with bold outlines using a black POSCA pen, then let those bright colors pop for maximum awesomeness.
Add doodles, cool quotes, or even wild patterns, and the journal transforms into a one-of-a-kind piece.
Here are three easy steps to personalize your journal cover:
- Sketch your design with a pencil first.
- Outline with black POSCA, then layer vibrant colors.
- Finish by sealing with a clear acrylic spray for durability and shine!
Abstract Whimsical Creatures
Creatures from the wildest corners of the imagination come alive when POSCA pens hit the page, bursting with colors and shapes that don’t even exist in real life—yet!
Abstract whimsical creatures are all about letting loose, using playful proportions and mixing wild, unexpected features. With POSCA’s opaque paints, artists can layer bold colors over light backgrounds, making every part of their imaginative designs pop.
Switching between thick and thin pen sizes lets creators add vibrant textures—think fuzzy bellies or scaly tails. Hatching and linear patterns can turn a simple doodle into a magical monster that’s totally unique.
Don’t be afraid to add googly eyes, wiggly arms, or even polka-dotted wings for a good laugh. The weirder, the better!
Frequently Asked Questions
What Easy Things Can You Do With Poscas?
Popular easy activities involve experimenting with various Posca techniques, like layering or hatching, trying Posca color blending for gradients, and testing different Posca surfaces—such as paper, wood, or plastic—while outlining, filling, and adding simple highlights or textures.
Is POSCA Ok on Skin?
The current question addresses POSCA pen skin safety. POSCA pens are generally safe for creating temporary tattoos and art therapy, but users should perform a patch test first and avoid sensitive areas to minimize risk of irritation or allergic reactions.
Why Is POSCA so Expensive?
Posca marker pricing reflects a balance of quality vs. cost, as the pens offer vibrant, long-lasting color, versatile application, and refillable design. For artists, the higher expense is viewed as a worthwhile art supply investment.
What Should I Draw With My Posca Markers?
When considering what to draw with POSCA markers, individuals might explore nature scenes, abstract designs, or geometric patterns. These subjects effectively showcase the markers’ vibrant colors and opacity, allowing for experimentation with layering, texture, and creative expression.
Conclusion
With these 20 easy Posca art projects, anyone can turn a blank page into something awesome. Whether you love doodling wild animals or making cool geometric shapes, there’s a project here that’ll spark your creativity. Don’t worry about being perfect—mistakes just add character! So grab those Posca markers, blast your favorite tunes, and let your imagination run wild. Who knows, maybe you’ll discover a new talent or just have a lot of fun along the way.
Leave a Reply