
Posca paint pens can transform boring stuff into cool art, like gold-dipped vases, patterned plant pots, or wild shoe designs. Try doodling mandalas on walls, creating rainbow gift tags, or adding funny pet portraits, too. Want something useful? Paint rock paperweights, design bold bookmarks, or jazz up your light switch covers. The ideas are endless—folk trinket boxes, graphic wall letters, and abstract coasters add serious flair anywhere. Stick around and get even more wildly creative inspiration!
Key Takeaways
- Transform plain plant pots and planters with bold geometric patterns, floral designs, or personalized quotes using vibrant Posca markers.
- Customize phone cases, mugs, and bookmarks with unique illustrations, lettering, and playful patterns for one-of-a-kind accessories.
- Elevate home décor by painting vases, trinket boxes, and glass votives with layered colors, gold accents, and detailed motifs.
- Experiment with abstract art, mark making, and layering techniques on coasters, box frames, and rocks for creative, small-scale projects.
- Add personality to shoes, pet portraits, and paperweights with whimsical, colorful Posca art that reflects your individual style.
Gold Dipped Ceramic Flower Vase
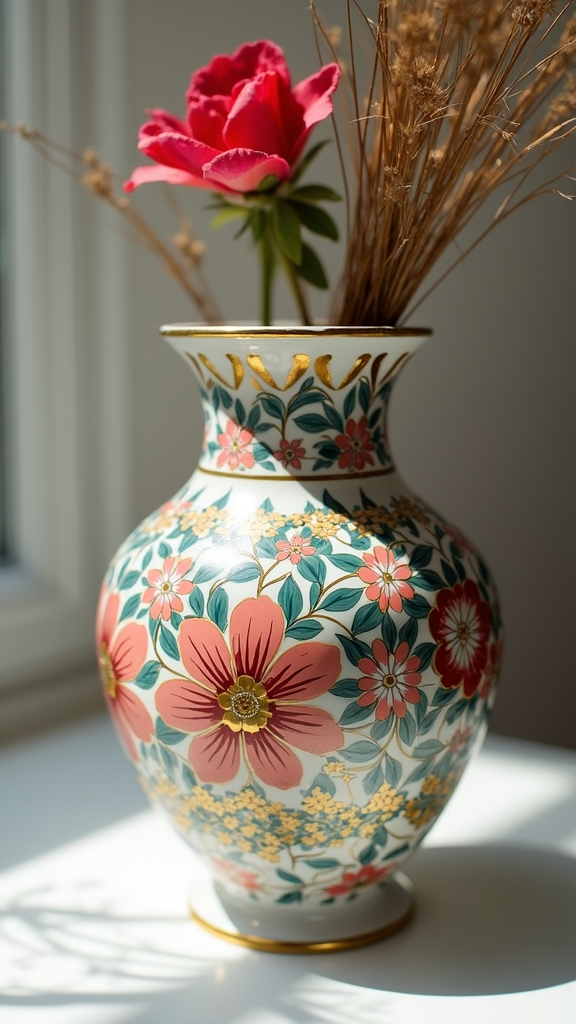
Sometimes, it just takes a little gold to turn something totally ordinary into a showstopper, and that’s exactly what happens with a gold dipped ceramic flower vase.
Imagine starting with a plain, unglazed vase—kind of boring, right? But when you grab a Gold 8k POSCA pen and get to work, things get exciting fast.
A plain, unglazed vase becomes pure magic the moment you touch it with a Gold 8k POSCA pen.
The secret is in the marker art technique: swipe the gold POSCA paint onto the bottom for that bold dipped look, then use a dry sponge to drag the color upward and create a soft, magical gradient. Layer on more gold for extra shine and drama.
The result? A vase that dazzles whether it’s holding flowers or just sitting there, looking fabulous and making every shelf jealous.
Folk Themed Trinket Box
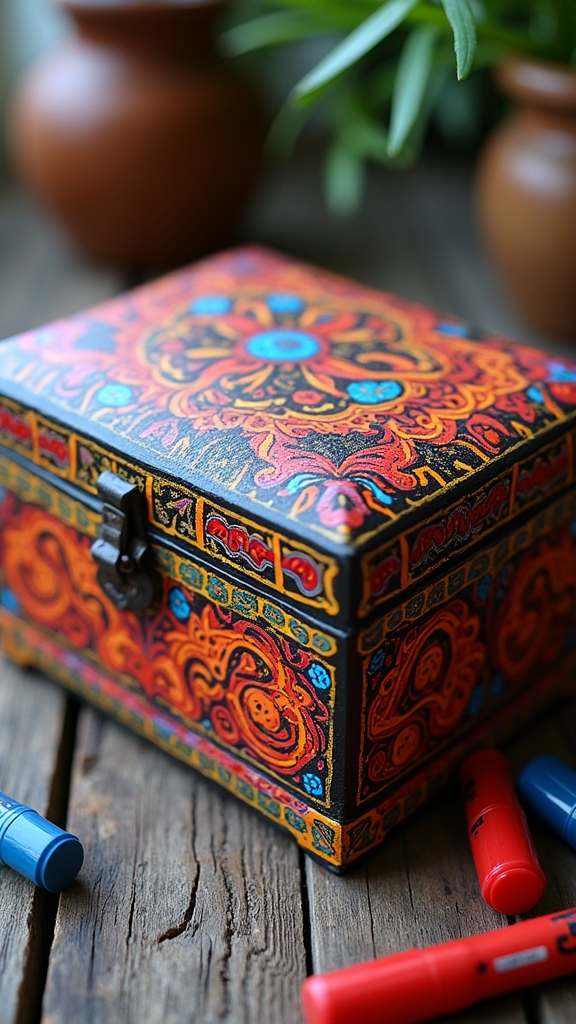
Creating a folk themed trinket box with Posca markers is all about layering bold floral patterns and blending colors to make everything pop.
Mixing blue shades for the background gives it a dreamy vibe, and then adding flowers in bright blue and yellow really brings the box to life—like a little festival for your desk.
There are some cool tricks for keeping the flowers crisp and the colors super vibrant, so get ready to make something that’s both useful and seriously eye-catching.
Layered Floral Motif Techniques
Although a plain trinket box might look boring at first, the magic really happens when bright Posca markers hit the surface. Creating folk-style layered floral motifs is all about building depth and interest, even on a simple mache box.
First, artists lay down a crisp white base using a marker from the Black and White Posca set. Then, blue Posca markers are blended together for a painterly look, setting the stage for eye-catching flowers.
Blue and yellow Posca pens are perfect for drawing floral motifs, and here’s where the fun really starts—layering!
- Start with simple petal outlines, then add details in darker or lighter shades.
- Layer colors by waiting for one to dry before adding the next.
- Experiment with overlapping shapes for added dimension.
- Mix patterns for a true folk art vibe!
Vibrant Color Blending Tips
A splash of color can turn any plain trinket box into a folk art masterpiece, but it’s the secret sauce of blending that really kicks things up a notch.
Start by using a white marker from the Black and White Posca set to cover the base—think of it as prepping your box for a magical transformation.
Grab a blue 5M Posca Pen and blend away for a painterly finish; it adds a cool, artsy vibe and real depth.
Want vibrant floral decorations? Use POSCA blue and yellow pens, layering them for eye-popping flowers.
Don’t rush! Let each layer dry before adding more color so your hues stay bold, not muddy.
Try mixing, swirling, and layering until you get those awesome, folk-inspired gradients.
Mark Making Box Frame

Sometimes, the plain old picture frame just doesn’t cut it—especially when there’s a stash of vibrant POSCA markers nearby, begging for action.
For anyone looking to try out new Pens Art techniques, transforming a simple box frame into a bold statement piece is a perfect first drawing project. To get started, grab a white box frame and reach for some 5M POSCA markers. Diagonal lines across the frame instantly create energy, and those sections are just waiting to be filled with bright, eye-catching colors.
- Blend pink and white for a smooth ombre effect—hello, depth!
- Add gold dots and dashes to give it extra sparkle and contrast.
- Mix and match colors for a wild, personalized vibe.
- Simple design, but the results? Totally next-level.
Delicate Floral Glass Votives
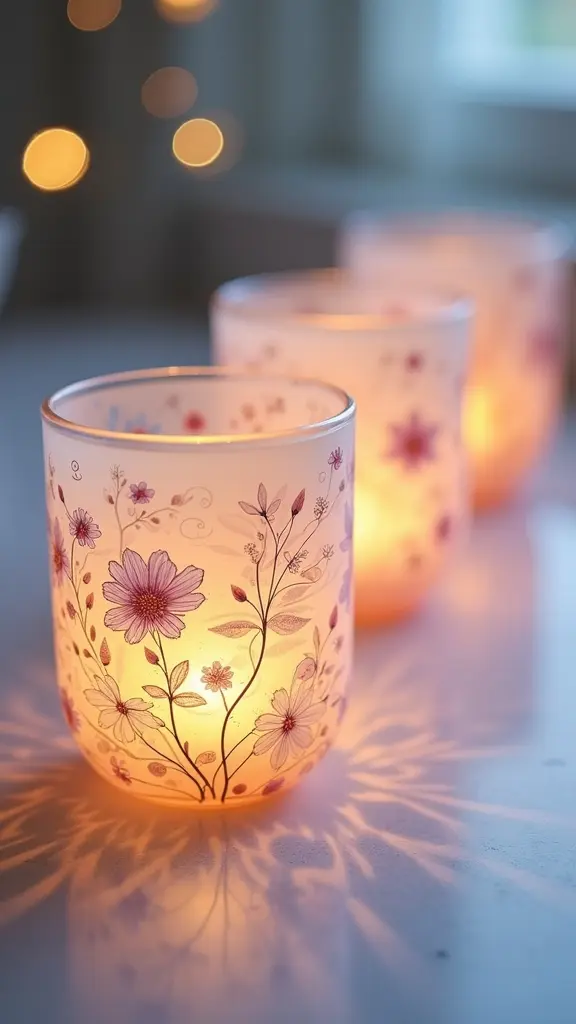
If the goal is to turn something ordinary into a showstopper, delicate floral glass votives are totally up for the challenge. Imagine grabbing a plain glass, and with a white POSCA paint pen, sketching super-fine floral patterns that seem to float on the surface. The secret? Trace a template first for total precision, then let the POSCA pen work its magic. These votives are made for LED tea lights—no fire hazards, just glowing vibes. And after your artwork dries, a quick coat of varnish keeps the beauty locked in for good.
Here’s a quick look:
| Glass Surface | POSCA Paint Details |
|---|---|
| Clear votive holder | Intricate white petals |
| Soft candlelight glow | Lacy, swirling lines |
| Elegant table accent | Lasting varnished charm |
Graphic HOME Letters for Wall Art
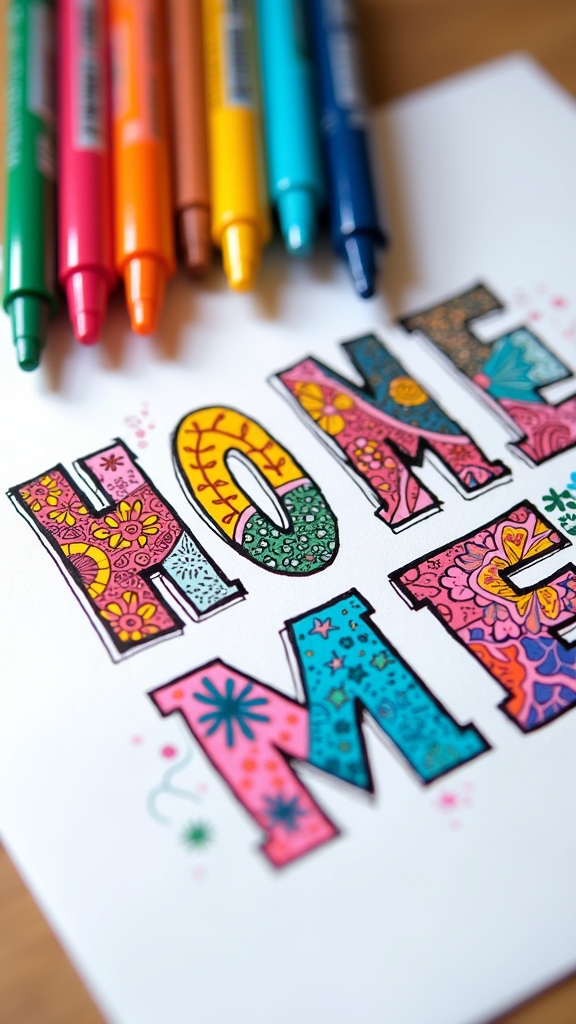
Bold letters can totally change the vibe of a room, especially when they spell out something as cozy as “HOME.”
Picture a set of chunky MDF letters, just waiting to be brought to life with a stash of POSCA pens. To get started, grab a Uni-ball Black and White Posca marker set and cover each letter for a crisp, bold base.
Then, let your creativity run wild—try adding dots, dashes, and squiggles in vibrant colors. The goal is to create graphic art ideas that really pop against your wall.
- Use White Posca for bold highlights and sharp contrasts
- Mix patterns like stripes, zigzags, and polka dots
- Experiment with unexpected color combos for a modern twist
- Display finished letters on a wall or shelf for instant wow-factor
Your space just got a lot more creative!
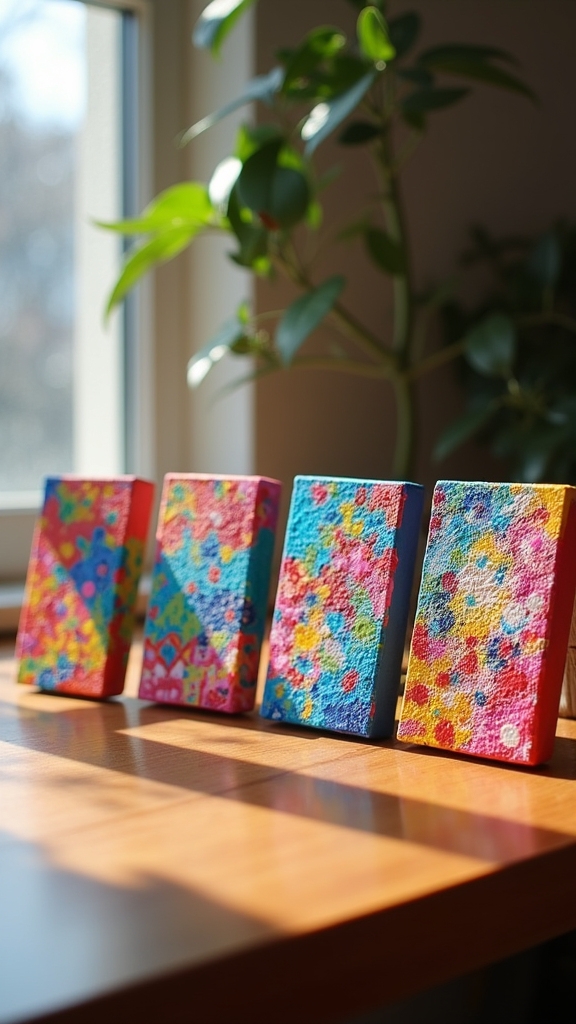
Cute Lemon Canvas Paintings
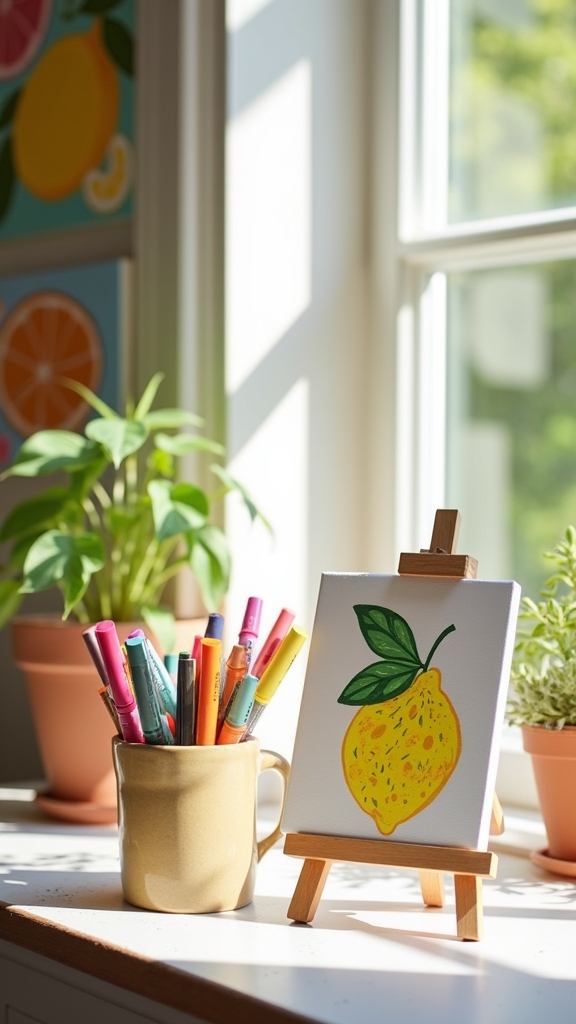
Whenever someone spots a cute lemon canvas painting, it’s hard not to smile—those zesty yellow circles almost seem to glow with happiness.
Artists searching for the best ideas and inspiration often turn to “drawing with my new” Posca markers, because these pens let them create sharp outlines and add fun, textured details to each lemon slice.
With a bit of green for leaves and a splash of white for highlights, these paintings feel fresh, just like something from Pinterest’s best ideas board.
Small canvases work perfectly for this style, especially if you want a quick project or a cheerful gift.
Add googly eyes or a smirking lemon face and suddenly, the painting becomes a playful masterpiece, perfect for brightening up any room.
Ombre Color Block Notebooks
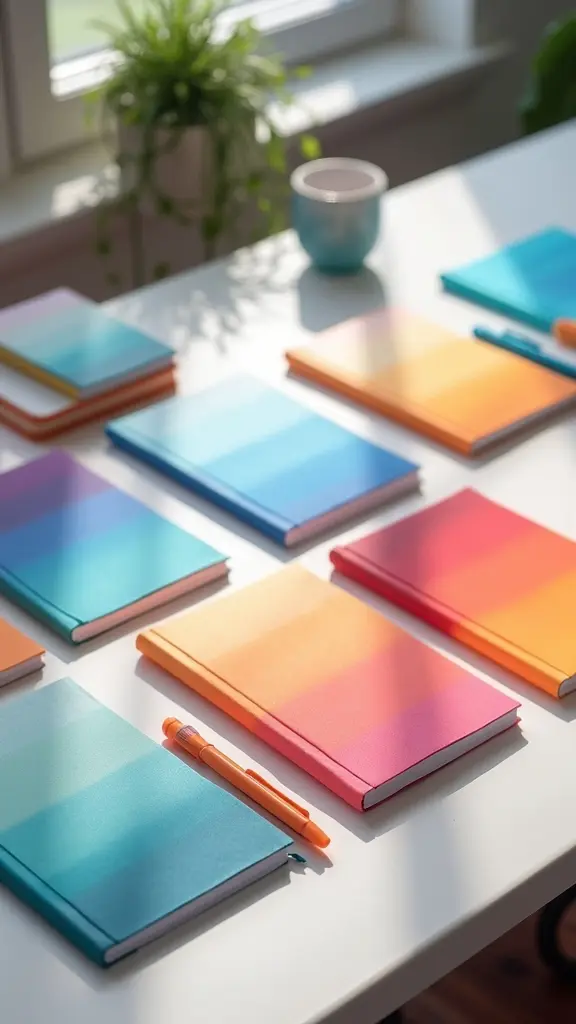
Ombre notebooks are like mini rainbows you can carry in your backpack, making even the most boring homework look a little more exciting.
To get inspired and try this project, start with a light base coat using your new Posca markers, then slowly blend in darker shades for that dreamy gradient effect.
Masking tape is your secret weapon—it keeps the color blocks sharp and clean, so your notebook looks pro, not messy. Remember, let each layer dry before adding the next color or detail to avoid smudges and keep those colors crisp.
For a personal touch, grab a fine-tipped Posca pen and add doodles or quotes.
Popular ombre notebook tips:
- Layer multiple Posca colors
- Use masking tape for clean lines
- Experiment with color combos
- Personalize with doodles
Kawaii Animal Illustration on Wood
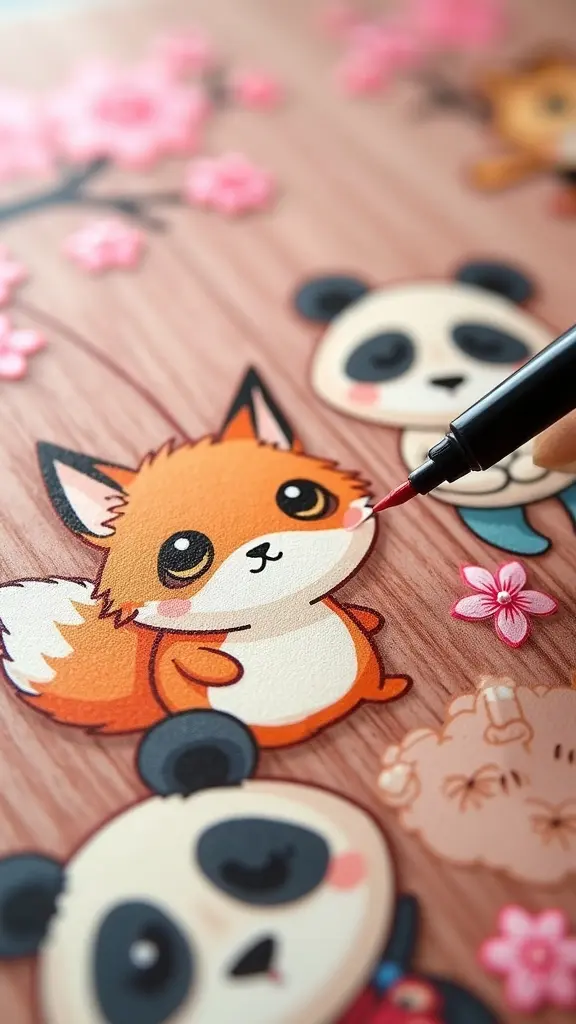
A whole world of cuteness opens up when Posca markers meet a blank piece of wood, especially if kawaii animals are involved. Seriously, it’s almost impossible not to smile when you see a chubby panda or sparkly-eyed bunny peeking out from the grain.
The kawaii style evolution has brought us all kinds of fun, from classic cats to wild, new creatures—whatever your favorite animal designs, they look extra charming on wood. The wood texture benefits every doodle, adding cozy vibes and a natural background that Posca’s bright colors totally pop against.
Plus, Poscas handle details like a champ, so big eyes and fluffy cheeks stay crisp. Leave a little white space for that extra wow factor, and you’ve got instant adorable art!
Abstract Patterns on Coasters
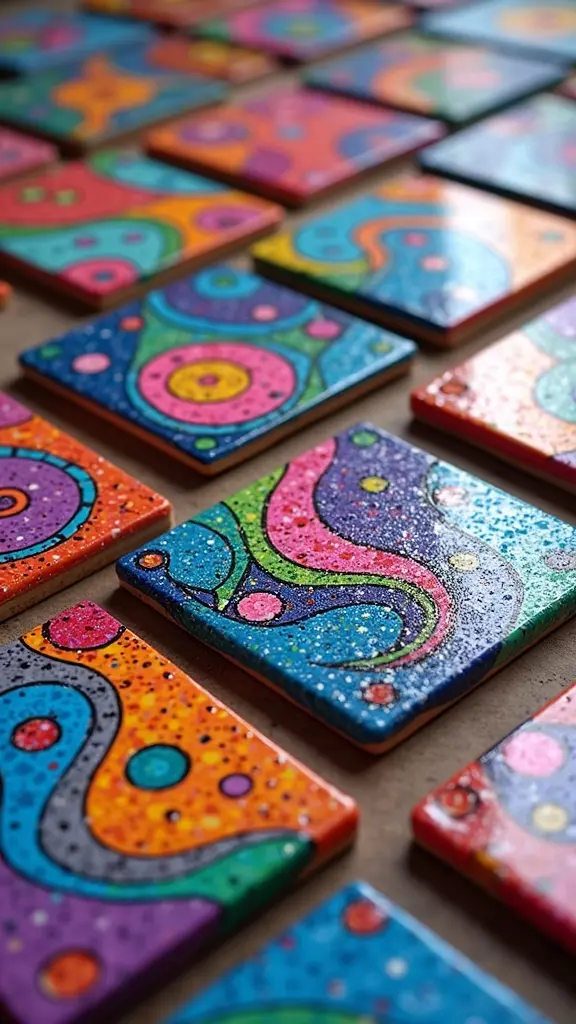
Coasters become way more than just cup holders when Posca markers come out to play. Suddenly, those little circles or squares turn into mini canvases, ready for your wildest abstract pattern inspirations.
Start with unglazed ceramic or wooden coasters—they’re perfect for soaking up bright Posca colors. Try layering color strategies by letting each color dry before adding the next, creating awesome depth and dimension.
Mix it up with different mark-making moves: dots, dashes, and wild squiggles. Want your designs to really pop? Use color contrast techniques for bold, eye-catching combos.
- Experiment with dots, dashes, and squiggles to make patterns unique
- Alternate light and dark shades for dramatic contrast
- Layer colors for cool 3D effects
- Always seal with clear varnish for lasting art
Now, every drink has a masterpiece to sit on!
Personalized Plant Pots
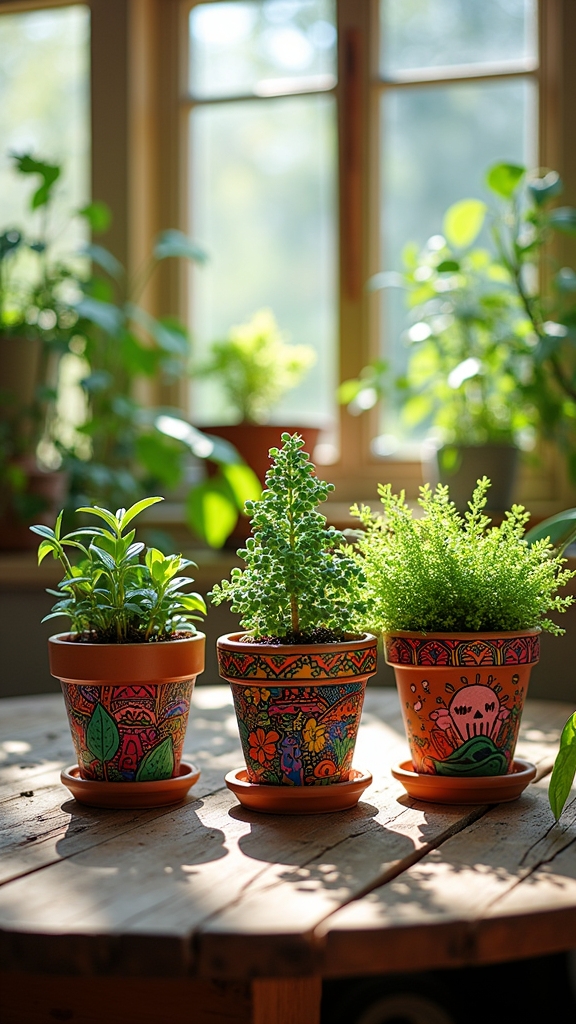
Why stop at coasters when plant pots are practically begging for a Posca makeover? Plant pot personalization is a total game-changer for anyone bored with plain old terracotta or ceramic. With Posca markers, artists can dive right into custom art techniques—think bold floral patterns, zany geometric shapes, or even quirky quotes scrawled around the rim. Starting with a white base layer really helps those vibrant color applications pop, making every design feel extra bright and cheerful. The fine tips on Poscas are perfect for those teeny-tiny details, so no need to worry about smudgy lines. Layering and blending colors adds cool dimension, and a clear varnish seals the magic, protecting your masterpiece from rain, sun, or even overenthusiastic watering.
Whimsical Bookmark Designs
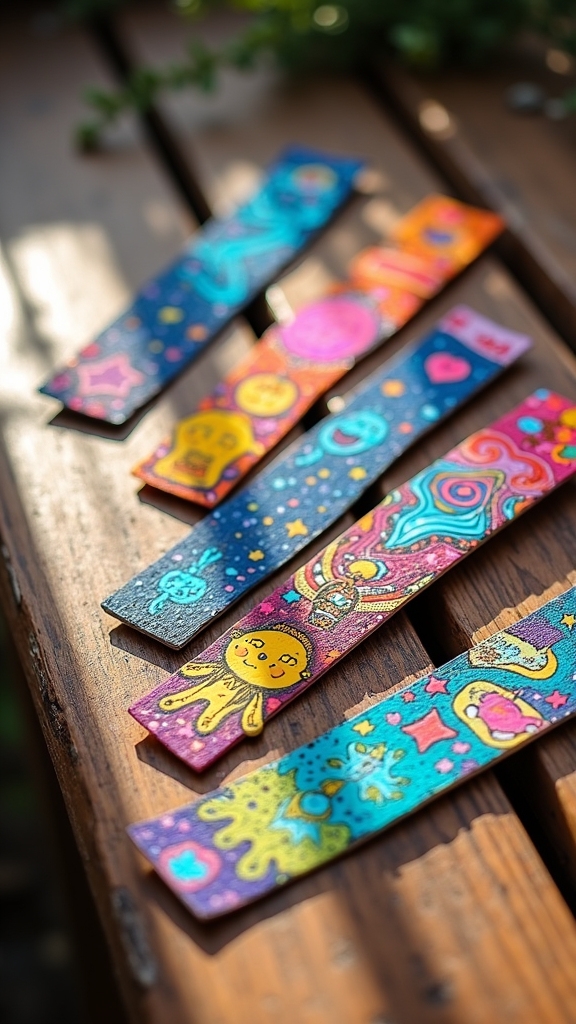
Whimsical bookmark designs are all about mixing playful patterns and eye-popping colors that make every book feel like an adventure waiting to happen.
With Posca markers, artists can add personalized character illustrations—imagine a sleepy cat, a wizard with wild hair, or even a taco with sunglasses—right onto the bookmarks for extra personality.
These little bursts of art can turn any page into a party, and honestly, who wouldn’t want a dancing pineapple saving their spot in a story?
Playful Patterns and Colors
Even though bookmarks are usually just a strip of paper, they can totally become mini masterpieces with a few Posca markers and a wild imagination.
Using playful color combinations, artists can make bookmarks pop with energy and joy. Layering textured patterns—think polka dots, bold stripes, or swirling lines—brings each design to life, while small doodles or whimsical character integration, like quirky animals or happy plants, adds a dose of personality.
Mixing fine and broad Posca markers gives a cool contrast between detailed sections and punchy backgrounds. To really make elements stand out, clever use of white space does wonders.
Try these ideas:
- Mix unexpected colors for a playful vibe
- Layer different patterns for texture
- Add mini characters to spark joy
- Leave white space for striking contrast
Personalized Character Illustrations
As soon as Posca markers hit the page, bookmarks can turn into tiny canvases for personalized character illustrations that burst with personality.
With a few clever character design techniques, anyone can turn a plain strip of paper into a magical buddy ready to peek out from between book pages. Bold outlines, dramatic expressions, and whimsical color palettes bring these characters to life—maybe a cat with rainbow glasses or a dragon in pajamas!
Mixing pen sizes allows for super-fine details and chunky, playful shapes, making every bookmark totally unique. Adding doodled backgrounds, fun patterns, or even a favorite quote turns each bookmark into more than just a placeholder.
These custom creations make perfect personalized gifting ideas for friends, teachers, or anyone who loves to read.
Custom Painted Phone Cases
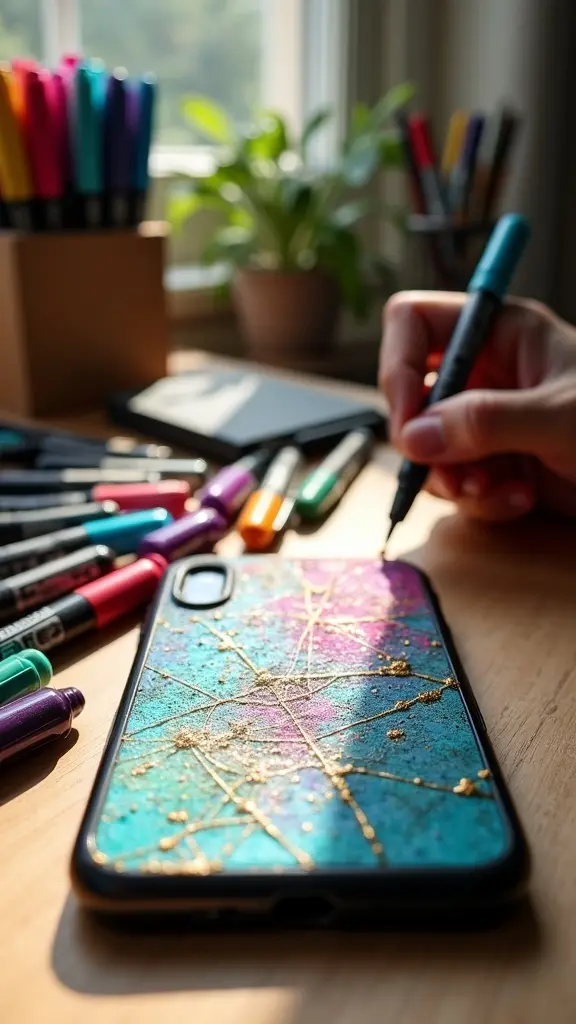
There’s something pretty magical about turning a plain, boring phone case into a mini masterpiece with Posca markers.
With just a few creative design techniques, anyone can jazz up their phone and show off what makes them unique. Posca pens work on all sorts of materials—plastic, silicone, even metal—so you don’t have to worry about your art fading fast.
The best part? The options for color combinations and personalization are endless. Want a chill floral pattern, a wild abstract splash, or maybe a squad of kawaii characters? Go for it!
Plus, painting your phone case is surprisingly relaxing.
Here are four ways to make your phone case pop:
- Layer bold colors
- Play with white space
- Mix different themes
- Add your name or initials
Funky Shoe Art With Posca Pens

While most people think of shoes as just something to cover your feet, they can actually be the perfect blank canvas for wild creativity—especially with Posca pens in hand.
Funky shoe art is all about turning plain sneakers into eye-catching, wearable masterpieces. With shoe customization techniques using Posca’s opaque paint markers, anyone can draw bold patterns, tiny doodles, or even wild illustrations on canvas or leather shoes.
Mixing colors, layering shades, and testing out different tip sizes makes it easy to follow the latest sneaker design trends—or start your own!
Artistic footwear styles are all about expressing what makes you unique. To keep those fresh designs safe from scuffs and weather, just add a clear sealant.
Every step you take becomes a style statement!
Illustrated Tote Bags
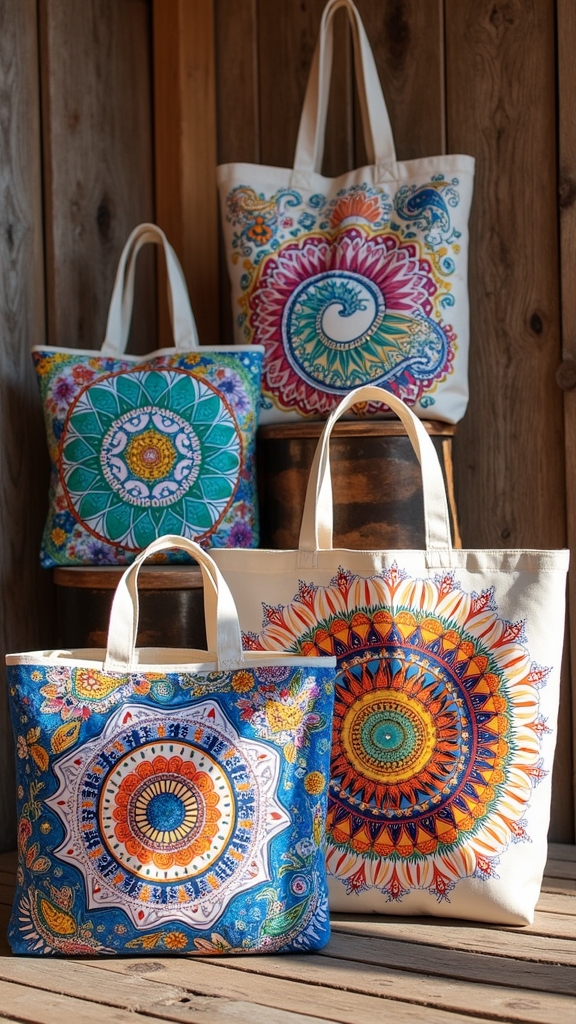
Even the plainest tote bag can become a show-stopping accessory with a little help from Posca markers. Imagine taking a boring canvas bag and turning it into an awesome piece of art that everyone notices!
With Posca markers, it’s easy to try out custom design techniques—think bold geometric shapes or delicate floral patterns. But before you start, a few fabric preparation tips help your masterpiece last longer (nobody wants their art to wash away).
Posca markers make custom tote designs a breeze—just prep your fabric first so your unique art stays bold and beautiful.
Try using creative color combinations to make each design pop and stand out in a crowd. Here are some tips to ace your illustrated tote bag:
- Wash and dry your tote bag before drawing
- Use light colors for the base, dark for outlines
- Heat set your design for durability
- Experiment with layering for cool effects
Mini Canvas Art for Desk Decor
Mini canvases pack a serious punch when it comes to desk decor—they’re tiny, but wow, do they make a statement! These pocket-sized art pieces are the secret weapon for anyone looking to brighten up a creative workspace without taking up much space. Using Posca pens, artists can fill a mini canvas with vibrant colors and detailed designs, letting their artistic expression run wild in just a few minutes. Whether it’s a cluster of cute characters, a single funky flower, or a wild abstract swirl, there’s plenty of mini canvas inspiration to go around.
| Theme | Vibe |
|---|---|
| Cute Characters | Playful and cheerful |
| Floral Designs | Fresh and calming |
| Abstract Swirls | Energetic and eye-catching |
Suddenly, boring desks feel way more fun!
Colorful Art Journal Pages
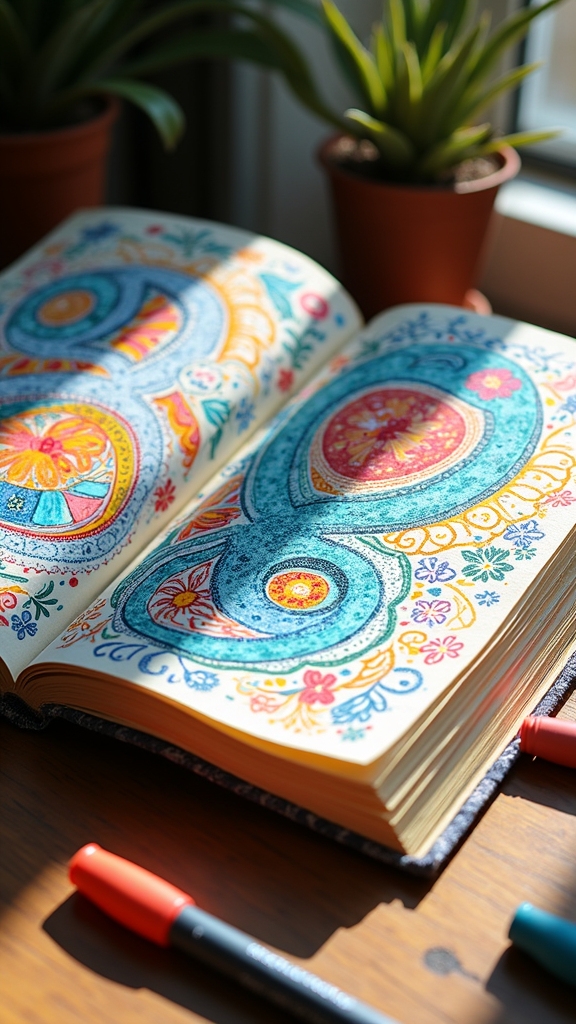
Colorful art journal pages really come to life when you layer bold blocks of color with Posca markers—think neon pinks crashing into electric blues.
But here’s the secret weapon: leaving big, bright patches of white space so your colors look even punchier, almost like they’re jumping off the page.
It’s a bit like giving your artwork room to breathe, and sometimes that empty space is just as important as the wildest doodle.
Layering Vibrant Color Blocks
While some artists might reach for pencils or paints, others dive straight into the world of Posca markers, creating jaw-dropping art journal pages with blocks of bold, vibrant color.
Layering vibrant color blocks isn’t just about slapping color on a page and calling it a masterpiece—it’s about using color block techniques and vibrant layering to make each section pop.
Experimenting with Posca’s wild palette can turn a bland background into something seriously eye-catching.
Want to really wow your friends? Try these tips for artistic composition:
- Blend colors while they’re still wet for smooth, punchy shifts.
- Switch up marker nib sizes for bold lines or tiny details.
- Use pastels and brights for contrast and excitement.
- Layer different colors to build depth and interest.
Incorporating Bold White Space
Sometimes, the most powerful part of a Posca art journal page isn’t the color—it’s the bold white space left behind.
White space techniques can seriously level up your pages, making the bright colors look even more electric. It’s like giving your eye a vacation spot between all that vibrant action!
When a page is packed with color, adding bold white space brings balance, making details pop and letting viewers actually notice your cool doodles. Plus, using dramatic white space can boost the emotional impact, setting the mood and guiding the eye like a secret visual storytelling map.
Don’t be afraid to go big with blank areas. They spark creativity and invite unexpected, abstract ideas. Sometimes, less really is more—and way more interesting!
Geometric Patterns on Planters
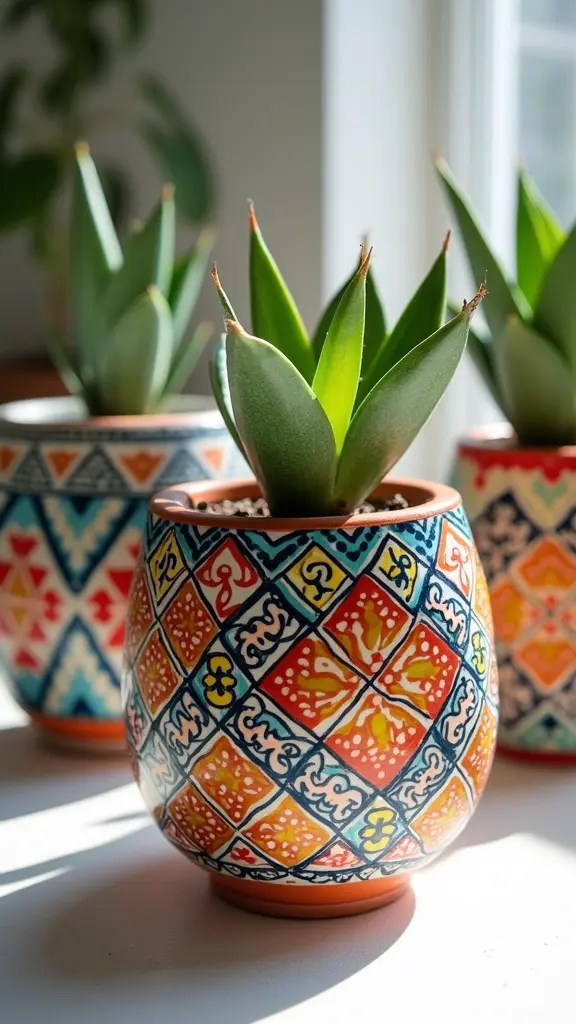
Even if someone has never doodled a straight line in their life, turning an ordinary planter into a geometric masterpiece with Posca markers is totally doable—and way more fun than it sounds.
Geometric planter ideas start with simple surface preparation techniques: wipe your planter clean and let it dry so the marker ink sticks perfectly. Sketch out wild triangles, playful circles, or zigzag stripes with a pencil, then go bold with your favorite contrasting color combinations. Don’t be shy about mixing things up!
For a modern vibe that pops, try this checklist:
- Clean and dry the surface for best results
- Sketch geometric shapes lightly as a guide
- Use bright, contrasting colors for extra flair
- Seal with clear varnish for a weatherproof finish
Suddenly, your planter isn’t just holding plants—it’s showing off your style.
Painted Rock Paperweights
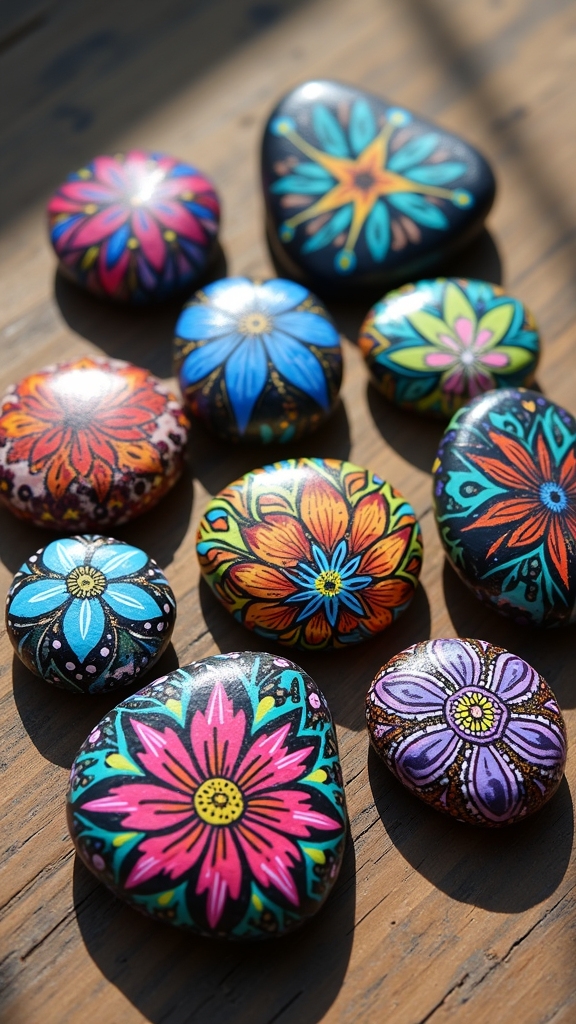
When it comes to painted rock paperweights, picking the right rock is half the fun—smooth and unpolished stones make the best canvas for those bold Posca colors.
Sealing your finished masterpiece with a shiny varnish keeps it looking fresh (and safe from sneaky spills), but the real excitement comes from dreaming up wild designs, like cartoon faces or galaxy swirls.
With just a few tips and a bit of imagination, anyone can turn an ordinary rock into a desk accessory that totally rocks—pun intended!
Choosing Rocks for Painting
A pile of rocks might not look like much at first, but with the right eye, it’s a treasure chest for Posca art adventures. Picking the perfect rock is half the fun—and it makes a huge difference in your painted rock paperweights.
Smooth, flat rock surfaces are the MVPs here because they’re just easier to paint on and show off details. Make sure your stones are clean and dry; nobody wants dirt messing up their masterpiece!
Try hunting for different stone sizes and shapes, too. It keeps things interesting and lets you test out new painting techniques. Here’s what to keep in mind:
- Choose smooth, flat rocks for easier painting
- Wash and dry rocks before you start
- Collect a mix of sizes and shapes
- Use Posca markers for bold, colorful designs
Sealing and Finishing Tips
Before any painted rock paperweight is ready to show off on a desk or windowsill, it needs a little superhero shield—a good sealer! Sealer application techniques can totally make or break your Posca marker masterpiece. Always let your paint dry completely, then spray a clear acrylic sealer in light, even coats. This is one of the best color preservation strategies, keeping your colors bold and safe from smudges. Finish options comparison is key: glossy sealers boost color vibrancy, making your rocks pop, while matte sealers give a subtle look (but might dull those bright hues a bit). Not sure which to choose? Test your sealer on a hidden spot first!
| Sealer Type | Effect on Colors |
|---|---|
| Glossy | Makes colors brighter |
| Matte | Softens color impact |
| Test First | Guarantees no surprises |
Creative Design Inspirations
Not every rock has to be just a boring old lump—some can turn into wild works of art, thanks to Posca markers!
Painted rock paperweights are a super cool way to show off your creativity, whether you’re doodling cartoon faces or blasting the surface with bright, bold patterns.
The secret? Start with smart rock selection tips—choose rocks that are smooth and flat for the best results.
Once you’ve picked your canvas, try mixing up your look with design layering techniques and fun patterns.
And don’t forget, color sealing methods matter if you want your masterpiece to last!
- Pick smooth, flat rocks for easier drawing
- Layer colors for a bold, eye-catching effect
- Add unique patterns or illustrations
- Seal your design with clear varnish for durability
Lettering and Quotes on Mugs
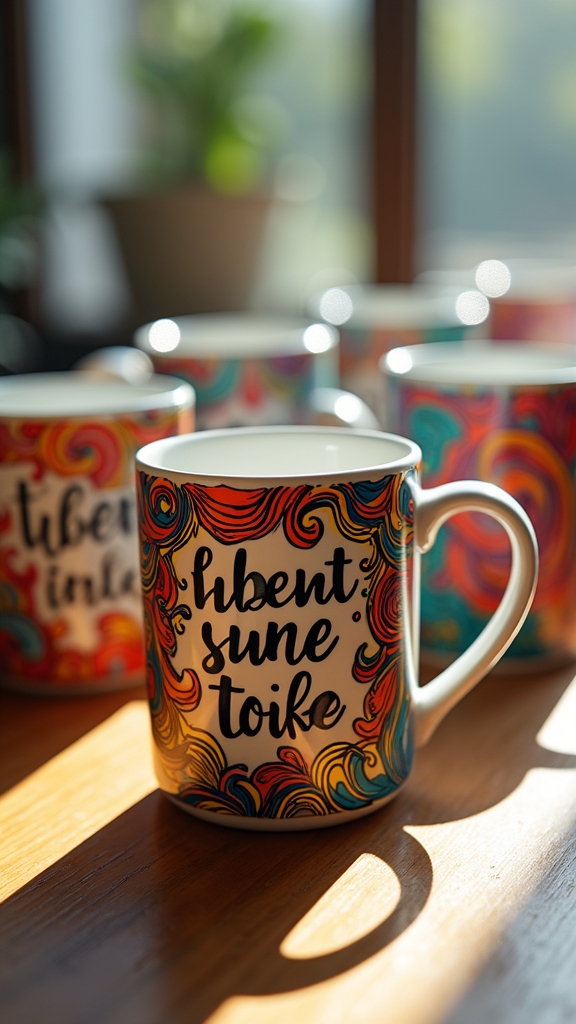
Lettering can turn an ordinary ceramic mug into a one-of-a-kind masterpiece, especially when Uni-ball Posca markers are involved. With mug design techniques, anyone can jazz up their morning routine or whip up personalized gift ideas for friends and family. Posca pens come in tons of tip sizes, so you can try creative lettering styles, from bold block letters to fancy script. Just remember—clean and dry the mug first, or your epic quote might slide off mid-sip! Once your design is set, let it dry, then bake it for extra staying power. For more fun, add doodles or patterns around your quote. Here’s a quick look at the basics:
| Step | Tip Size Use | Extra Touch |
|---|---|---|
| Clean Mug | Fine for outlines | Contrasting color |
| Letter Design | Medium for bold quotes | Fun illustrations |
| Finish & Bake | Broad for accents | Patterned borders |
Posca Mandala Wall Hangings

Picking the right color palette is a big deal when making Posca mandala wall hangings—will you go wild with rainbow brights or chill with calm pastels?
Layering patterns with Posca pens can get pretty intense, letting artists mix crazy fine lines with bold shapes, kind of like a doodle explosion.
Once the masterpiece is finished, finding a cool way to hang and show it off, whether that’s on canvas, wood, or something totally unexpected, adds the final wow factor.
Choosing Mandala Color Palettes
How do artists decide which colors to use when creating Posca mandala wall hangings? It’s all about using color harmony techniques and following mandala design principles.
Artists think about the mood they want to create—maybe soft and dreamy with pastel Posca markers, or super bold with vibrant shades that pop off the wall. Choosing just 3-5 colors helps keep everything looking organized and lets the intricate mandala shapes shine.
To really amp up the style, many artists love adding metallic colors like gold or silver for a touch of sparkle.
- Complementary colors create eye-catching contrast
- Analogous colors give a soothing, calm effect
- Limited palettes keep designs focused and detailed
- Pastel versus vibrant shades totally change the vibe
Choosing colors isn’t random—it’s all part of the magic!
Layering Patterns With Posca
Even though a mandala might look super complicated at first glance, layering patterns with Posca markers is actually a blast, and it lets any artist go wild with creativity.
The process kicks off with a simple mandala sketch on your favorite surface—don’t stress if your lines aren’t perfect! Grab those Posca pens and start experimenting with layering techniques: dots, zig-zags, wavy lines, or even wild geometric shapes.
There’s no rulebook, so mix up your color combinations and see what pops. The magic of Posca pens is how they layer so smoothly, letting artists stack colors for cool depth and dimension.
Every layer adds more mandala inspiration and detail, turning your wall hanging into something that’s totally one-of-a-kind and seriously eye-catching.
Hanging Methods and Display
Once a Posca mandala is packed with layers, wild patterns, and colors that pop, it’s time for the real fun—showing it off.
Choosing the right hanging techniques makes all the difference in your wall presentation. Whether your mandala art is created on canvas, wood, or fabric, there are tons of display options to fit your vibe.
Want to keep things simple or get a bit fancy? Check these out:
- Adhesive hooks for zero-drill hanging—super easy, no tools needed
- Decorative clips for a funky, casual look (and easy swapping)
- String or twine for a boho, artsy feel if you’re into that
- Framing your mandala for a classic, gallery-worthy finish
Seal your art with clear varnish to keep those colors bold, and your wall hangings will stay fresh for ages!
Playful Pet Portraits
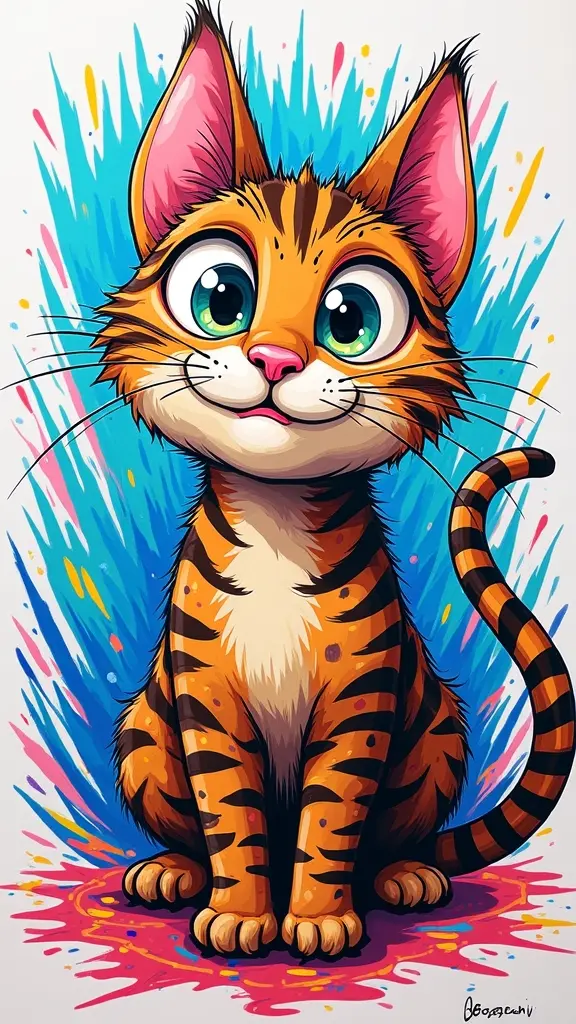
Imagination runs wild when artists pick up Posca markers to create playful pet portraits. With a dash of creativity and a splash of color, even the grumpiest of cats or the silliest of dogs can transform into quirky masterpieces.
Artists love experimenting with vibrant color techniques—think bold neon fur or rainbow whiskers—to make each pet pop off the page. Whimsical animal expressions, like a wide-eyed hamster or a smirking poodle, bring tons of personality and humor.
Some go for super playful character styles, mixing kawaii cuteness or cartoon vibes, while others try a more detailed approach. By switching between fine and broad Posca tips, they nail the balance between sharp details and big, colorful blocks.
The result? Pure, joyful chaos!
Patterned Light Switch Covers
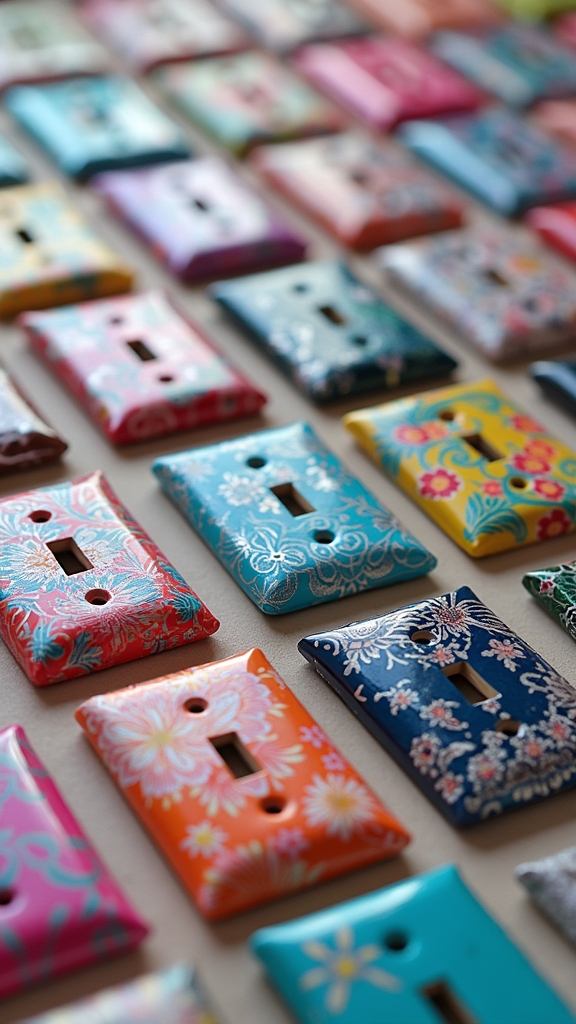
When it comes to patterned light switch covers, picking bold color schemes is half the fun—think neon stripes, crazy zigzags, or whatever matches your room’s vibe.
Geometric patterns like triangles or checkerboards can totally transform a boring switch into something you actually want to show off, not just flip on and off.
For designs that stick around (even if your little brother keeps poking them), sealing your masterpiece with a clear varnish is the secret weapon.
Choosing Bold Color Schemes
Although light switch covers might seem like the most boring things in a room, they can actually become tiny masterpieces with the right bold color scheme.
Using color theory basics, anyone can pick a vibrant palette selection that truly pops—think electric blues with sunny yellows or fiery reds with cool greens. The trick is to use contrasting color combinations that catch the eye and make the cover stand out against the wall.
Choosing the right colors can turn even a plain light switch into a jaw-dropping art piece. To get started, consider:
- Picking colors that are opposite on the color wheel for extra contrast
- Matching or clashing with the room’s main colors
- Testing marker shades on a scrap surface first
- Layering bright hues for maximum vibrancy
Color choices matter—so dare to go bold!
Incorporating Geometric Patterns
Once the perfect bold colors are picked out, it’s time to level up with some awesome geometric patterns.
Patterned light switch covers are the ultimate spot to show off a mastery of geometric color theory—think about how certain colors and shapes can pop when paired together. For inspiration, check out pattern inspiration sources like tile mosaics, funky fabrics, or even math class doodles.
Triangles, circles, and stripes all work great, especially when you use contrasting colors for depth. Try layering lighter shades underneath and then sketching sharper, darker shapes on top.
Grab different Posca marker sizes to nail those crisp lines and intricate details. Smart design balance techniques, like repeating shapes or spacing patterns evenly, make the cover look super pro and seriously eye-catching.
Tips for Lasting Designs
Before jumping straight into doodling, a little prep work can make all the difference between a killer design and a smudgy mess that barely survives its first week.
Patterned light switch covers with Posca pens can look epic, but only if you use some smart design durability techniques. Start by cleaning the switch cover—seriously, wipe it down like it owes you money. A white base coat helps your colors pop and keeps the artwork looking pro.
Layering is your friend since Posca markers don’t blend into mush. For those tiny zigzags and dots, grab a fine-tipped marker. Finally, seal it up like a treasure chest with clear varnish for ultimate artwork protection.
Remember:
- Clean thoroughly
- Use a white base
- Layer colors
- Seal for protection
Rainbow Doodle Gift Tags

Rainbow Doodle Gift Tags are like little bursts of happiness that can turn any boring present into something unforgettable.
Rainbow Doodle Gift Tags bring a splash of joy, transforming even the plainest gift into a memorable, colorful surprise.
With Uni-ball Posca markers, anyone can create bold, vibrant doodles and playful gift tag designs that really stand out. Start by cutting tag shapes from sturdy cardstock—think rectangles, circles, or even stars.
Then, grab a rainbow of Posca colors and get creative! Mix broad and fine tips to add thick lines, delicate details, and fun textures. Leaving some white space makes those colors pop, almost like magic.
Don’t forget to add personalized messages—funny, sweet, or mysterious—whatever fits the vibe.
Once your masterpiece is done, tie it onto your gift with twine or ribbon. Suddenly, your present isn’t just a gift; it’s an experience!
Frequently Asked Questions
What Cool Things Can You Do With POSCA?
Exploring cool things with Posca involves experimenting with unique Posca techniques, such as color blending and layering. Artists utilize creative surfaces—ceramic, glass, wood, or canvas—to craft bold patterns, intricate details, and personalized home décor projects.
Is POSCA Ok on Skin?
Questions about Posca safety on skin often arise, especially for temporary tattoos. While generally safe, some individuals may experience a skin allergy. Testing on a small area first is recommended, and dedicated skin-safe markers are preferable for body art.
What Should I Draw With My Posca Markers?
When considering what to draw with Posca markers, artists may explore abstract patterns, vibrant nature scenes, or imaginative character designs. Experimenting with color blending and bold shapes can highlight the markers’ unique qualities and inspire creative expression.
Why Are Poscas so Expensive?
The cost justification for Posca markers lies in their superior marker quality, featuring vibrant pigments and durable construction. Compared to other brands, Poscas offer enhanced performance, precise control, and lasting results, which explains their premium price point.
Conclusion
With 23 awesome Posca art ideas, anyone can turn boring objects into total masterpieces. Whether it’s doodling on light switch covers or creating graphic wall art, there’s no limit to what you can make with a handful of markers and a little creativity. Even if your first flower vase looks more like a spotted potato, that’s just part of the fun. So grab those Poscas, pick an idea, and let your imagination run wild—mistakes included!
Leave a Reply